Environments
Note: Since v0.4.0, environment introduces
Environment Typeto enhance management.
An environment is the target of resource deployment. A project may contain multiple environments.
Environment Type
Note: Custom environment type is not supported at present.
Before v0.4.0, the isolation between different environments is not guaranteed, which means we will run into the below problems.
- A production-purpose Connector can be referenced by an environment intended for testing.
- A common developer can deploy a resource into production-purpose environment.
Starting with v0.4.0, each environment declares its purpose by its type, thus preventing that User without the ability to operate (write) on that Environment Type from operating the environment. It is worth noting that Connector also needs to declare what Environment Type it applies to.
The system has 3 built-in environment types, which are Development, Staging and Production.
- Development and Staging environments can be operated by any User.
- Production environments can only be operated by Manager and Administrator, General User stays in read-only.
By using environment types, we can get the following isolation features.
- The environment can only reference the same type of Connector.
- The project members can only operate the environments of the type that their roles can operate, otherwise, they will be treated as project Viewer.
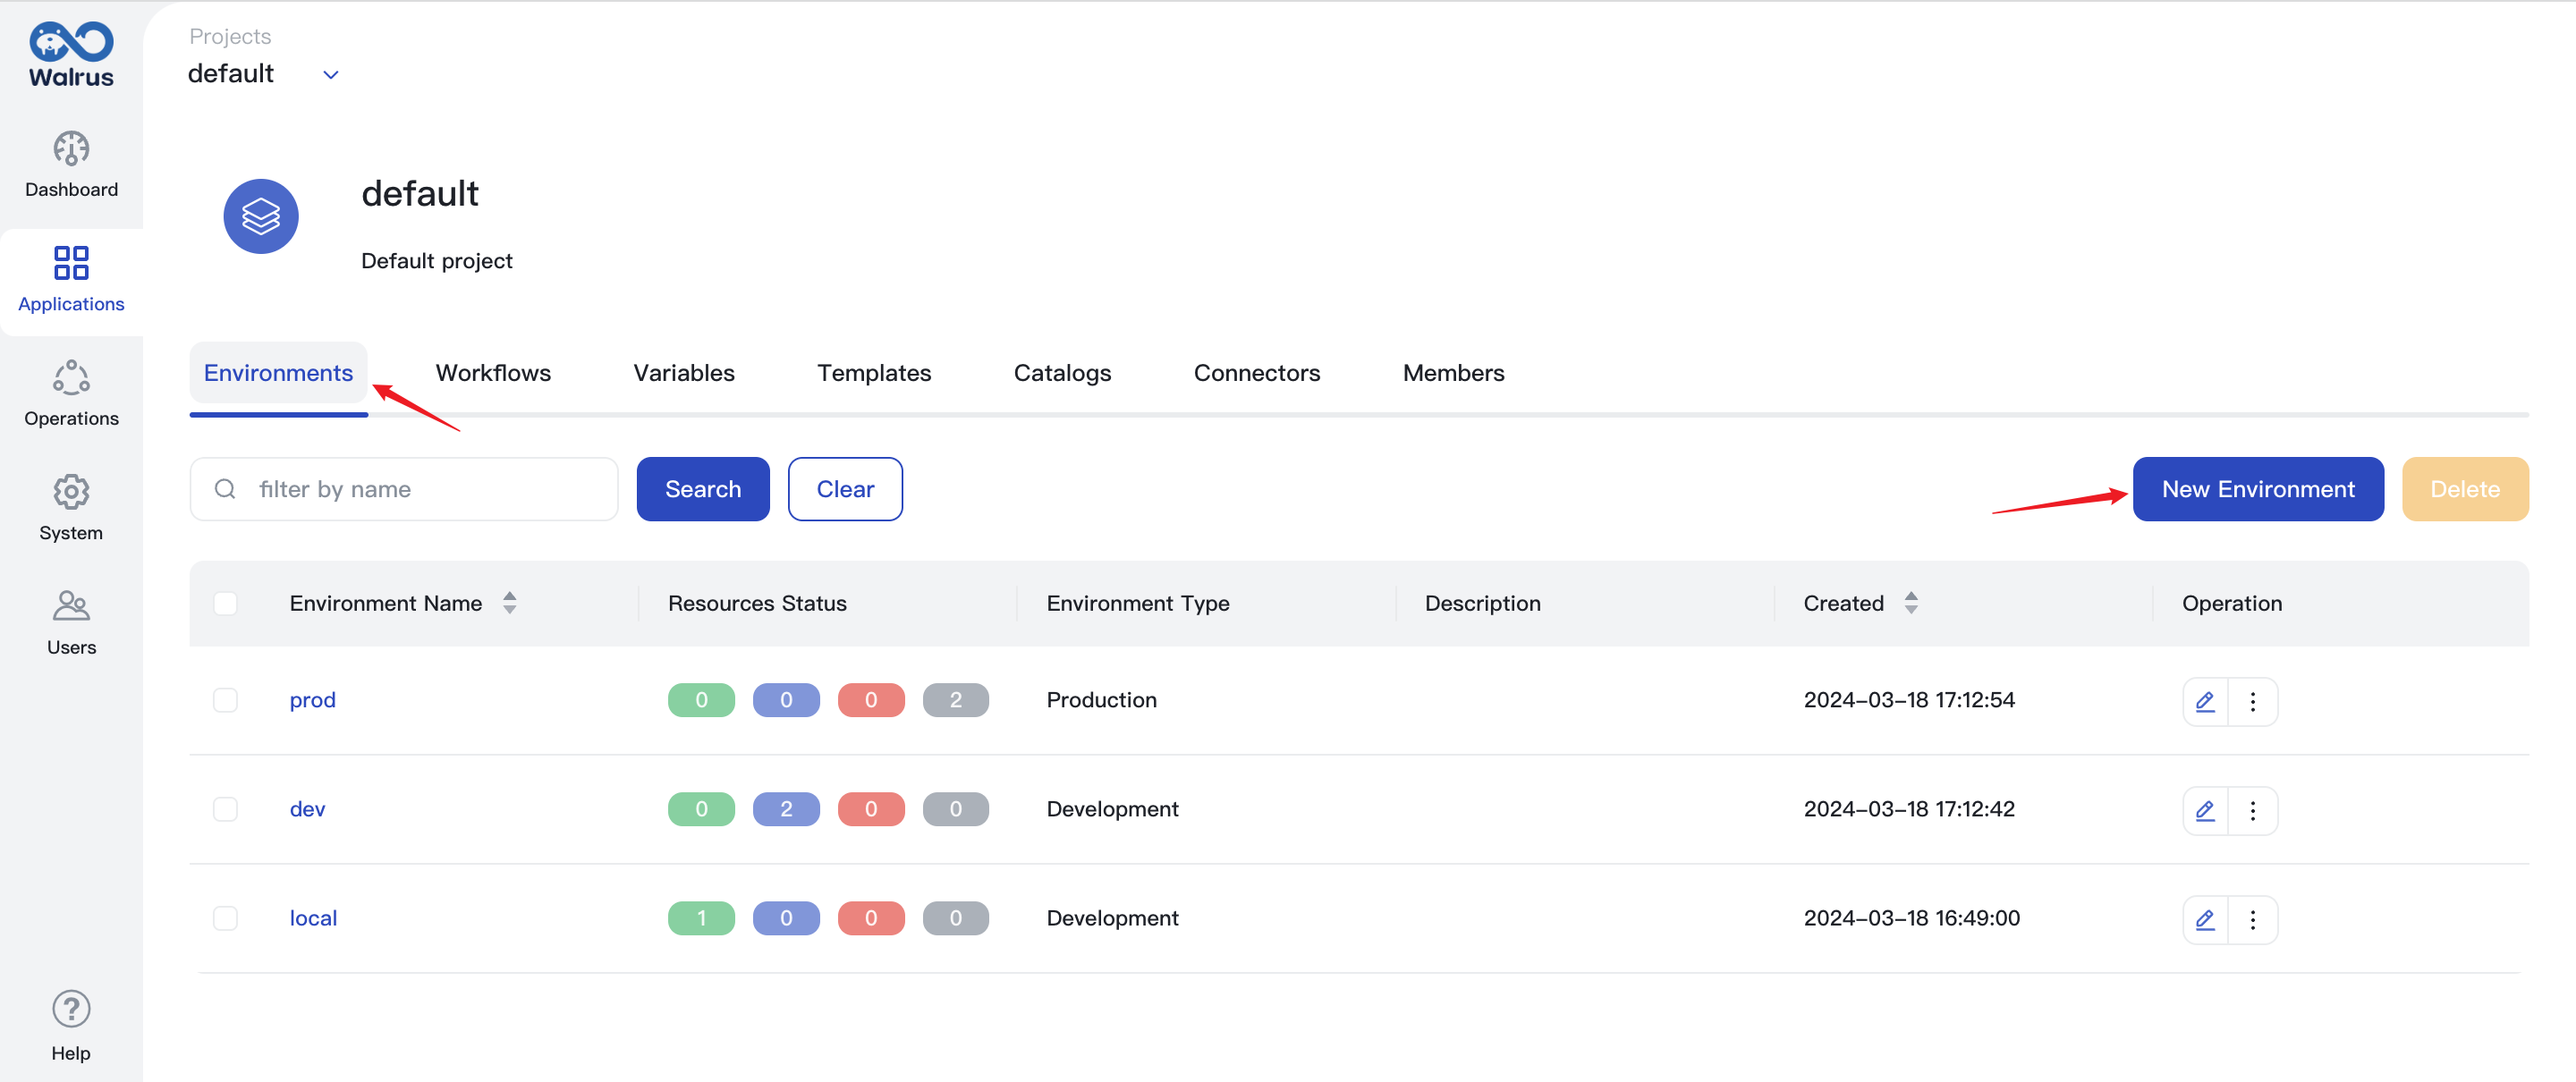
View Environment List
- Click
Applicationson the left navigation bar. By default, the first project view will be displayed. The project can be switched via the top-level breadcrumb. - The environment list under this project can be viewed in the Environments tab.
- You can enter keywords in the search bar of the environment list page to quickly search for related environments.
Create Environment
- Access the list page through the action of viewing the environment list.
- Click
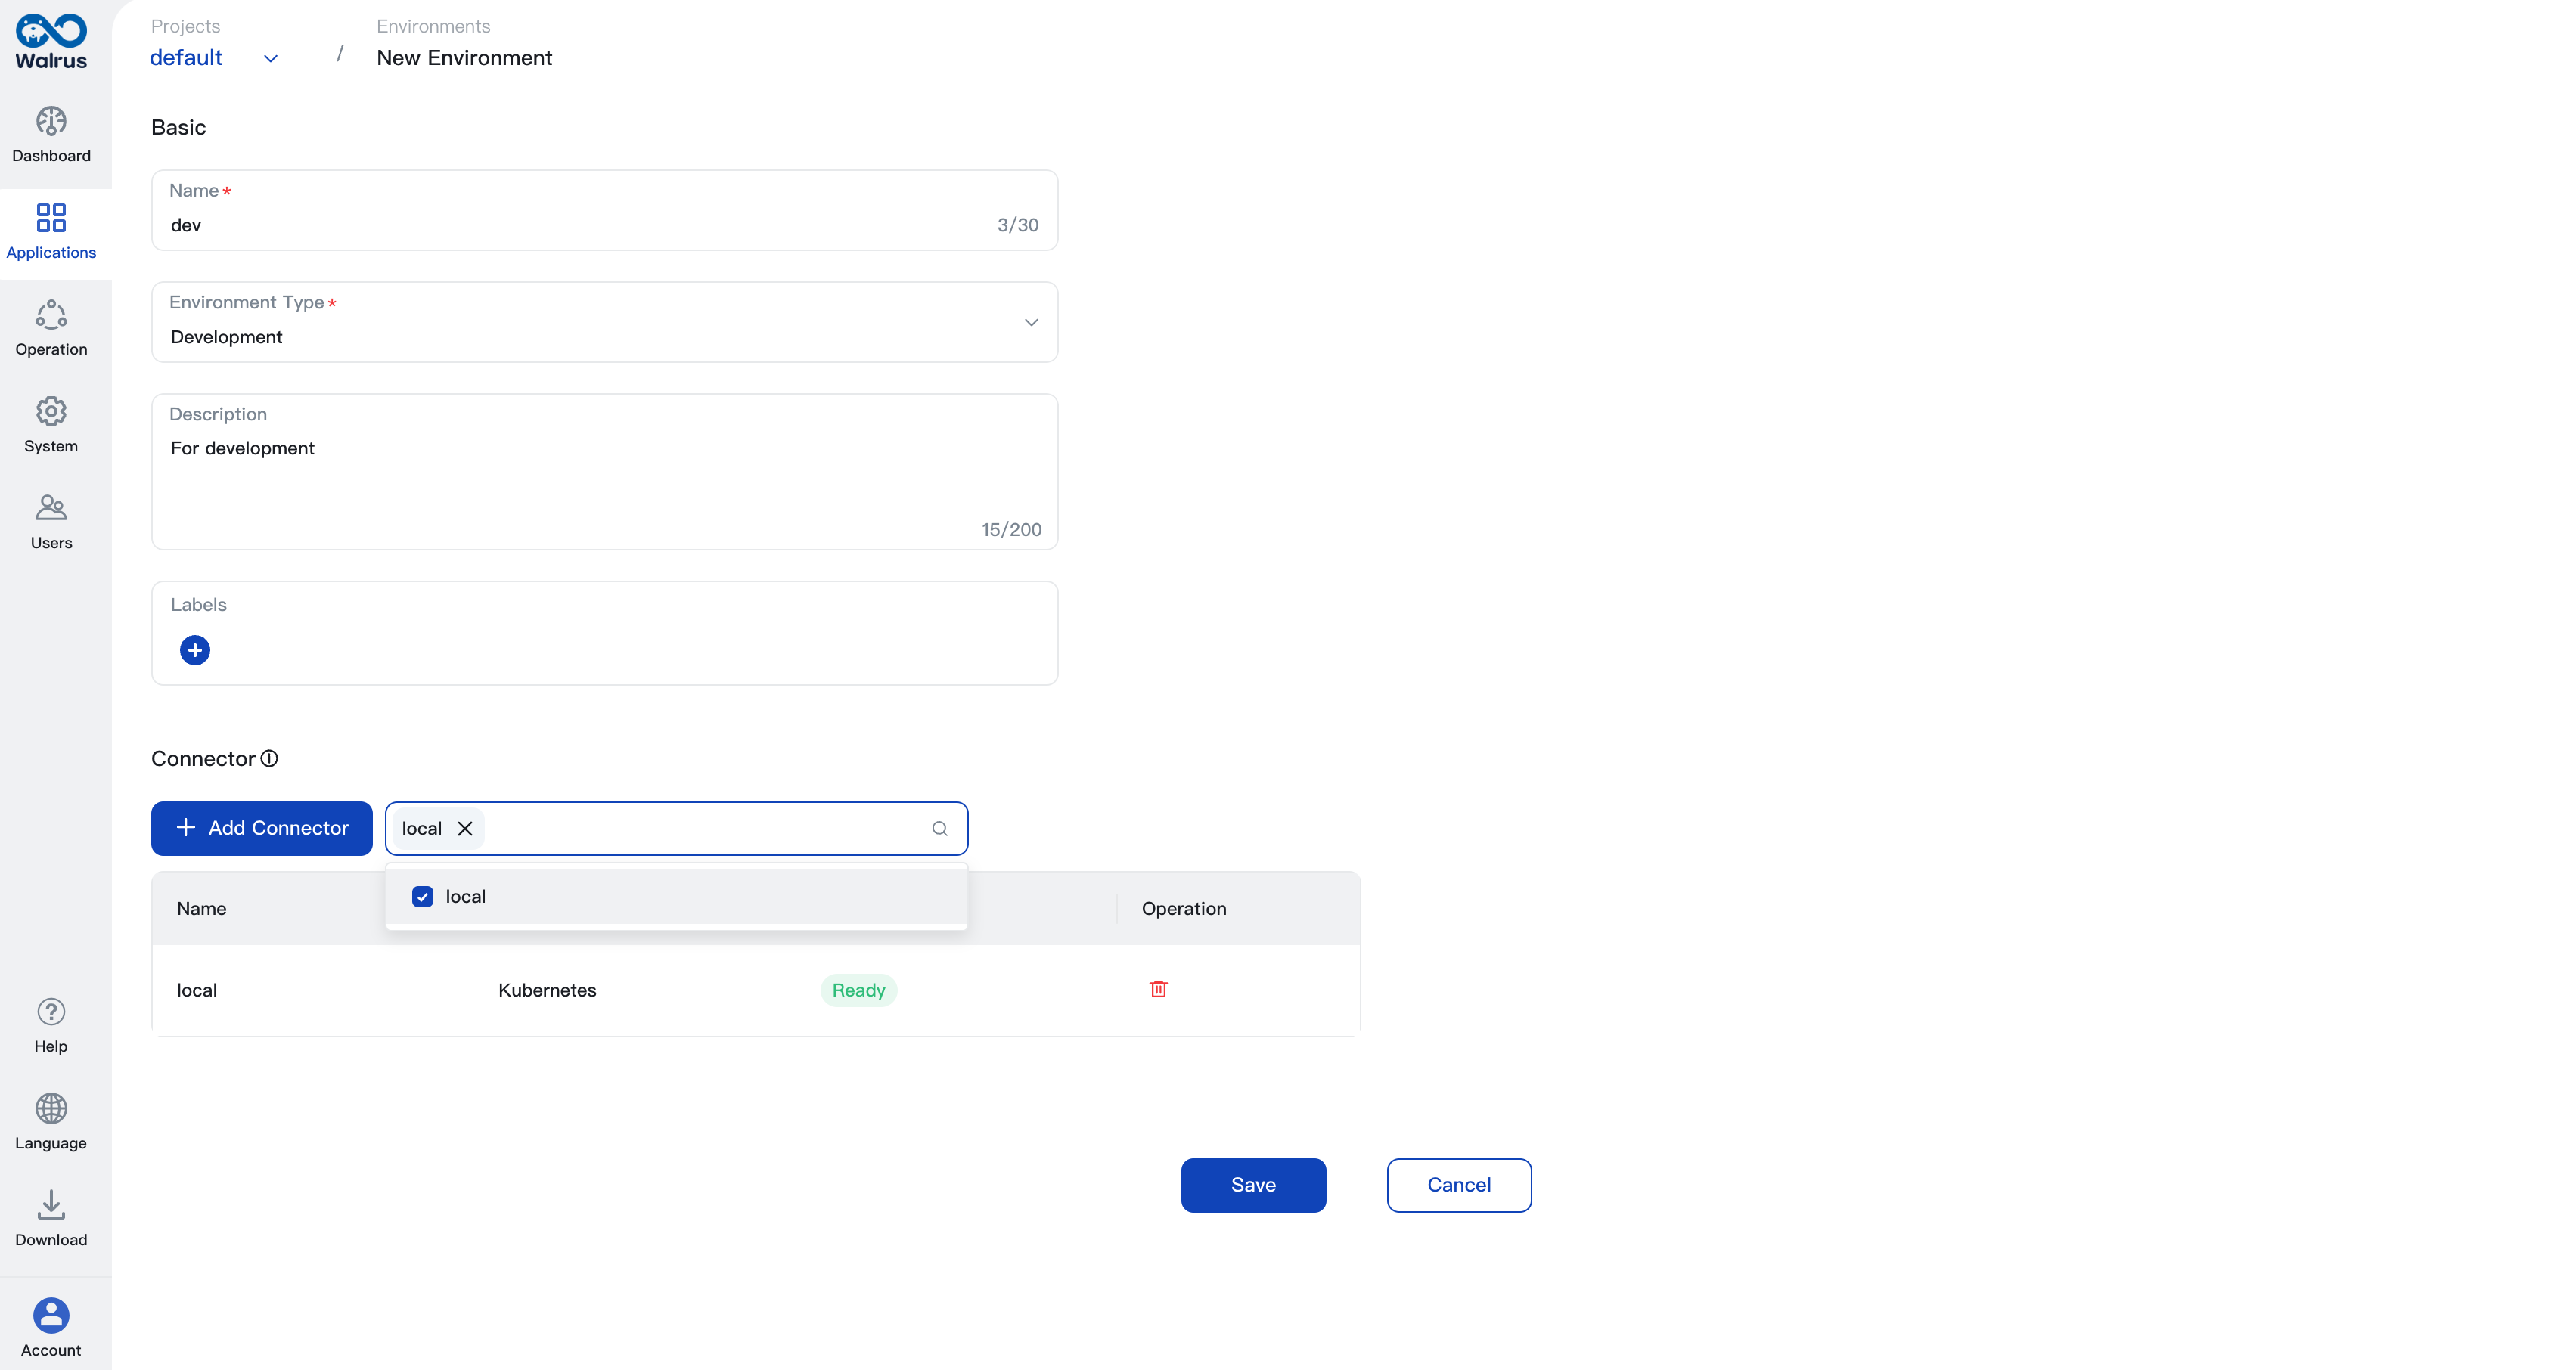
New Environment, enter thenameto identify your environment. The environment name should be unique, so you can easily find it in the environment list.
- Add
Environment tagsandEnvironment descriptionbased on the actual environment. - Choose proper
Environment type. - Add a connector, click
Add Connector, select the connector used in the environment, and finally click theConfirmbutton. - Click the
Savebutton to save the environment configuration, and then you can use this environment in Applications.
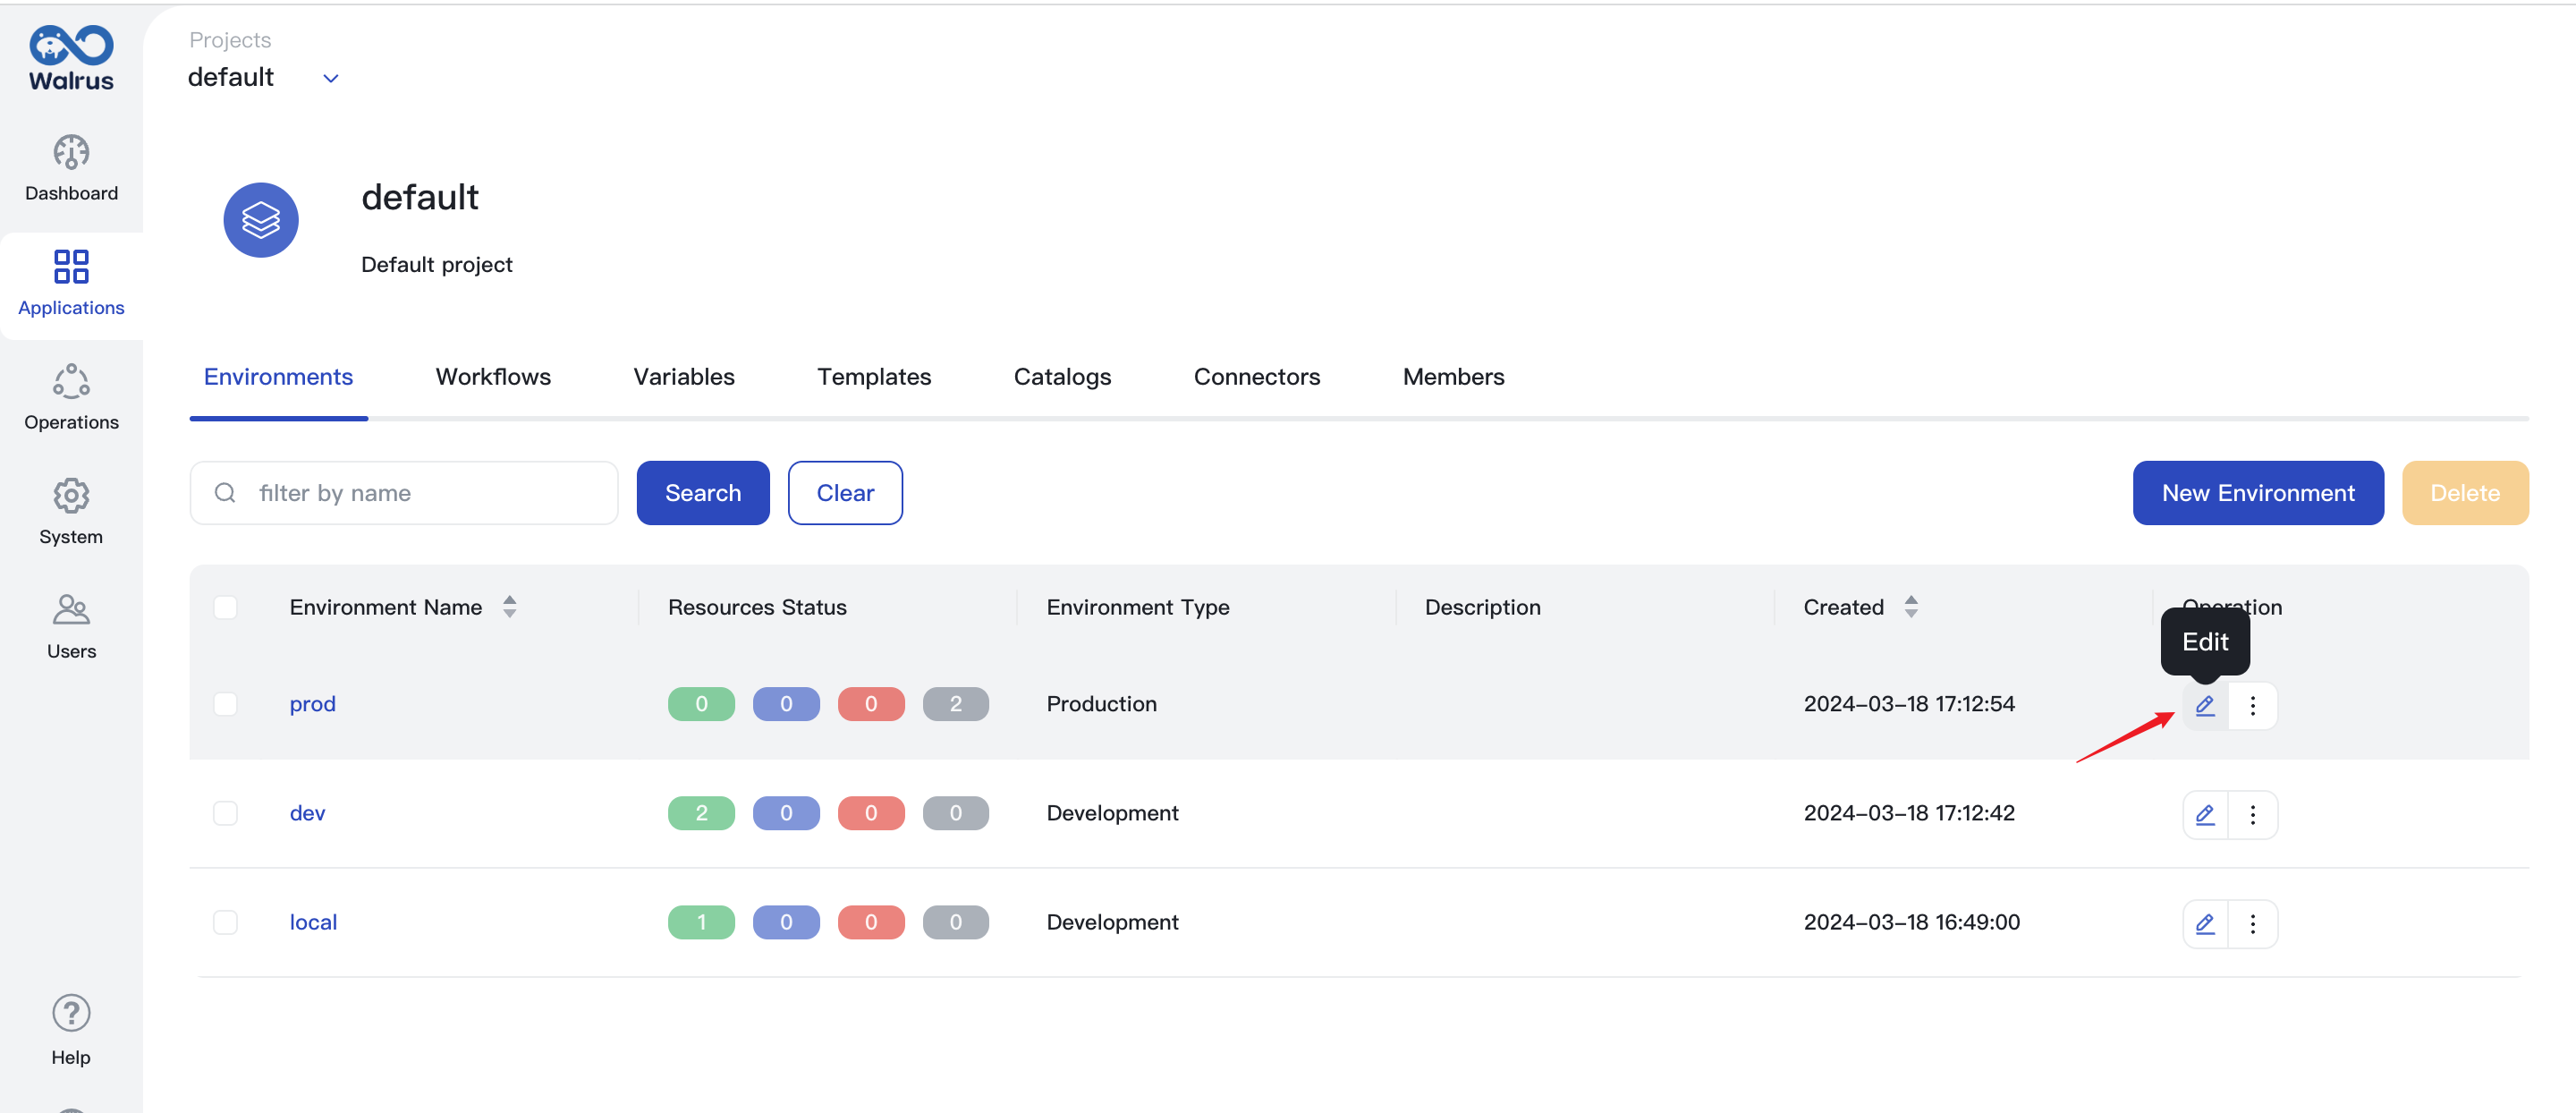
Edit Environment
- Access the list page through the action of viewing the environment list.
- Select the environment that you need to edit and click the Edit button.
- Modify the environment configuration as needed, and add or delete connectors.
- Click the
Savebutton to save the environment configuration.
Manage Resources
Within the environment, you can manage the resources, including adding resources, deleting resources, and modifying resource configurations.
- Click
Applicationsin the navigation bar, switch to the corresponding project, and select the environment that needs to be managed. - Manage the resources in the environment under the
Resourcestab.
For more details on resource management, please refer to Resources.
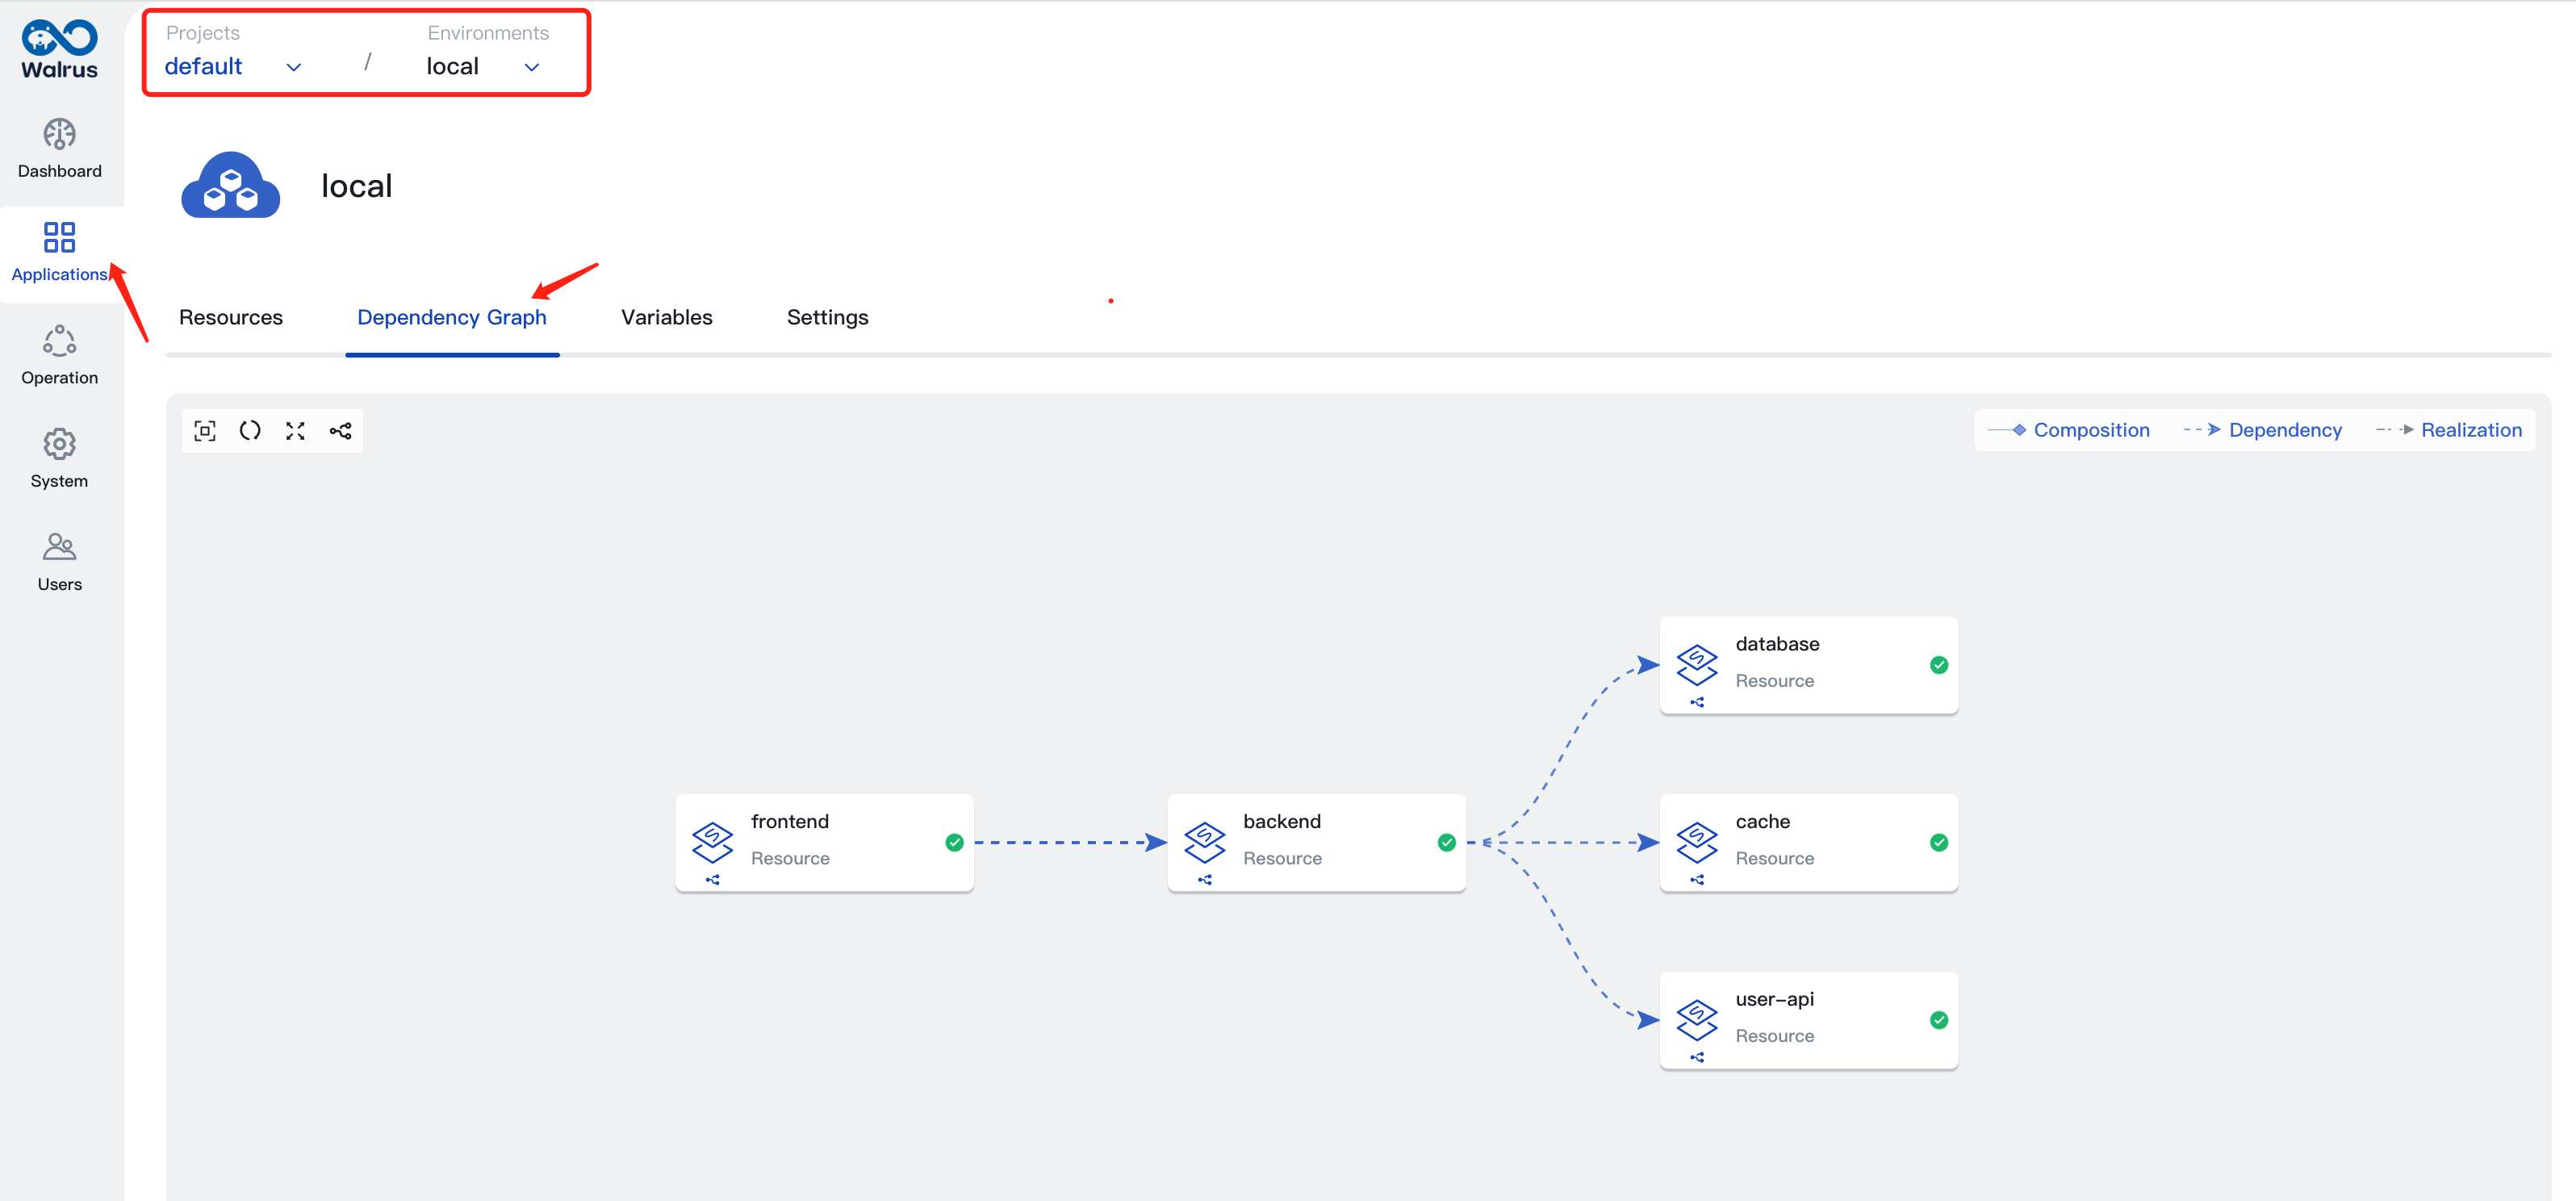
Dependency Graph
Resources within an environment may depend on each other. The dependencies between resources can be viewed through the dependency graph. The dependency graph shows all resources and their dependencies. You can perform operations on resources by clicking the top-right corner of the resource icon. For example, you can view logs or access terminals on container resources.
For more detailed information on dependency graphs, please refer to Dependency Graph.

Environment Variables
Environment variables are environment-scoped key-value pairs and can be referenced in the configuration of resources in the environment. Variables of an environment can only be used within the environment, and variables in different environments are independent of each other.
If a variable with the same name exists in the project or globally, the variable value defined in the environment will override the project or global variable value.
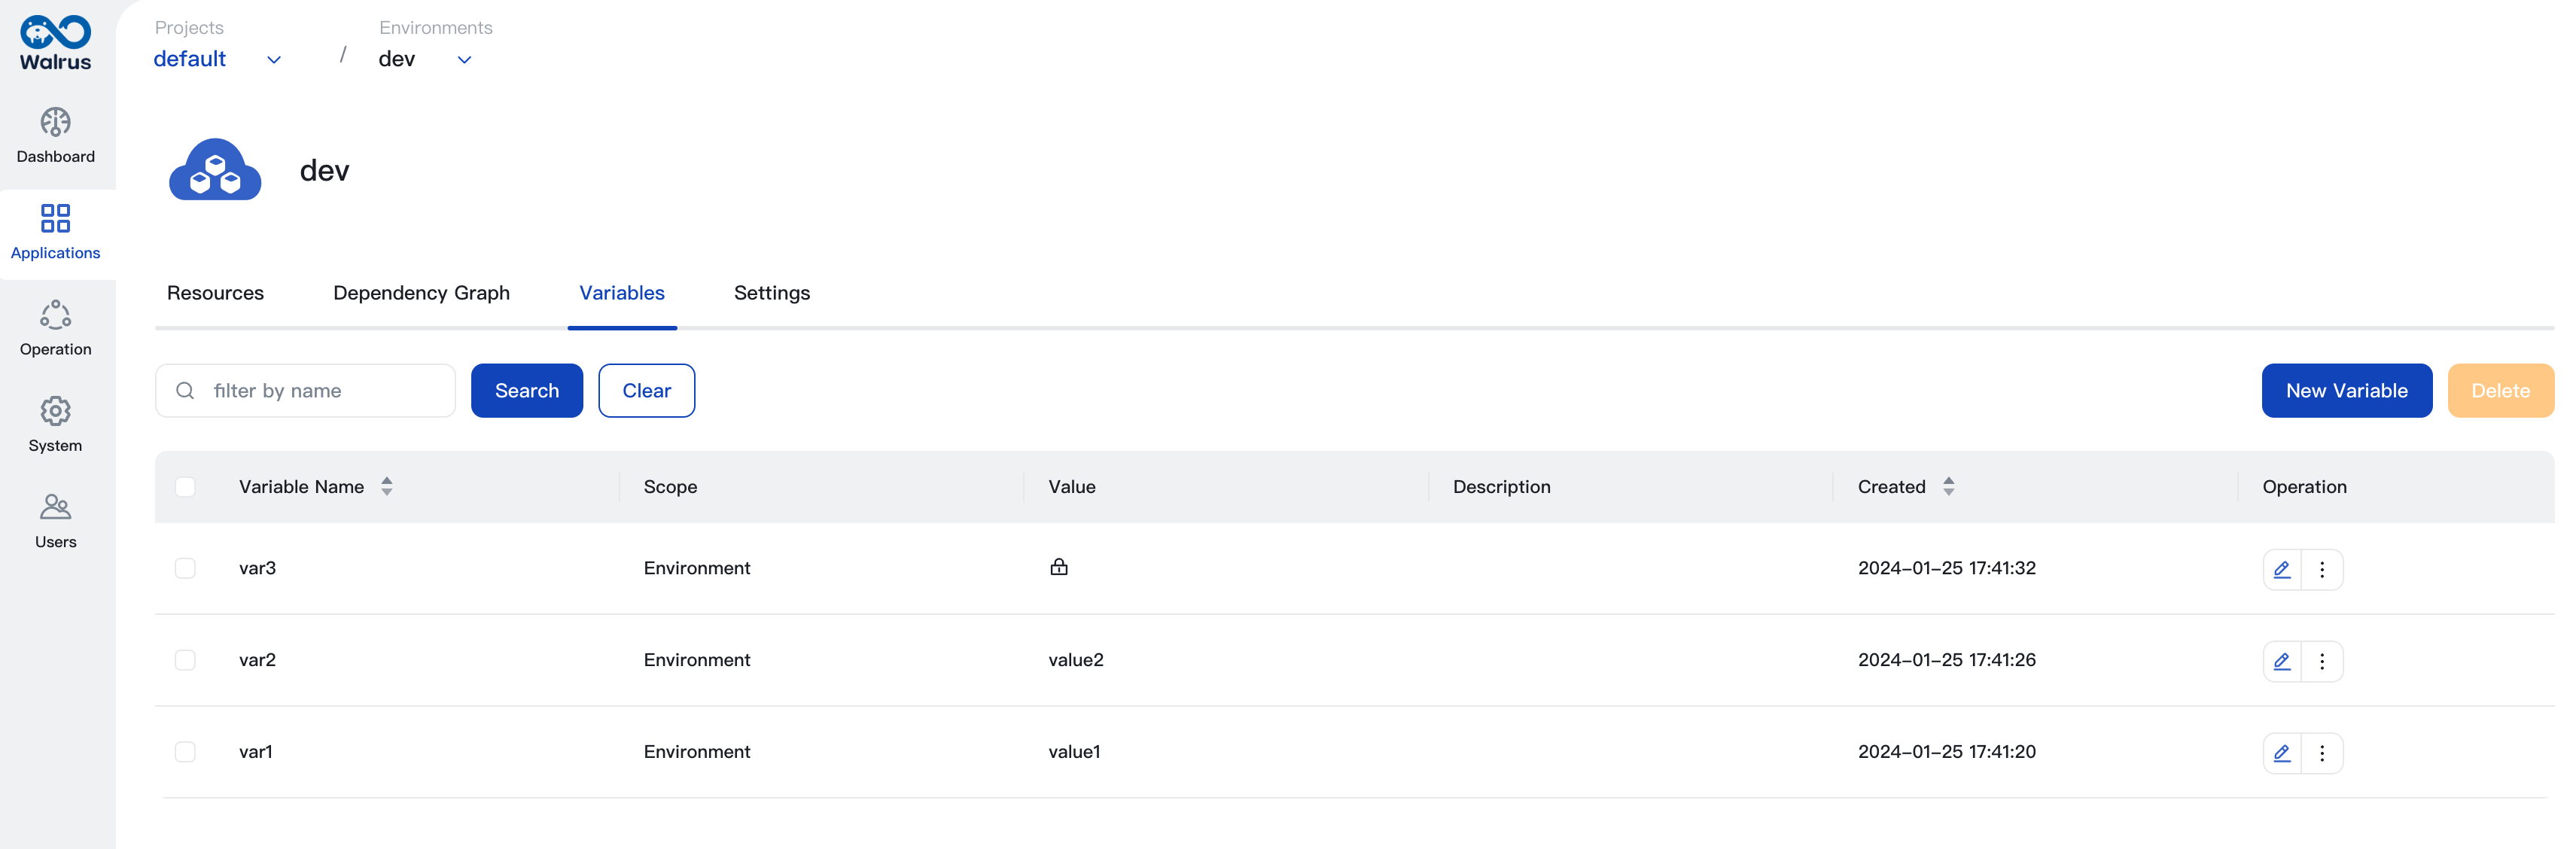
To reference a variable in resources' configuration, use the format ${var.your_variable_name} in any input fields of resources.
For more detailed information on variables, please refer to Variables.
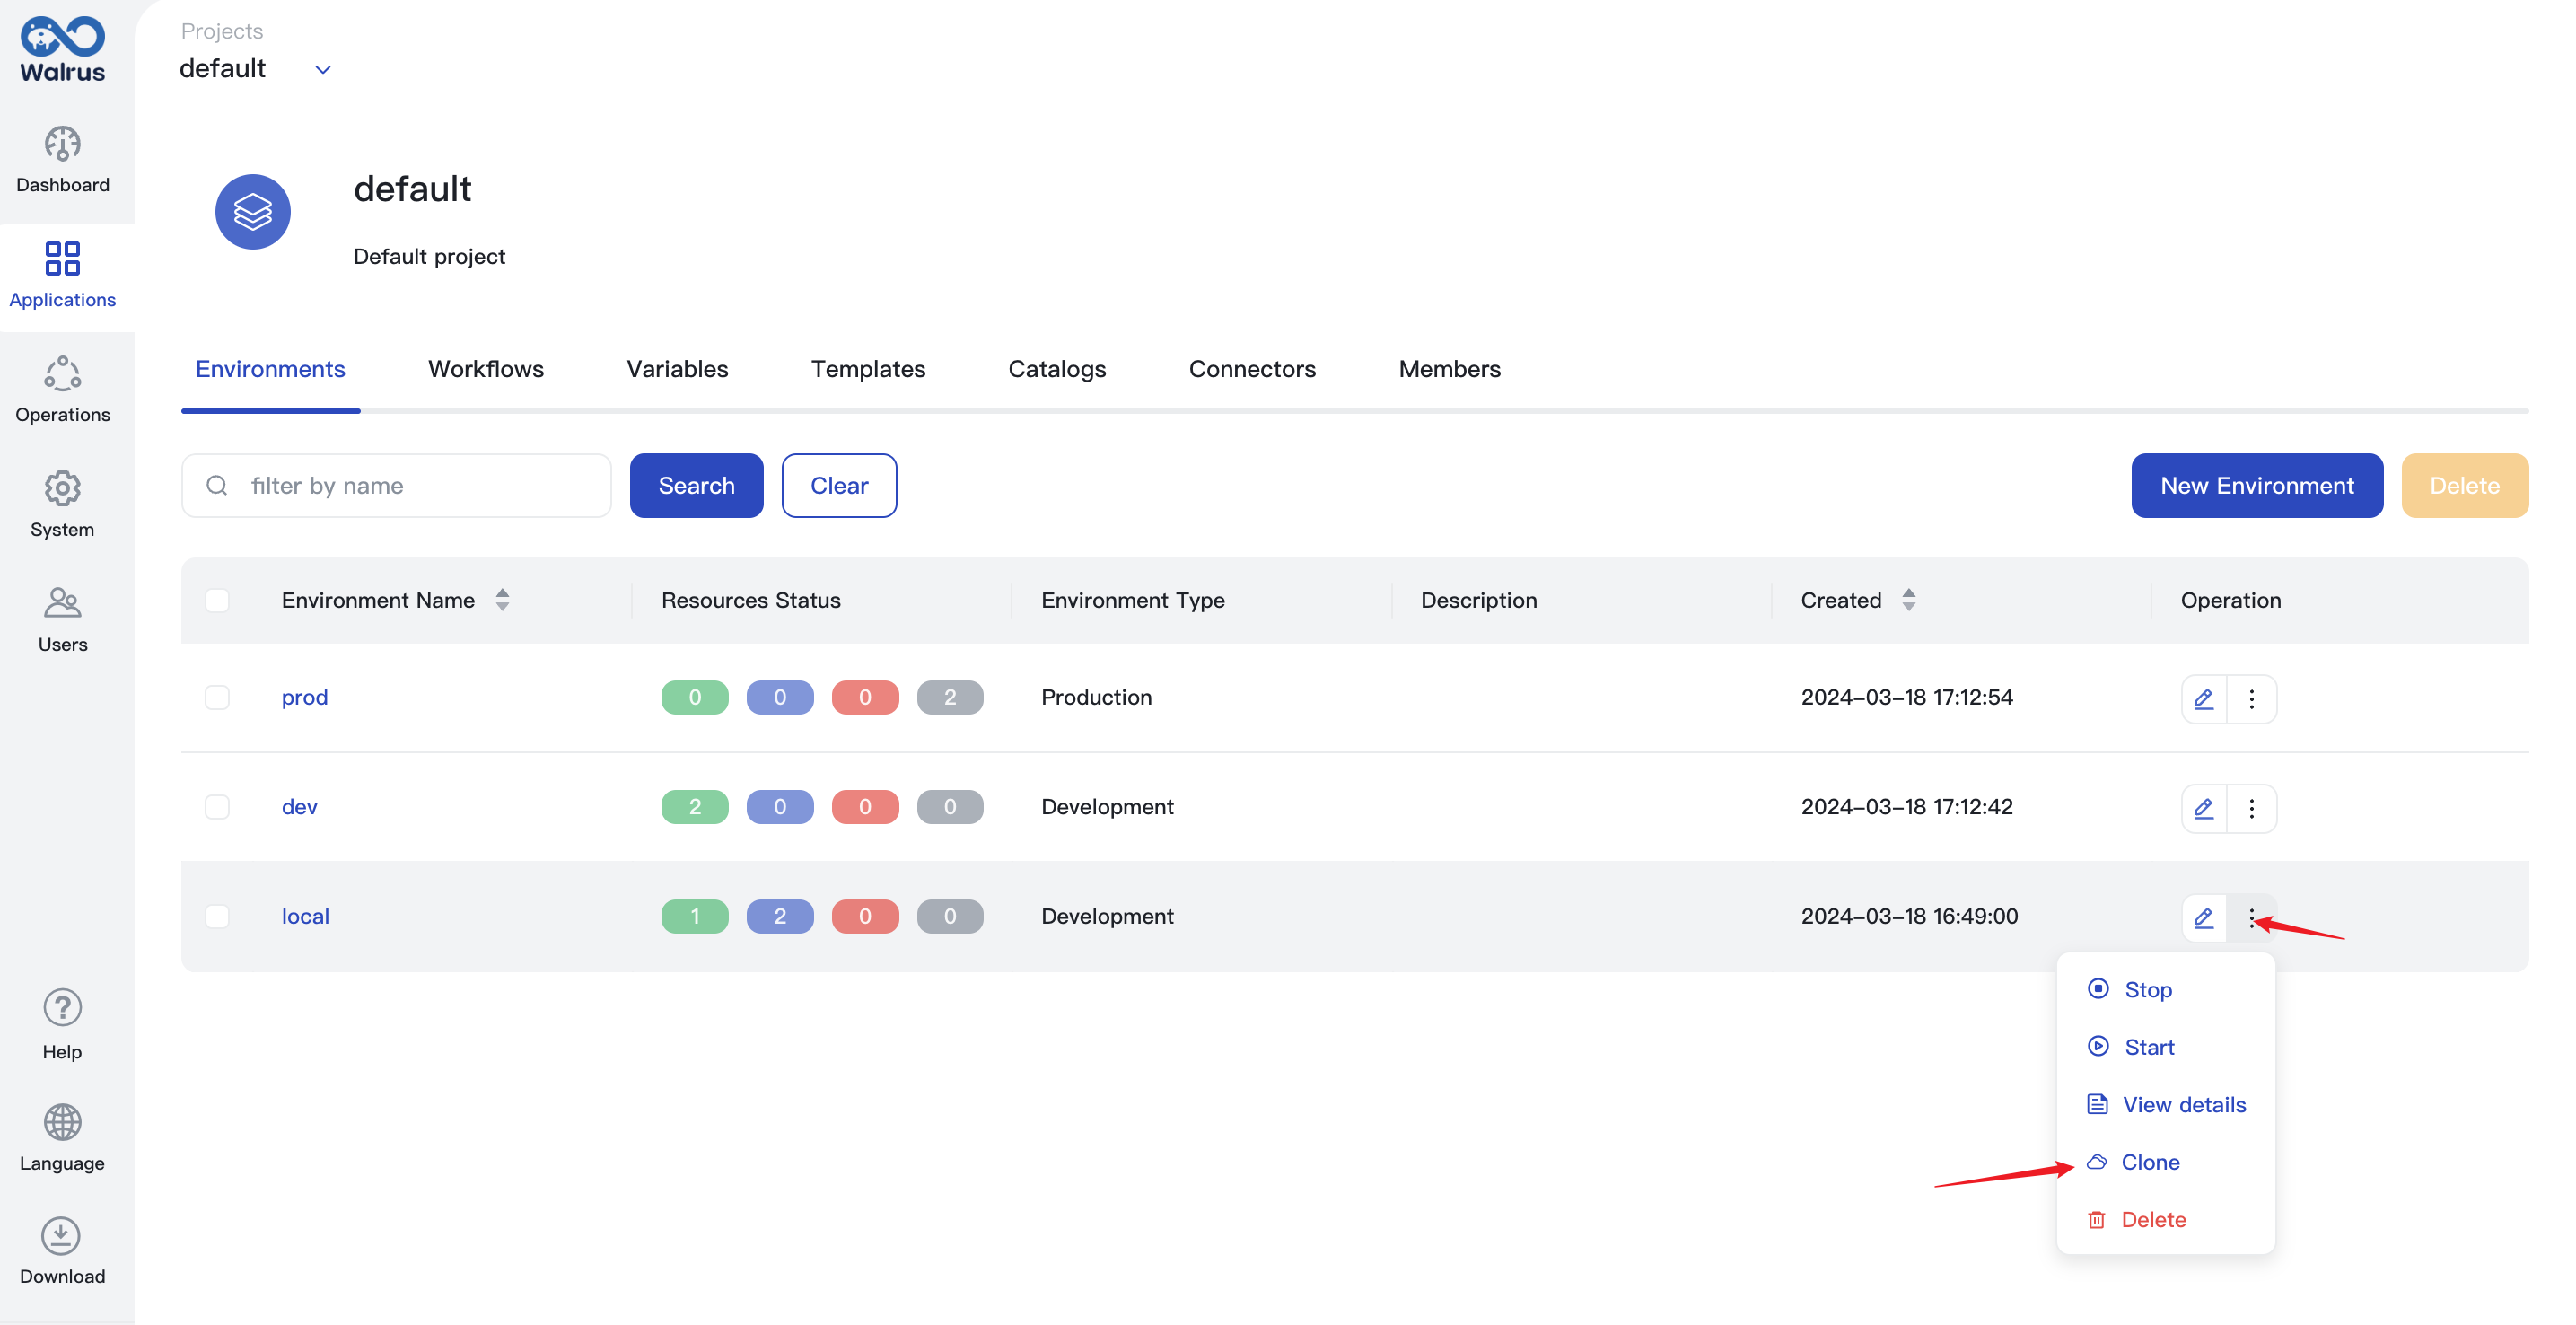
Clone Environment
In some cases, you may need to create an environment that is identical to an existing one, in which case you can use the Clone Environment feature. Cloning an environment allows you to quickly create a new environment based on the configuration and resources of the existing one.
- Click
Projectsand go to a project view. - In the environment list, find the environment that needs to be cloned.
- Click the action dropdown and click
Clone.
- Configure the name, description, tags, etc., of the cloned environment, and select connectors.
- If needed, modify the configuration of resources in the cloned environment. Click to select the resource, modify the resource configuration in the pop-up window, then click
Confirmto save the alteration. - After everything is set, click
Saveto complete the cloning of the environment.
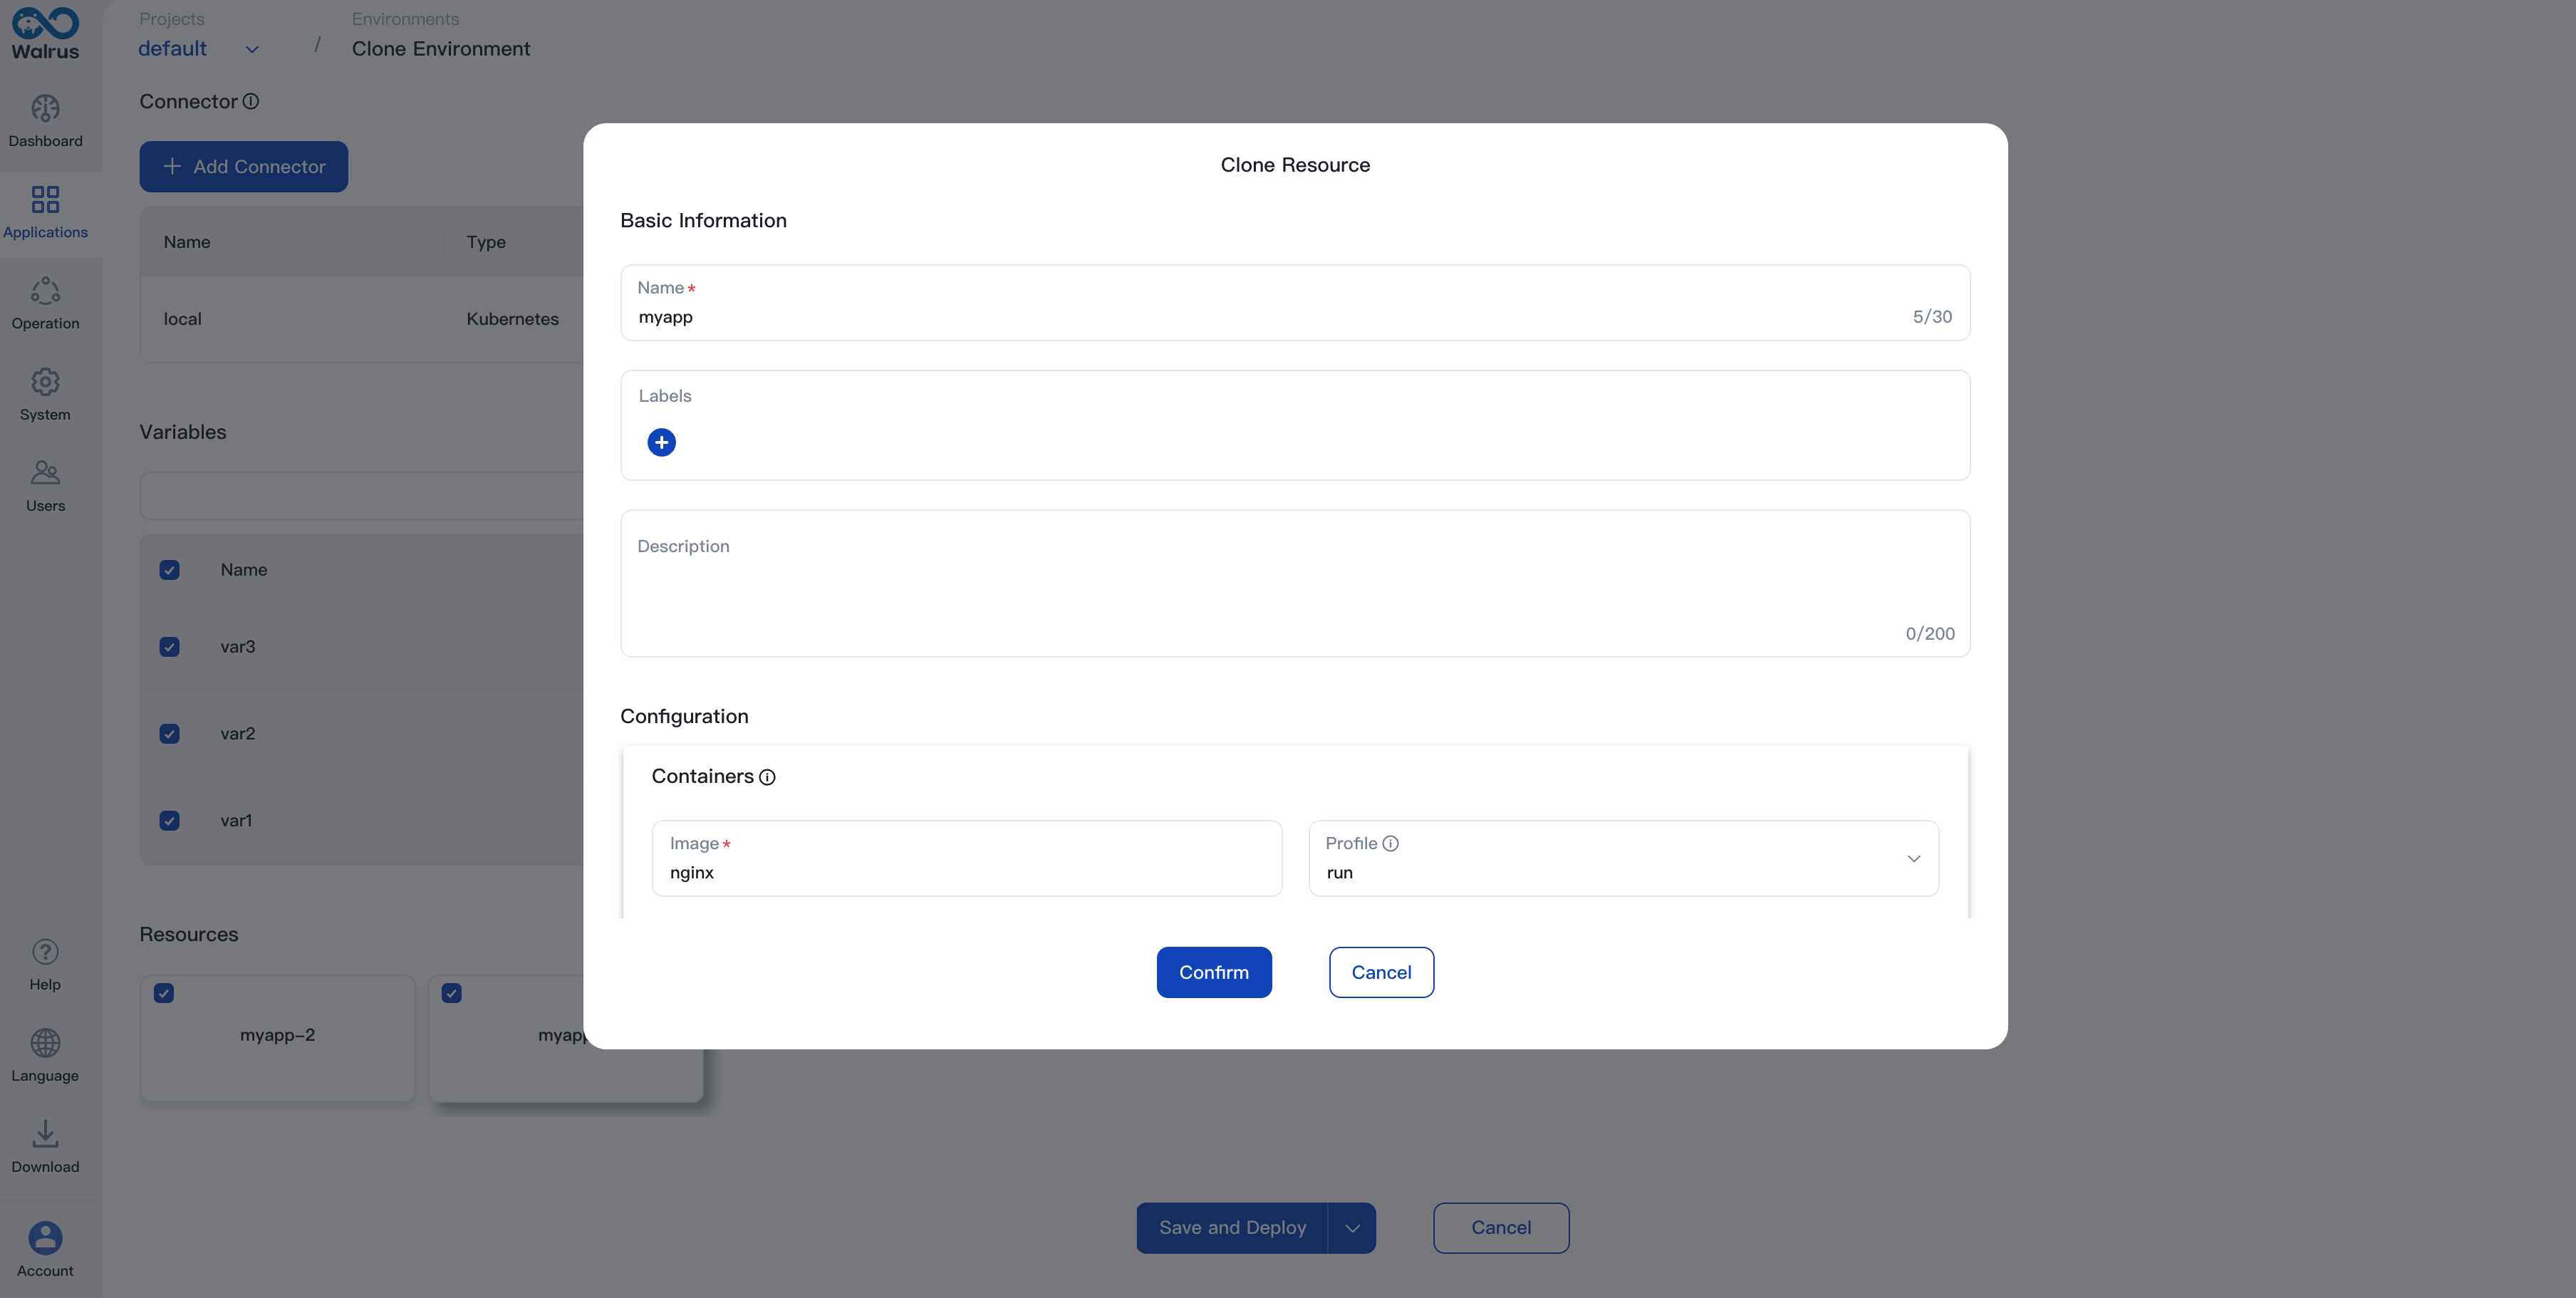
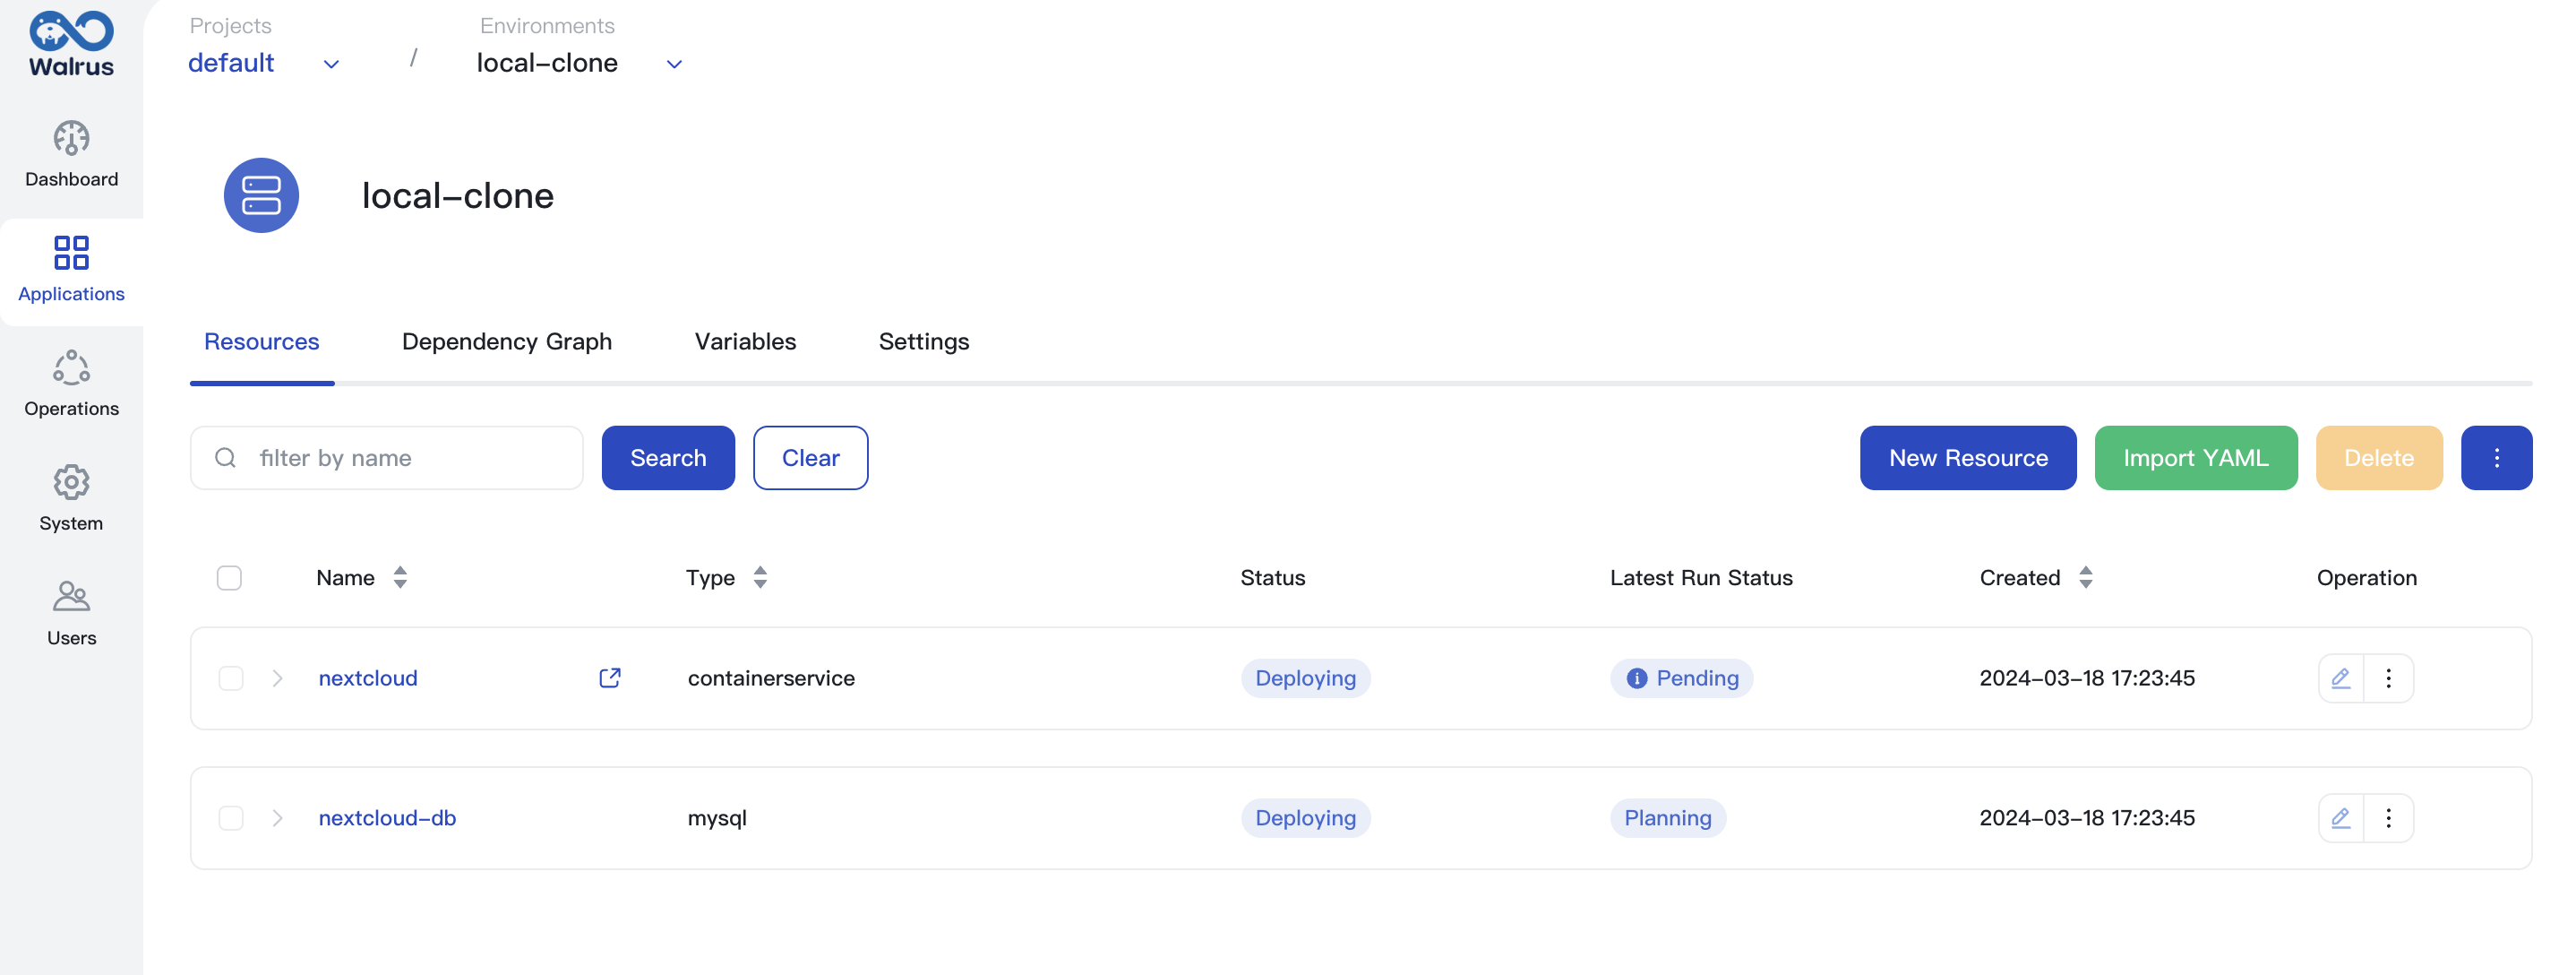
- Once the environment cloning is completed, you can use the newly cloned environment in the 'Applications'. Resources in the original environment will be cloned and deployed in order based on their dependencies. You can check the status of each resource in the resource list.
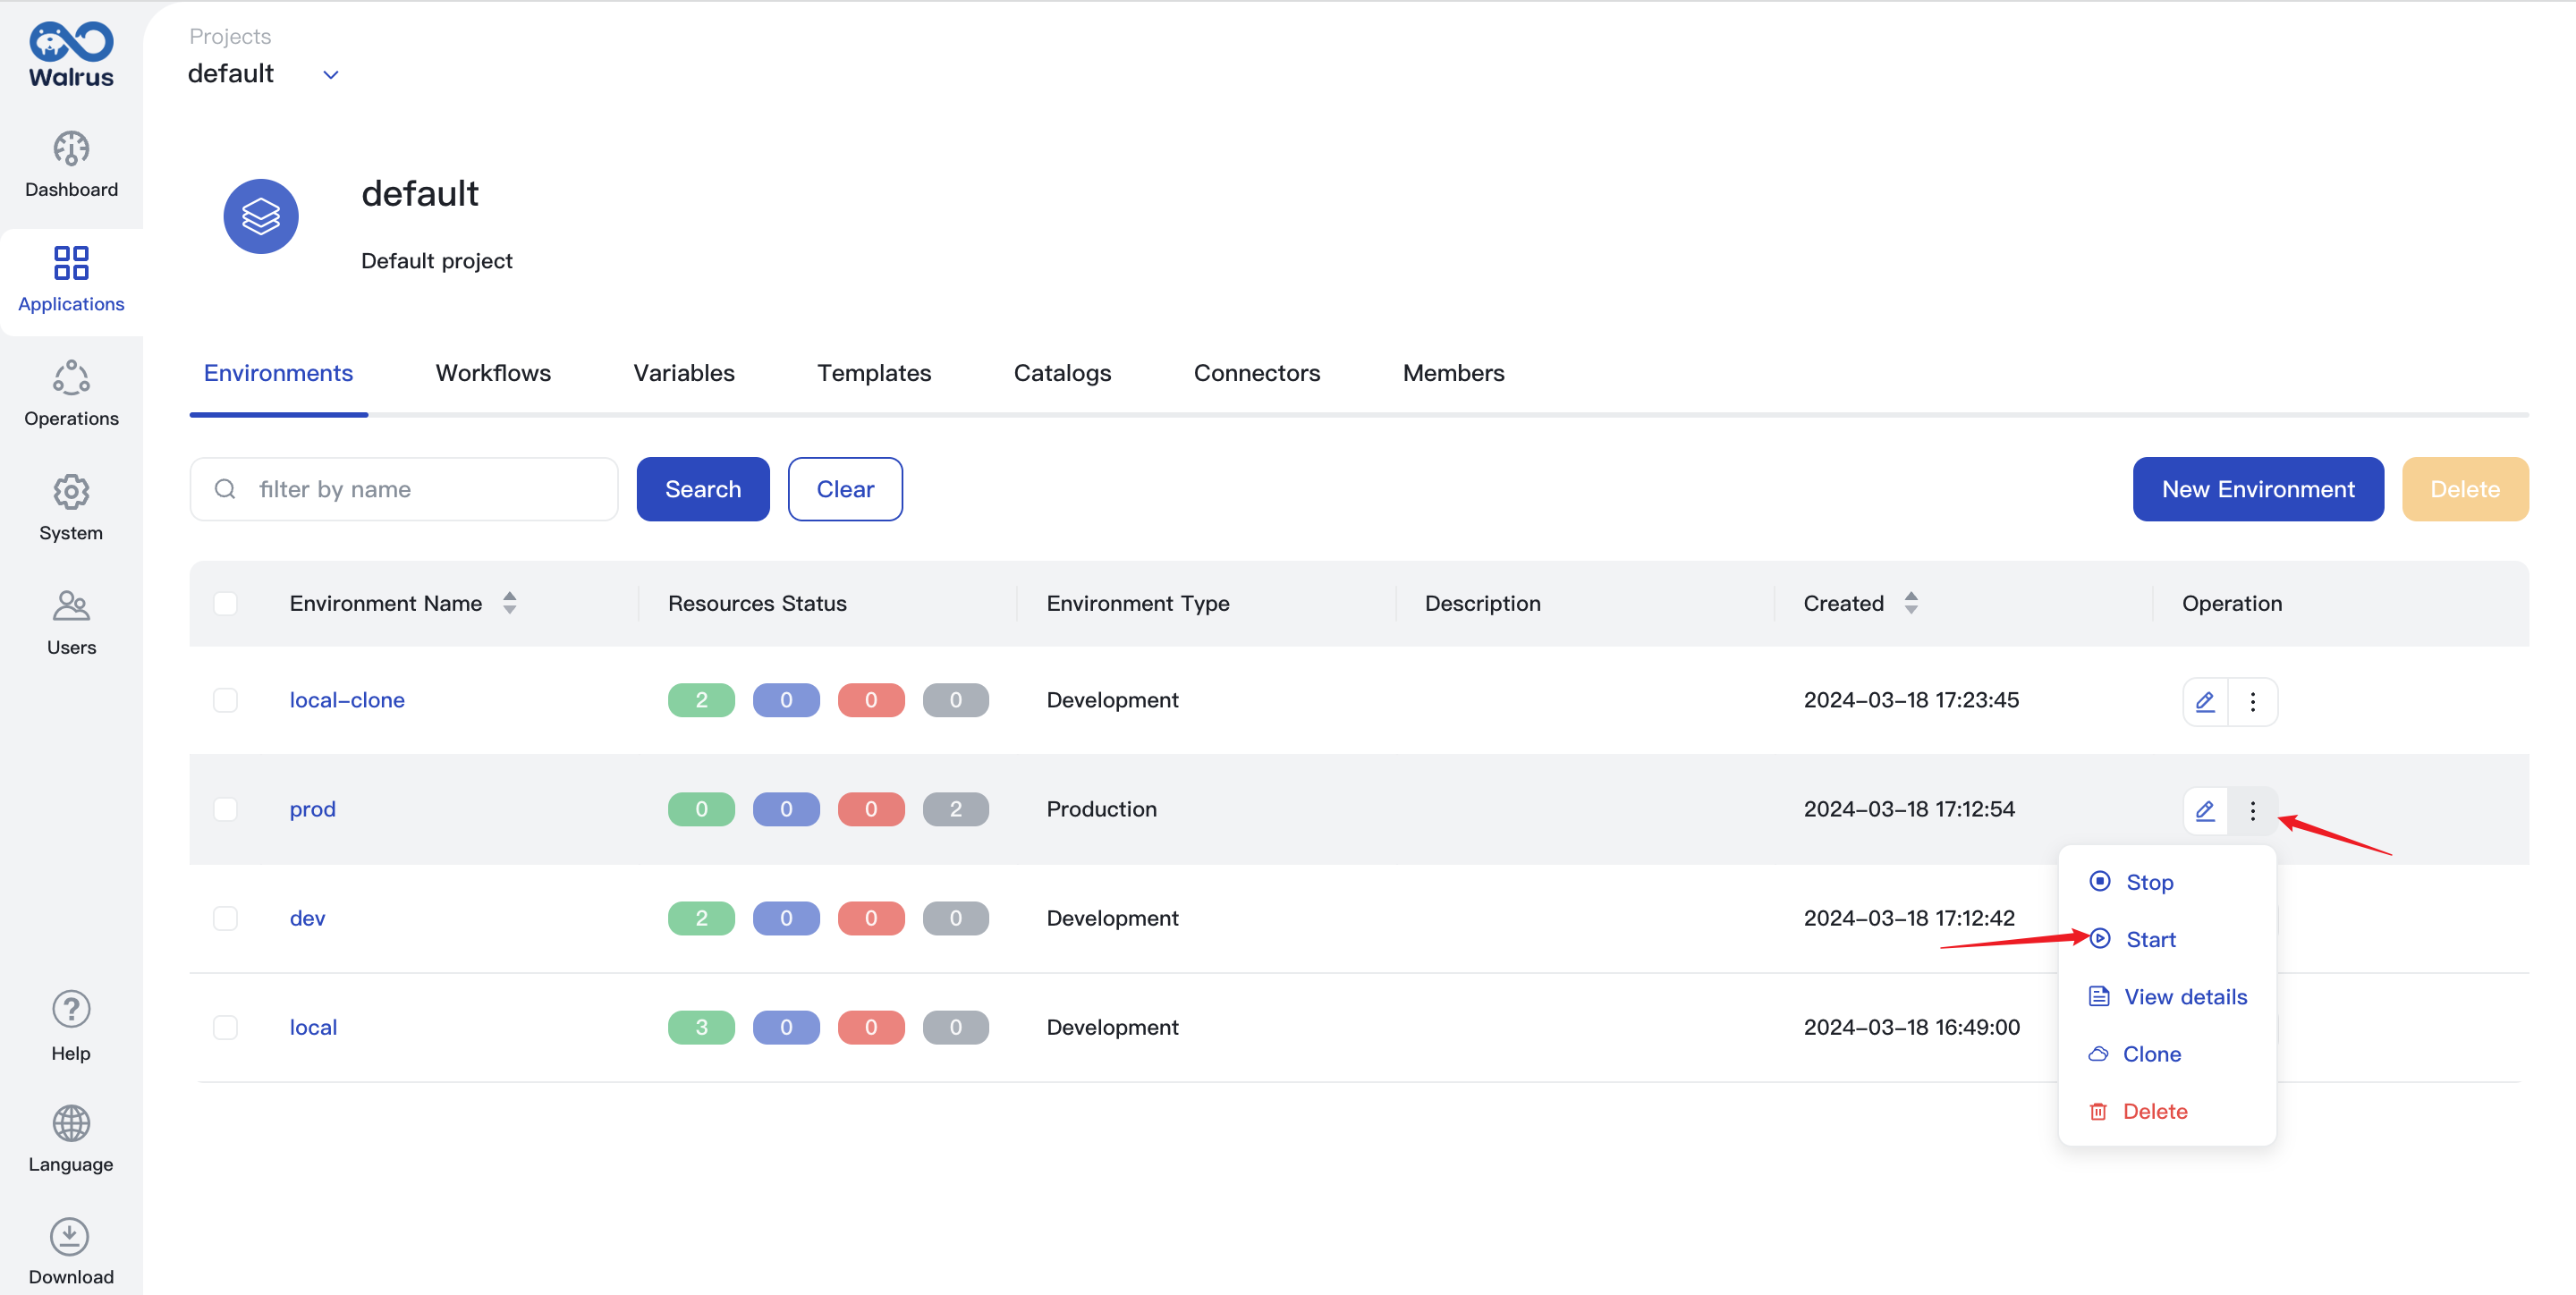
Start Environment
When you start an environment, Walrus will deploy the resources in the environment in sequence according to the dependencies, and you can view the resource status in the resource list. Resources that have been stopped or under undeployed status in the environment will get deployed.
- Click
Applicationsand go to a project view. - In the environment list, find the environment that needs to be started.
- Click the action dropdown and click
Start.
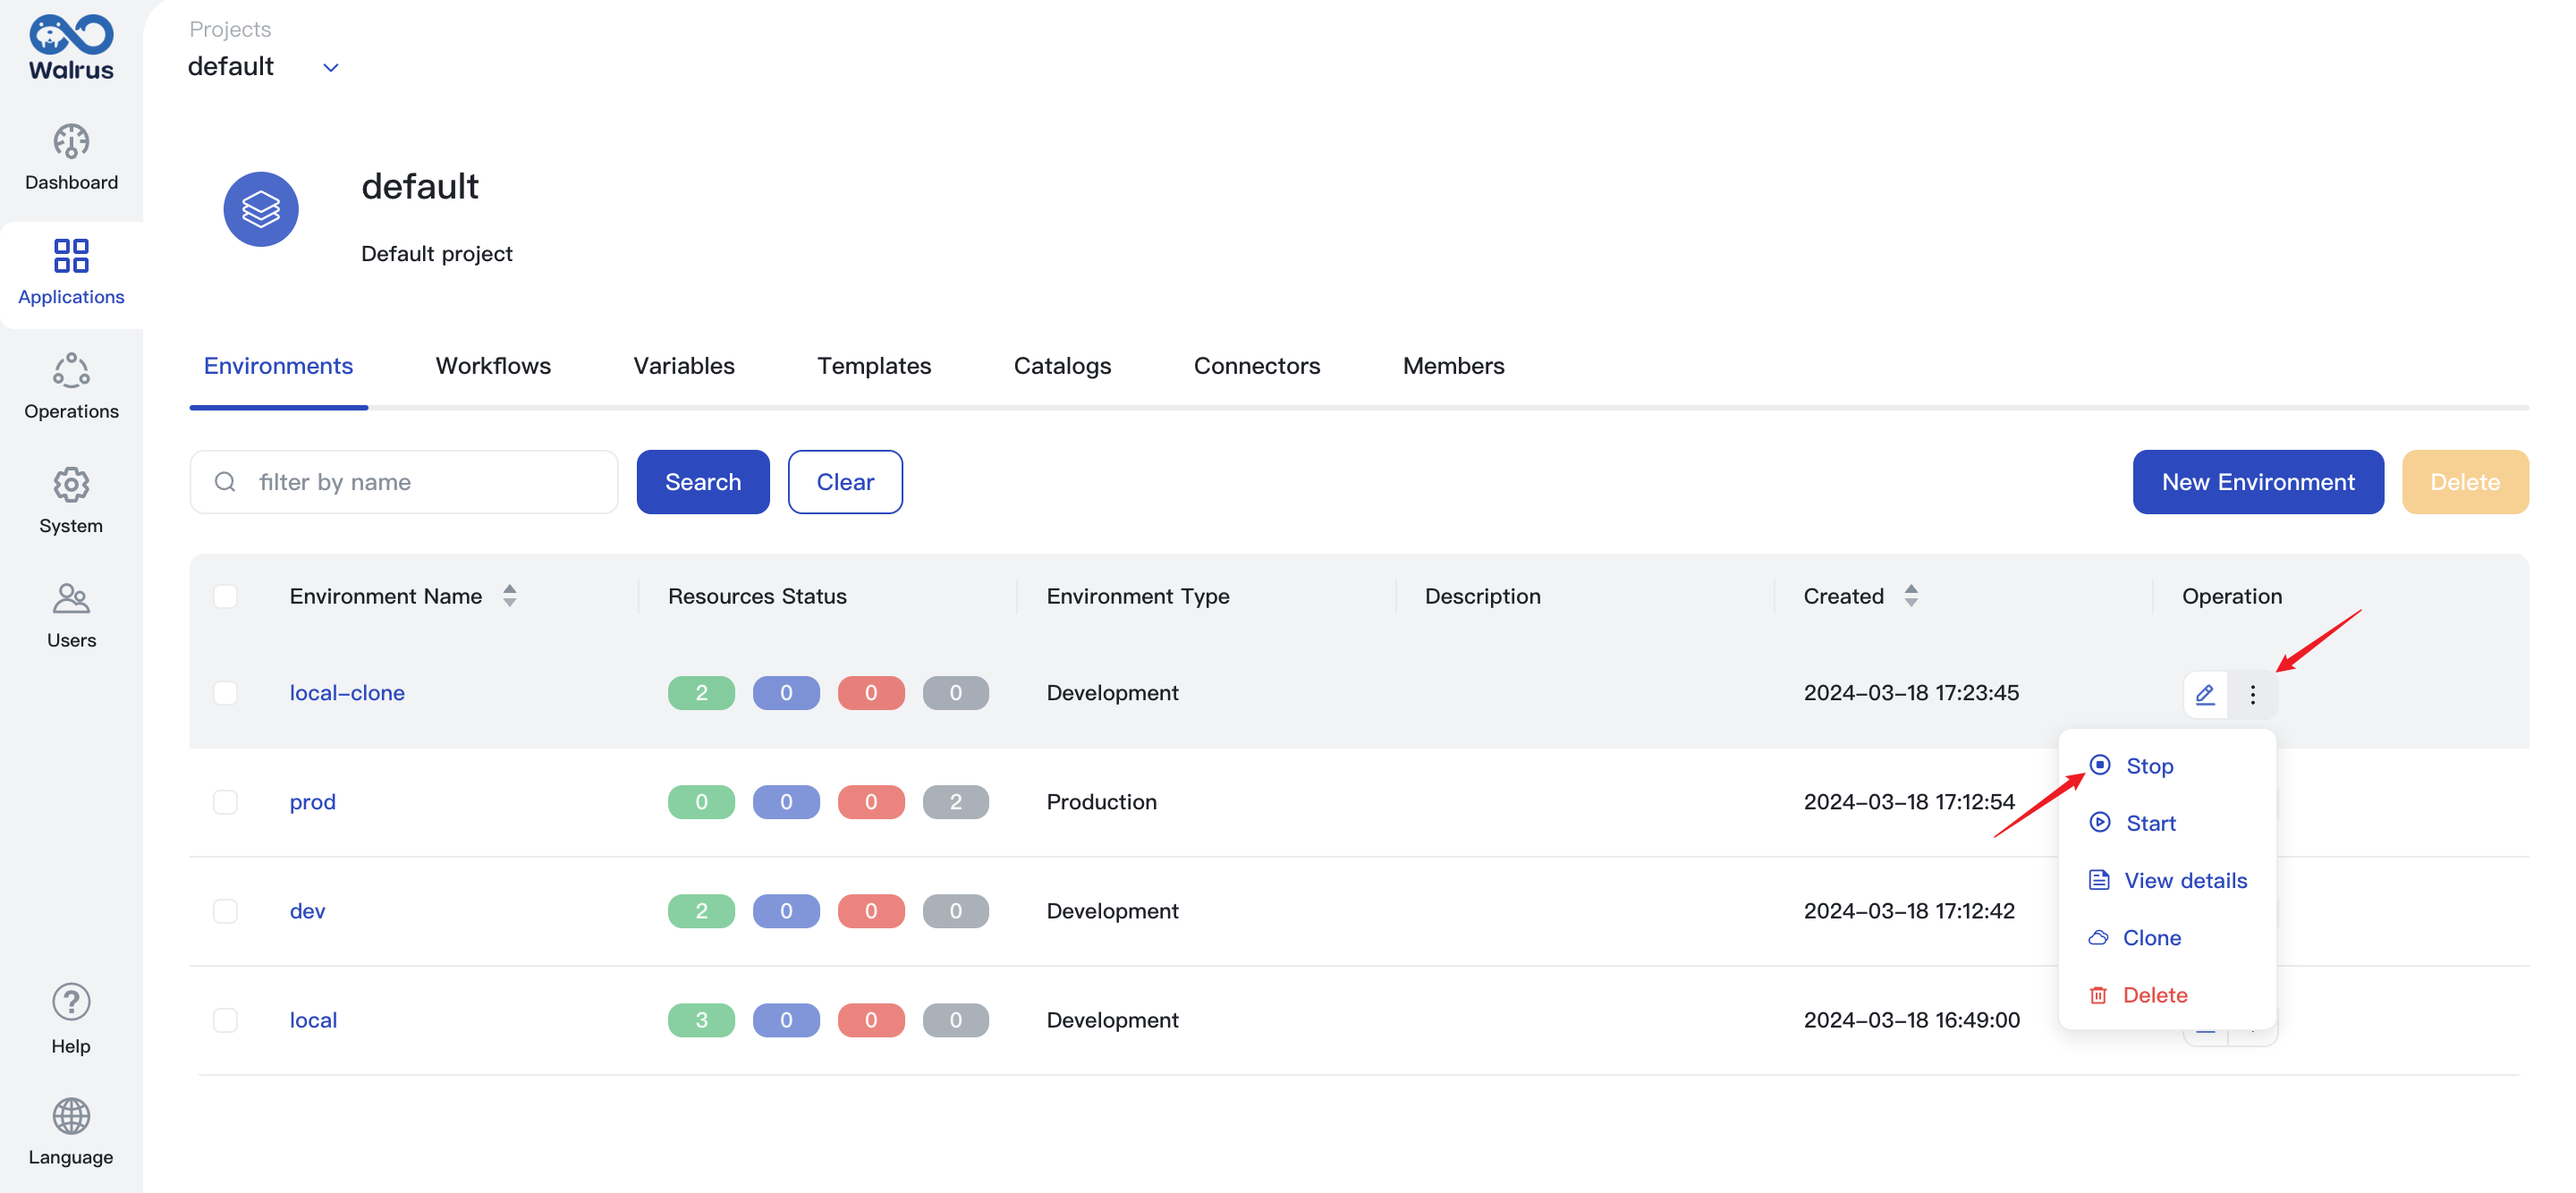
Stop Environment
When you stop an environment, Walrus will stop the resources in the environment in sequence according to the dependencies, and you can view the resource status in the resource list. When a resource is stopped, its configuration is kept while the underlying components are cleaned up.
- Click
Applicationsand go to a project view. - In the environment list, find the environment that needs to be stopped.
- Click the action dropdown and click
Stop.
Delete Environment
- Click
Applicationsand enter the environment list of a project. - Ensure no resources depend on this environment, select the environment you need to delete and click
Deleteto complete the deletion.
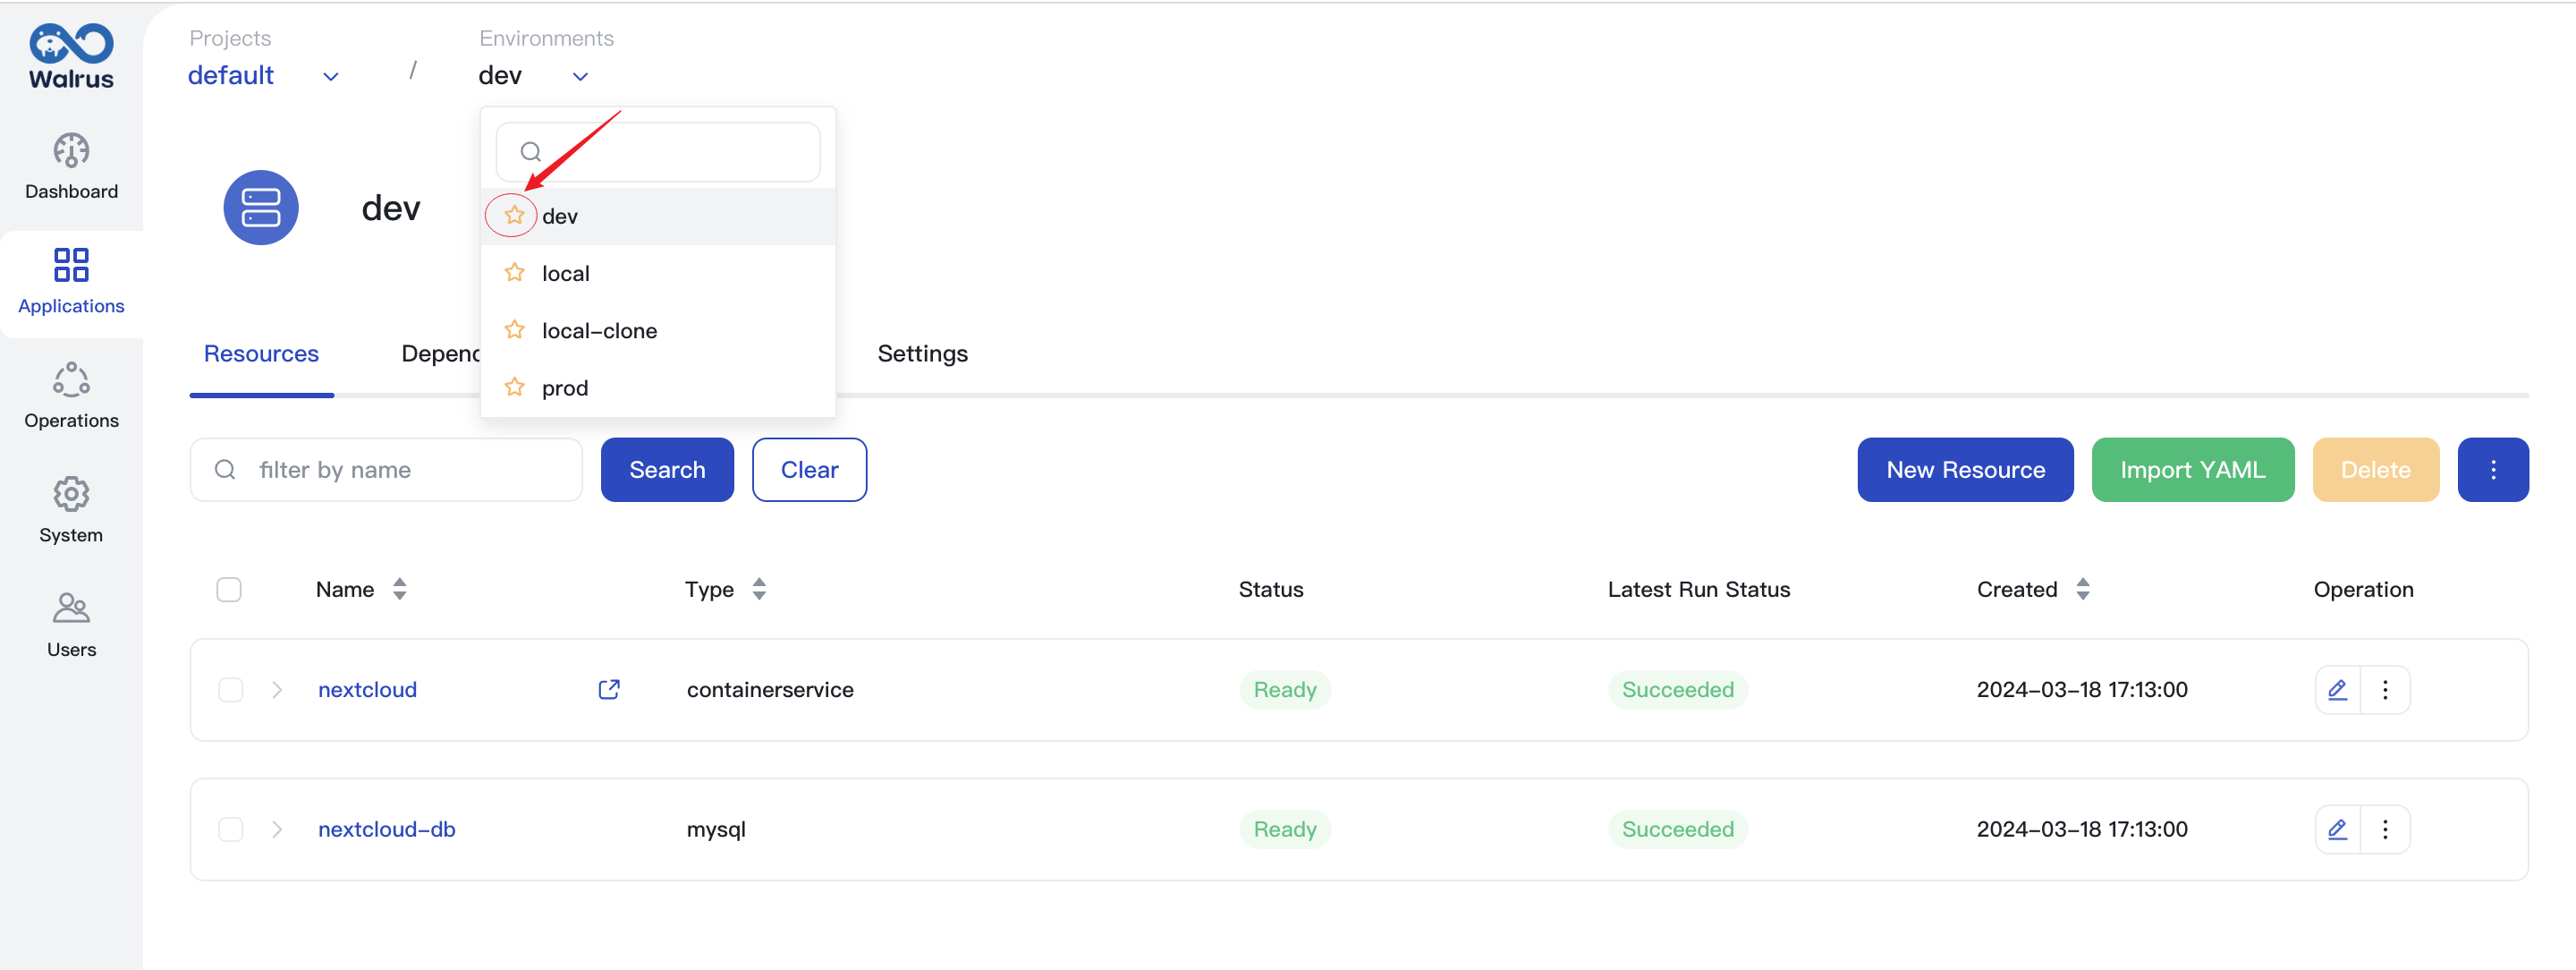
Set Default Environment
In Walrus, when there are multiple environments, you can designate one environment as the default environment. The method is as follows:
- In the
Environmentsdropdown option in the top breadcrumb menu, click to set it as the default environment.
- If the project corresponding to the default environment is deleted, this setting will also be deleted.
- After setting a default environment, upon successful login or clicking the
Applicationsmenu, will enter the default environment details page.
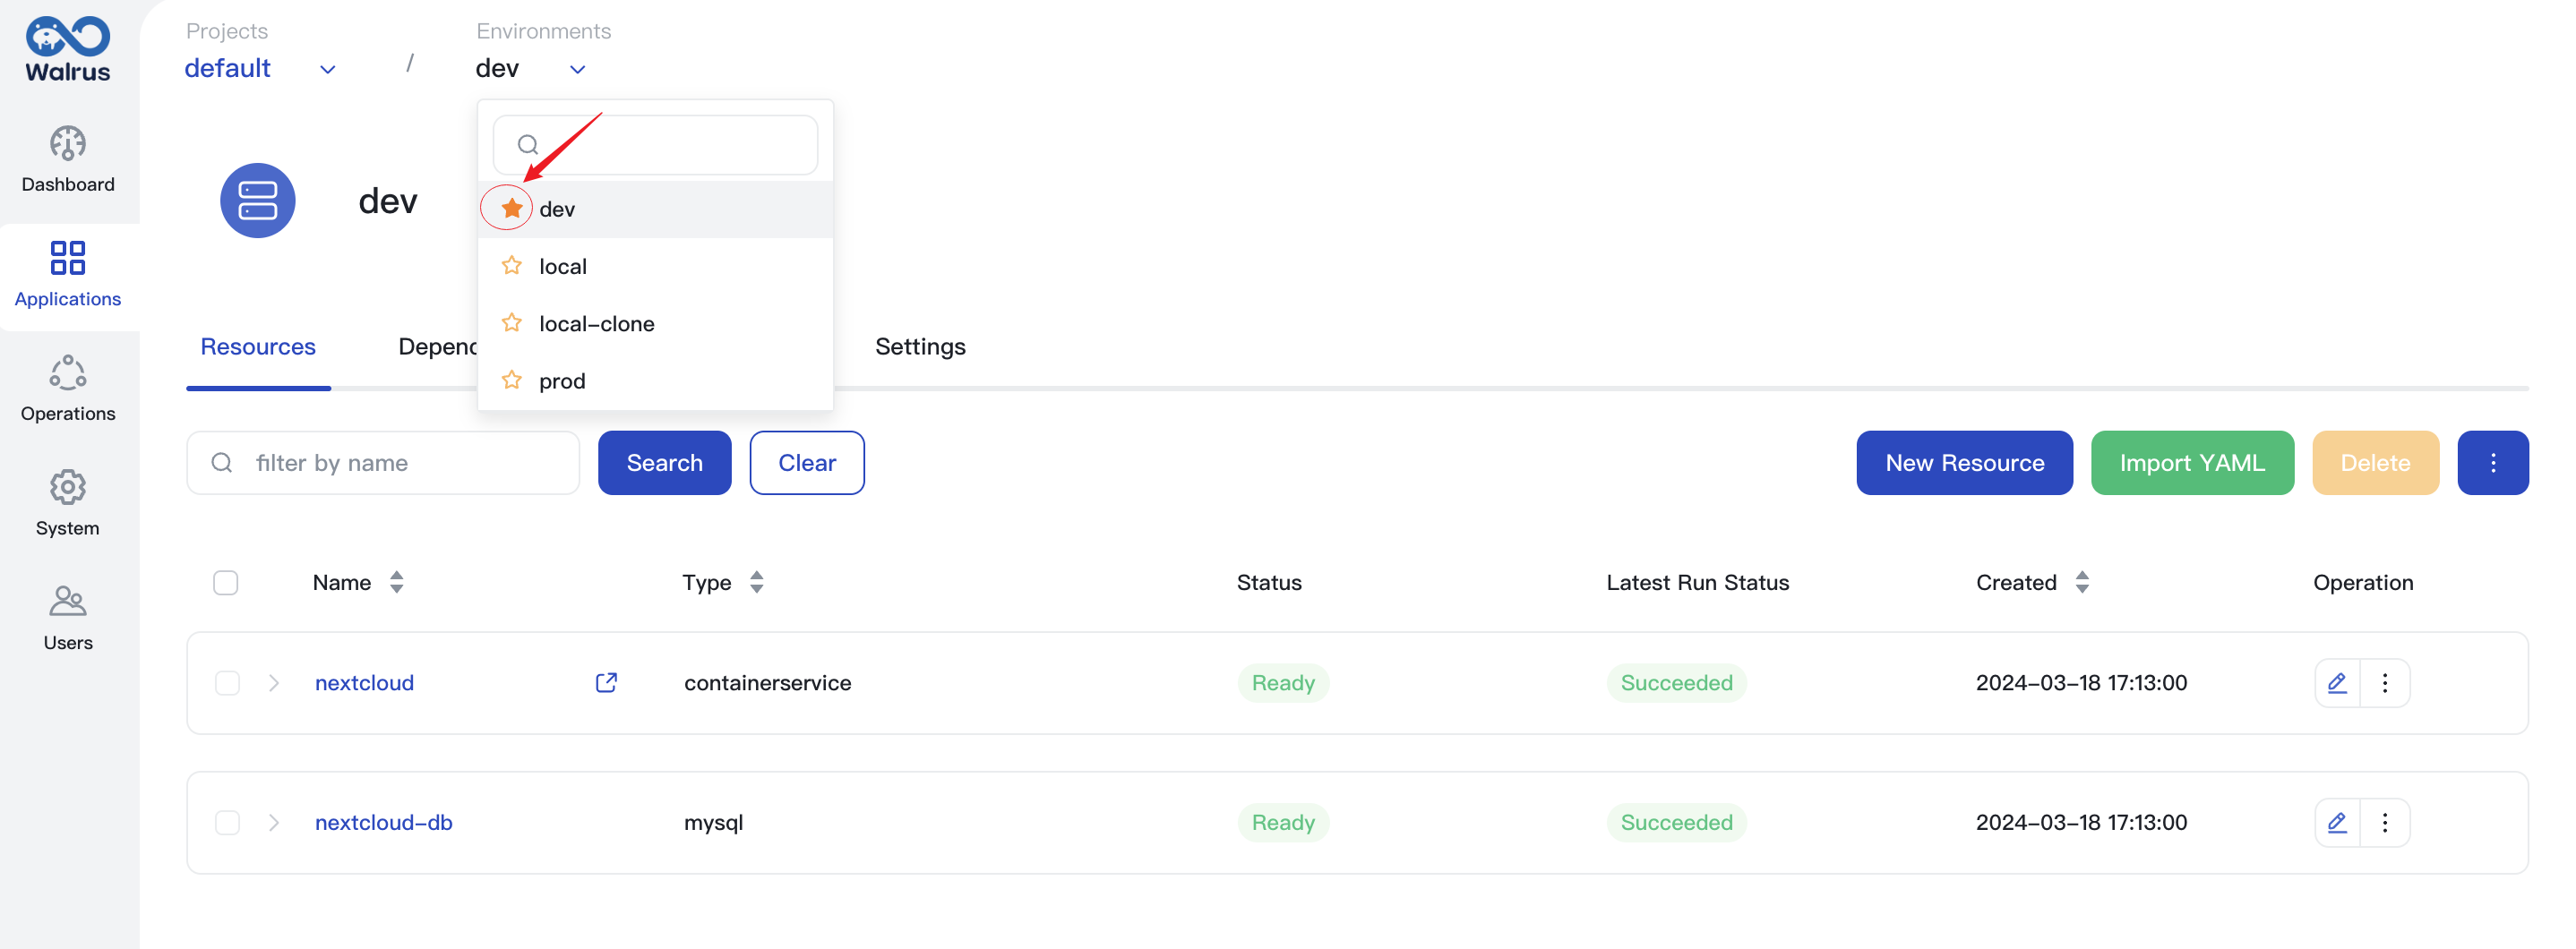
Unset Default Environment
- In the
Environmentsdropdown option in the top breadcrumb menu, click to unselect it as the default environment.
- After unsetting or deleting the default environment, the default access after a successful login will be the first environment under the first project.
- After unsetting the default environment, clicking the
Applicationsmenu will take you to the recently visited page (project list, project details, environment details). - After deleting the default environment, clicking the
Applicationsmenu will grant default access to the first environment under the project.