Resources
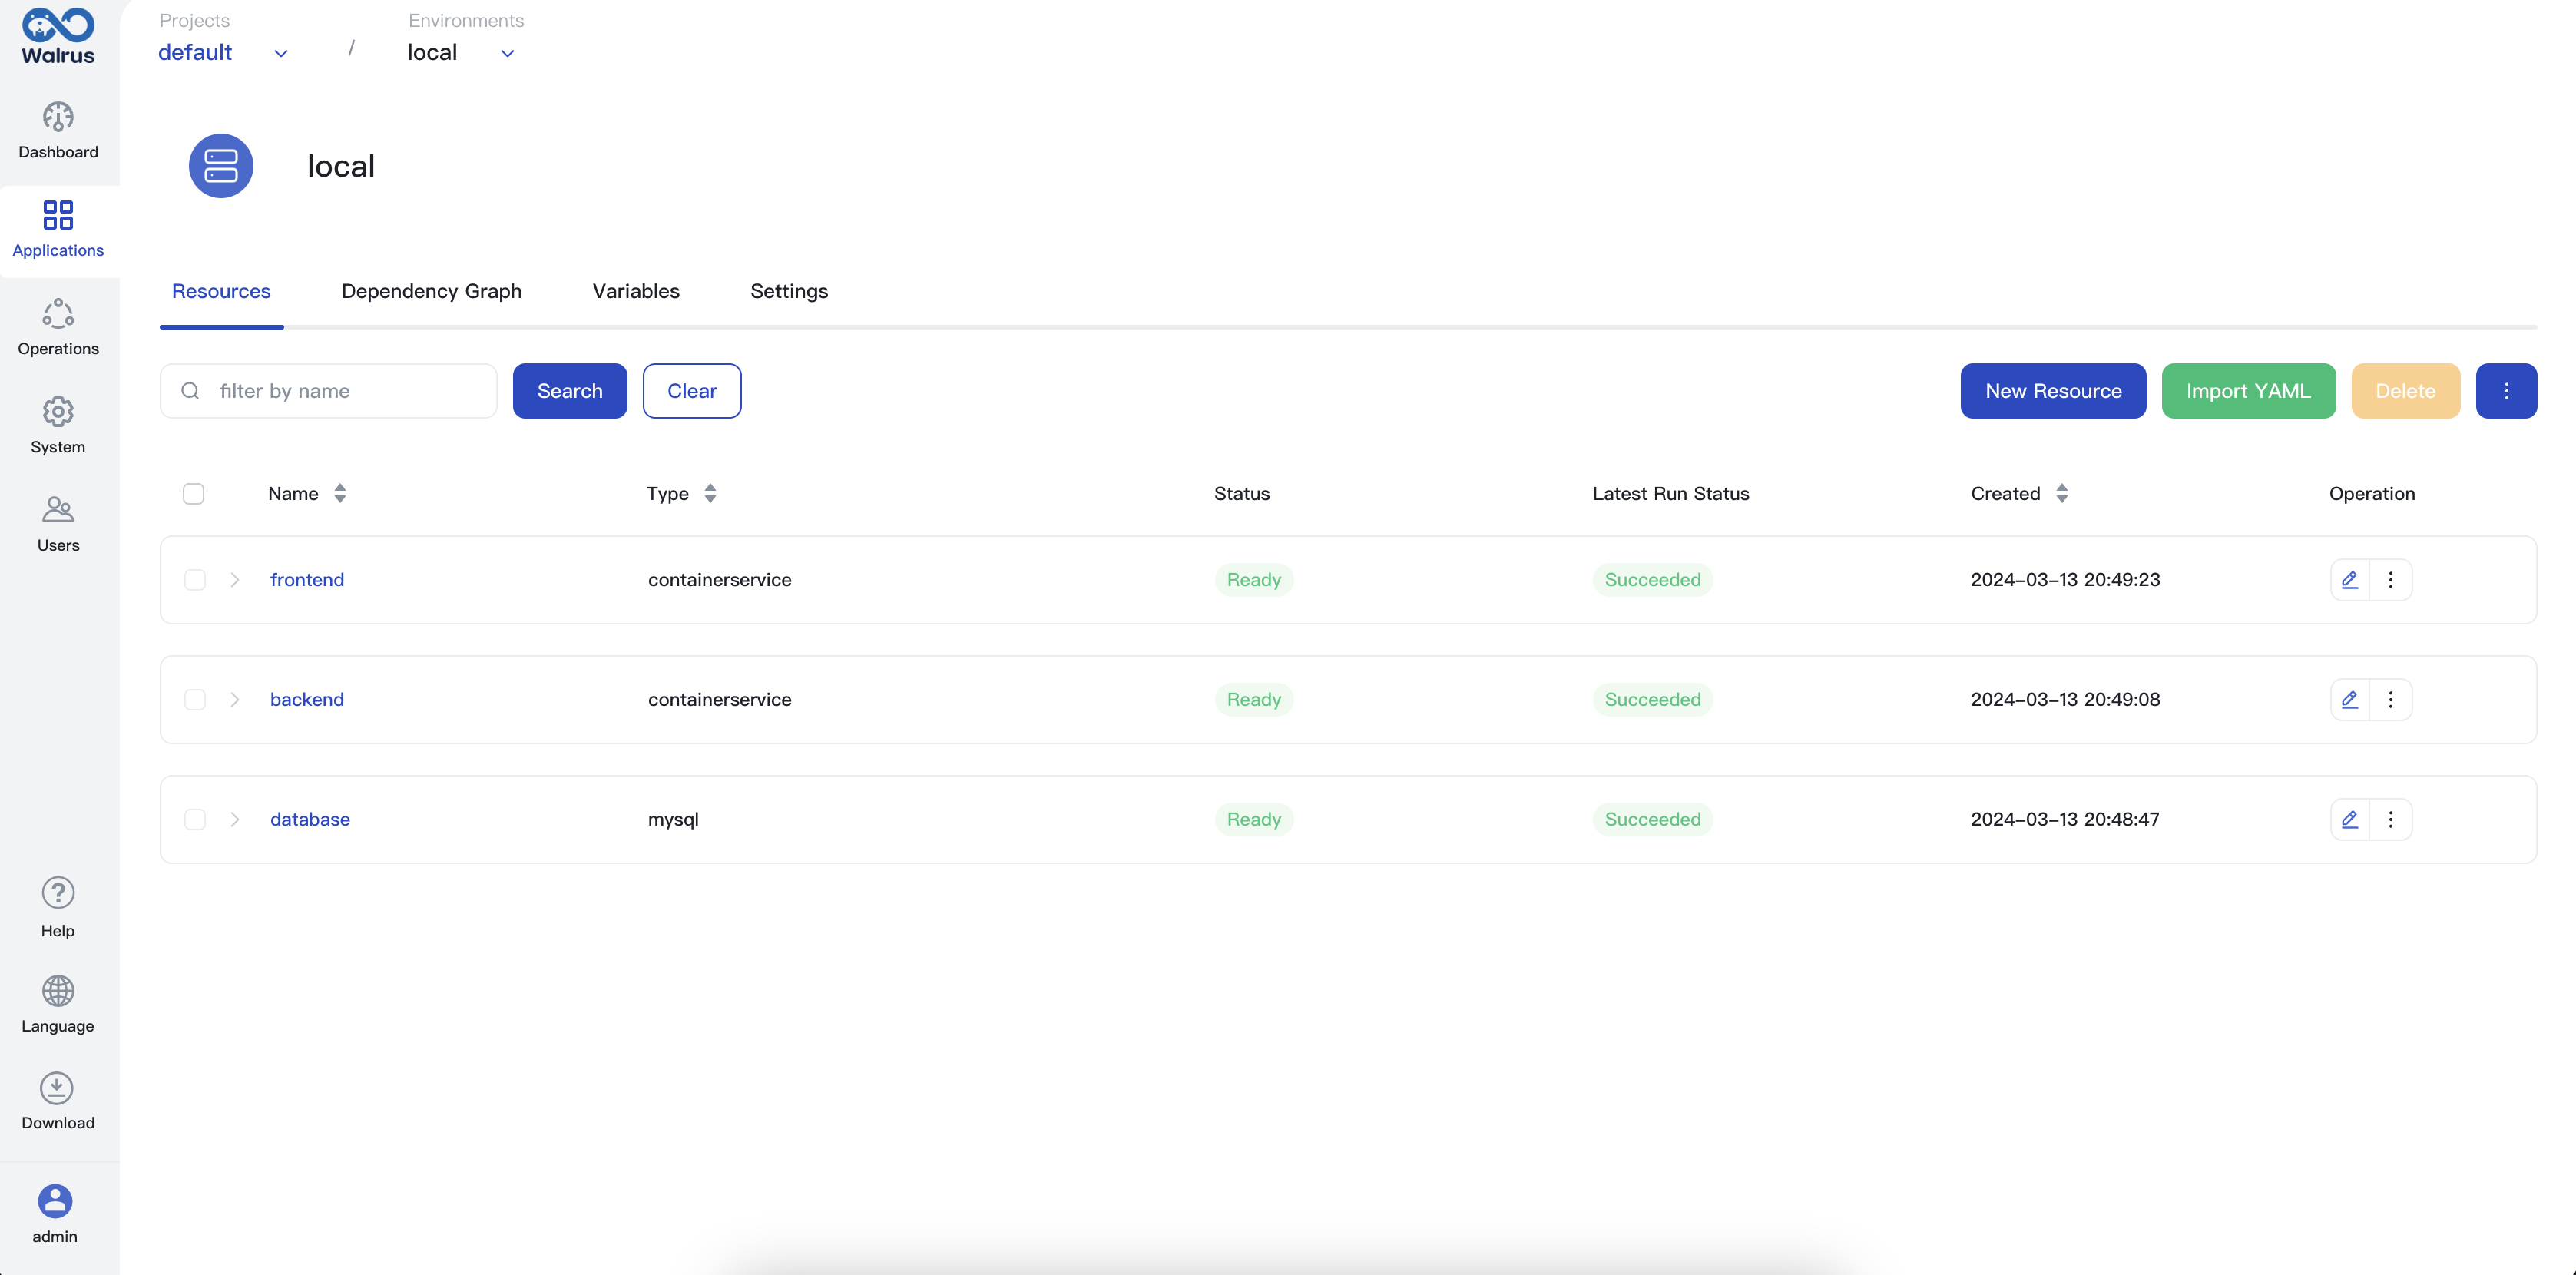
View Resource List
Resources belong to an environment, and you can view the list of resources in the environment view.
- Click on
Applicationsin the left navigation bar. - By default, you will enter the view of the first environment. You can switch to view resources under different projects or environments through the top-level breadcrumb. You can also set the default environment to enter through the breadcrumb.
- In the
Resourcestab, you can view the list of resources under this environment.
View Resource Details
- Navigate to the
Resourcestab in the environment view. - Find the resource you need to view and click its name to enter the detail page.
On the resource details page, you can view the resource's basic information, component list, dependency graphs, and more.
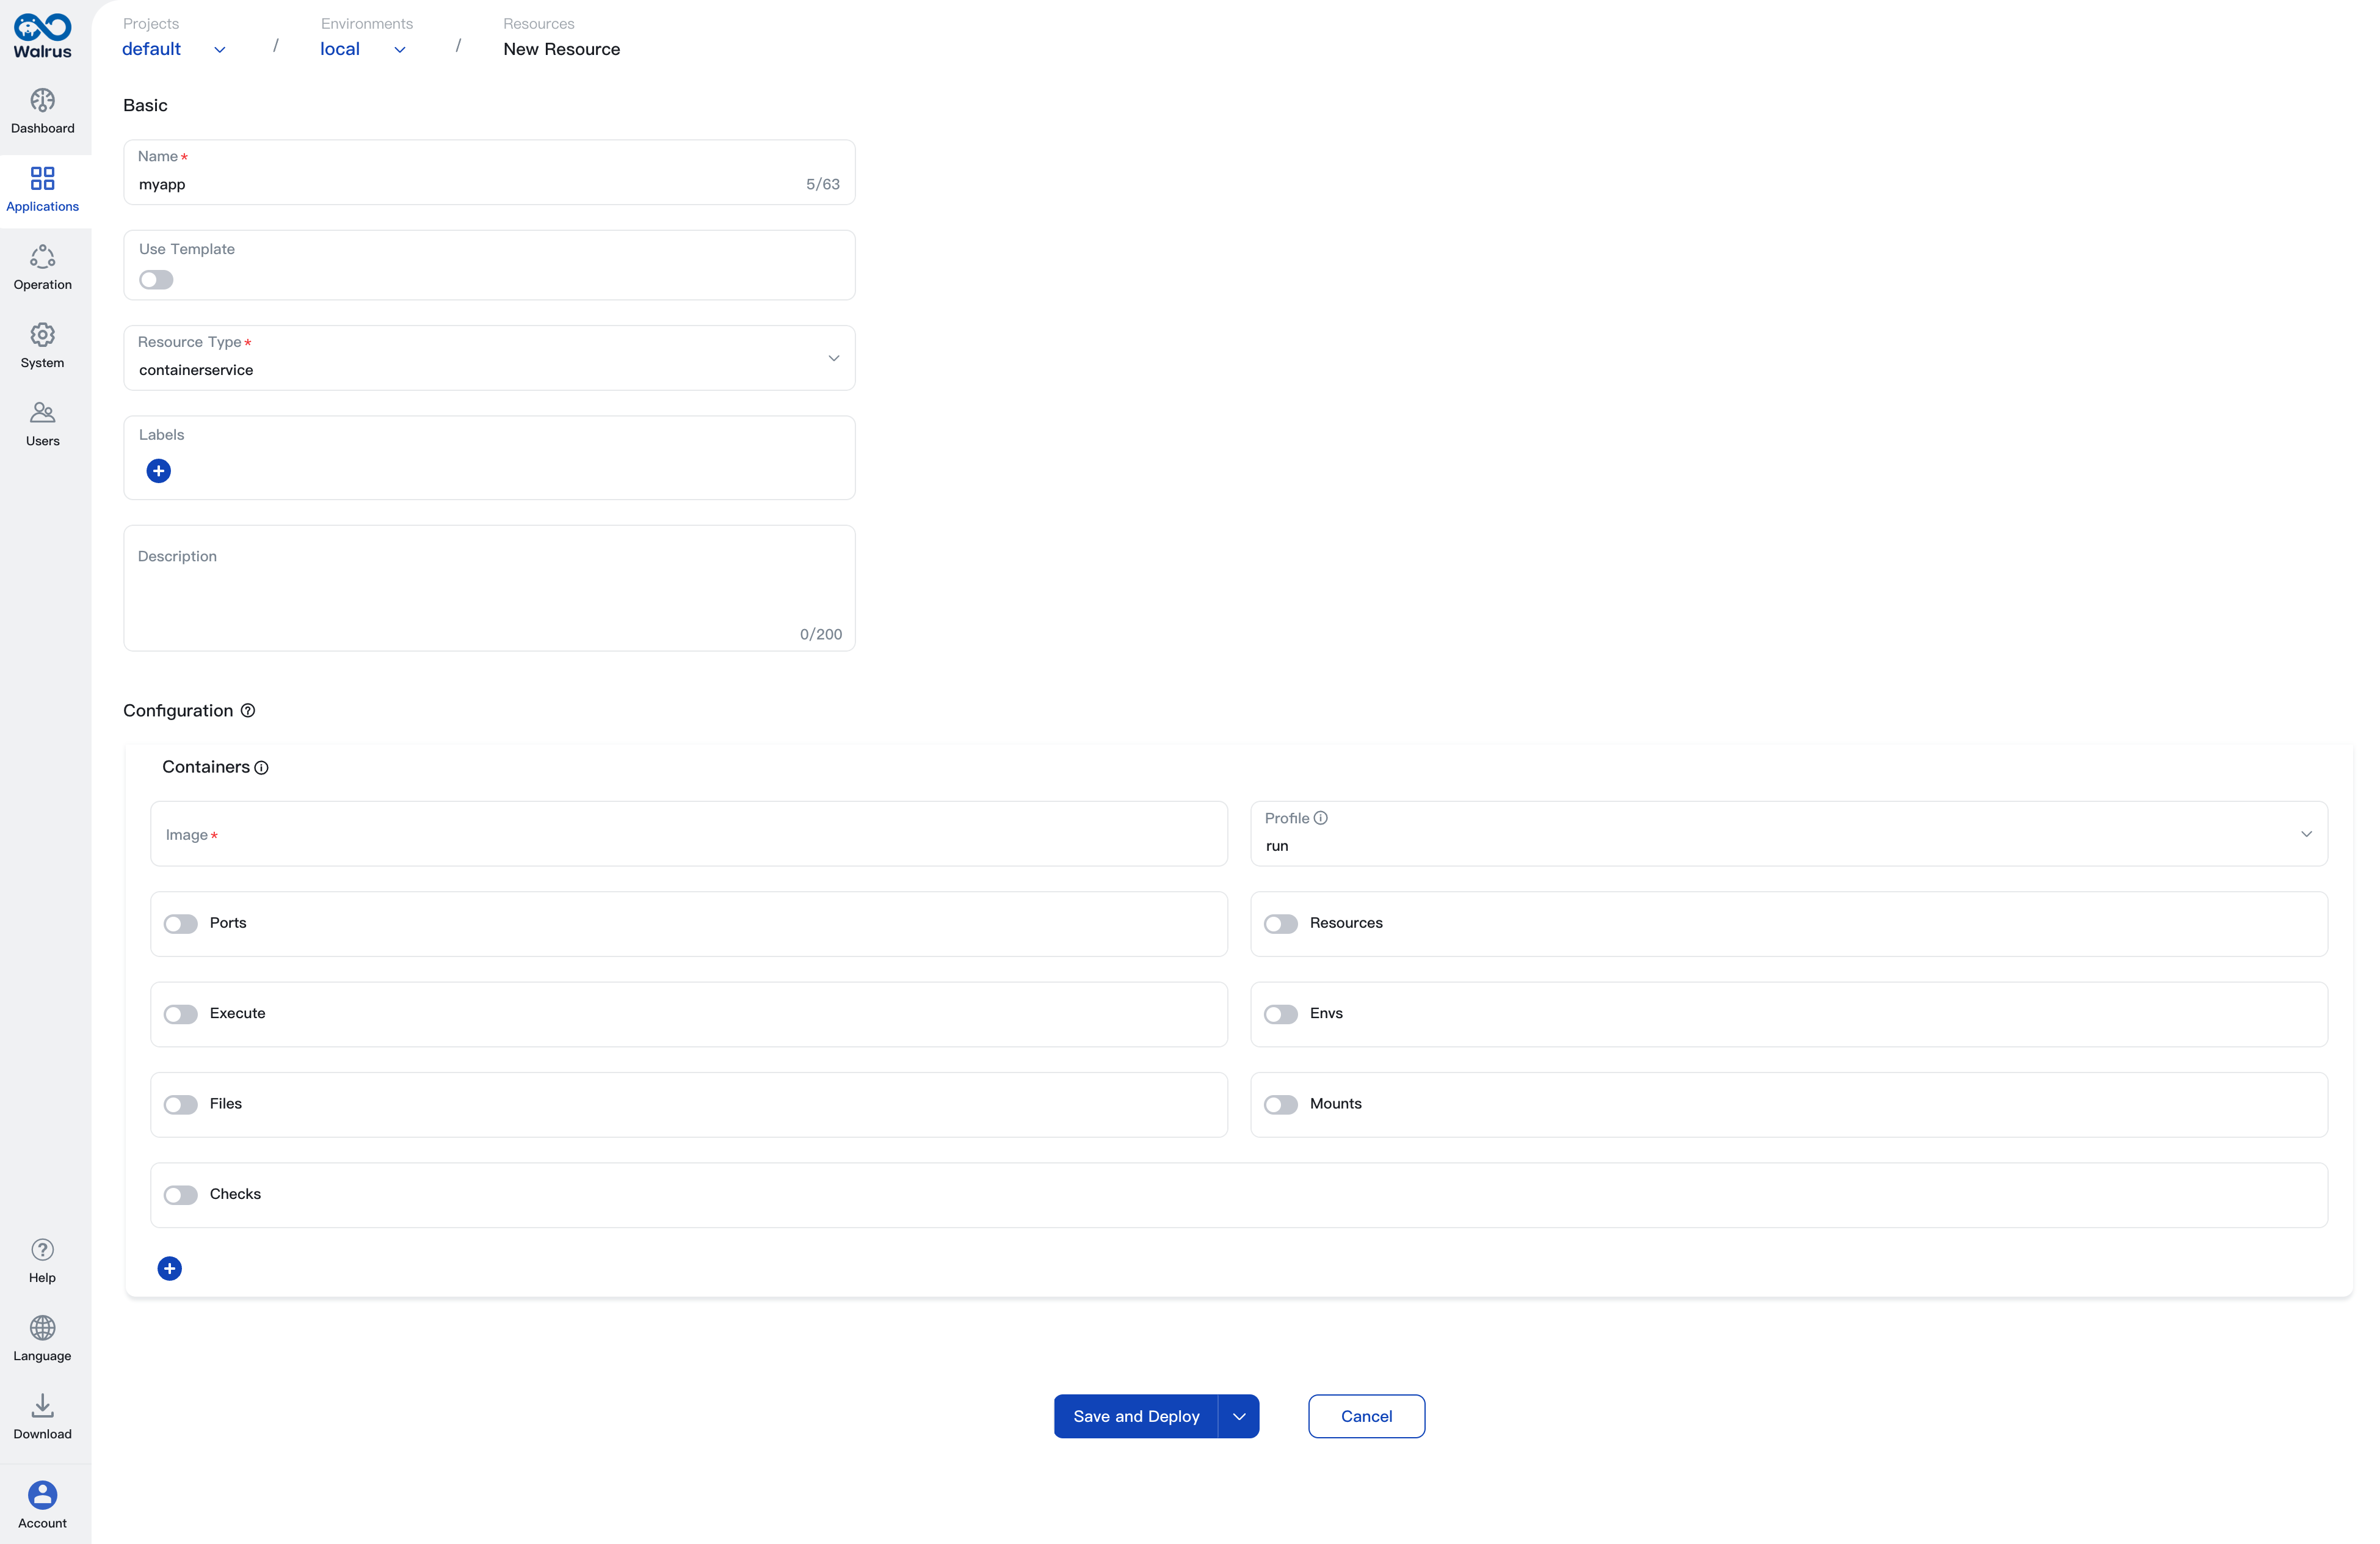
Create Resource
- Navigate to the
Resourcestab in the environment view. - Click
New Resource. - Select the resource type. If you want to create from template, enable the
Use Templateoption, then select the template and version. For more information about resource types, please refer to Resource Definition. - Enter the
Name,Description, andLabels. The name should be unique under the same environment. - Fill in the configuration form, configuration items depends on the template or resource type you selected.
- Click the
Save & Deploybutton.
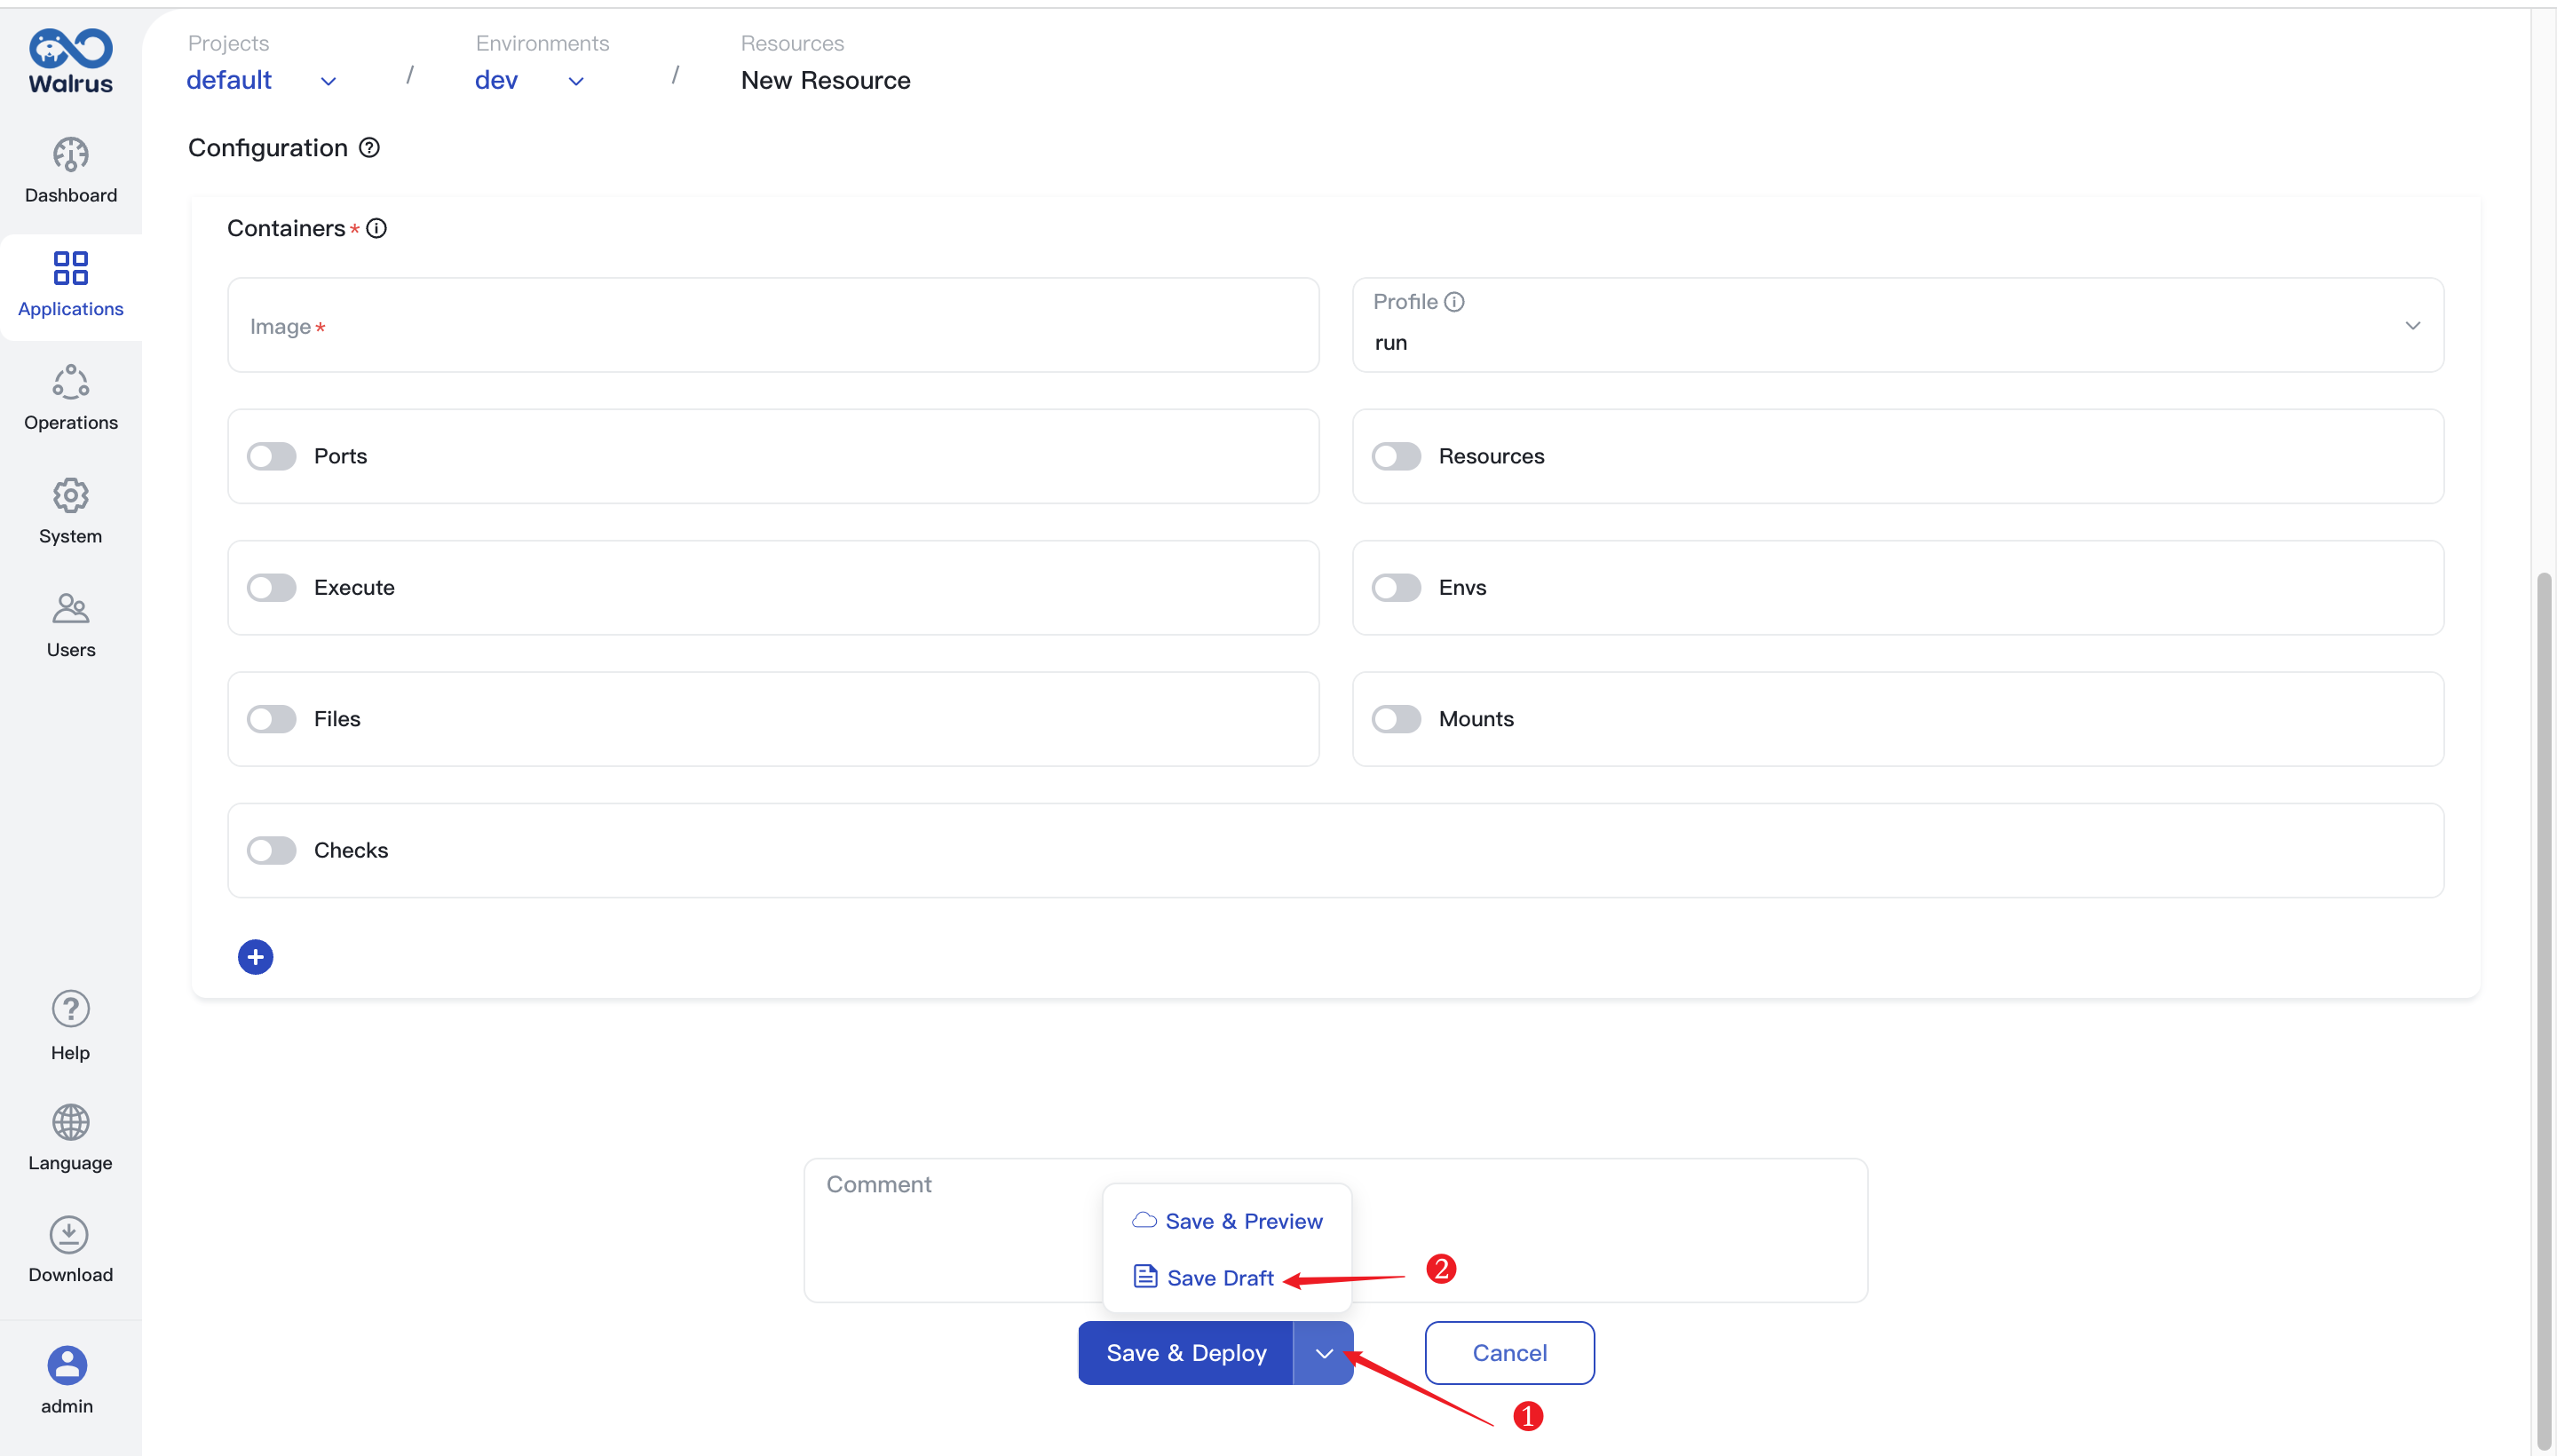
Create Resource Draft
You can create a resource as draft.
- Navigate to the
Resourcestab in the environment view. - Click on
New Resource. - Select the resource type. If you wish to create a resource from a template, enable the
Use Templateoption, then select the desired template and its version. - Enter the
Name,Description, andLabels. Ensure the name is unique within the same environment. - Fill in the configuration form. The configuration items will depend on the selected template or resource type.
- Click the downward arrow next to the
Save & Deploybutton. - Select
Save Draft.
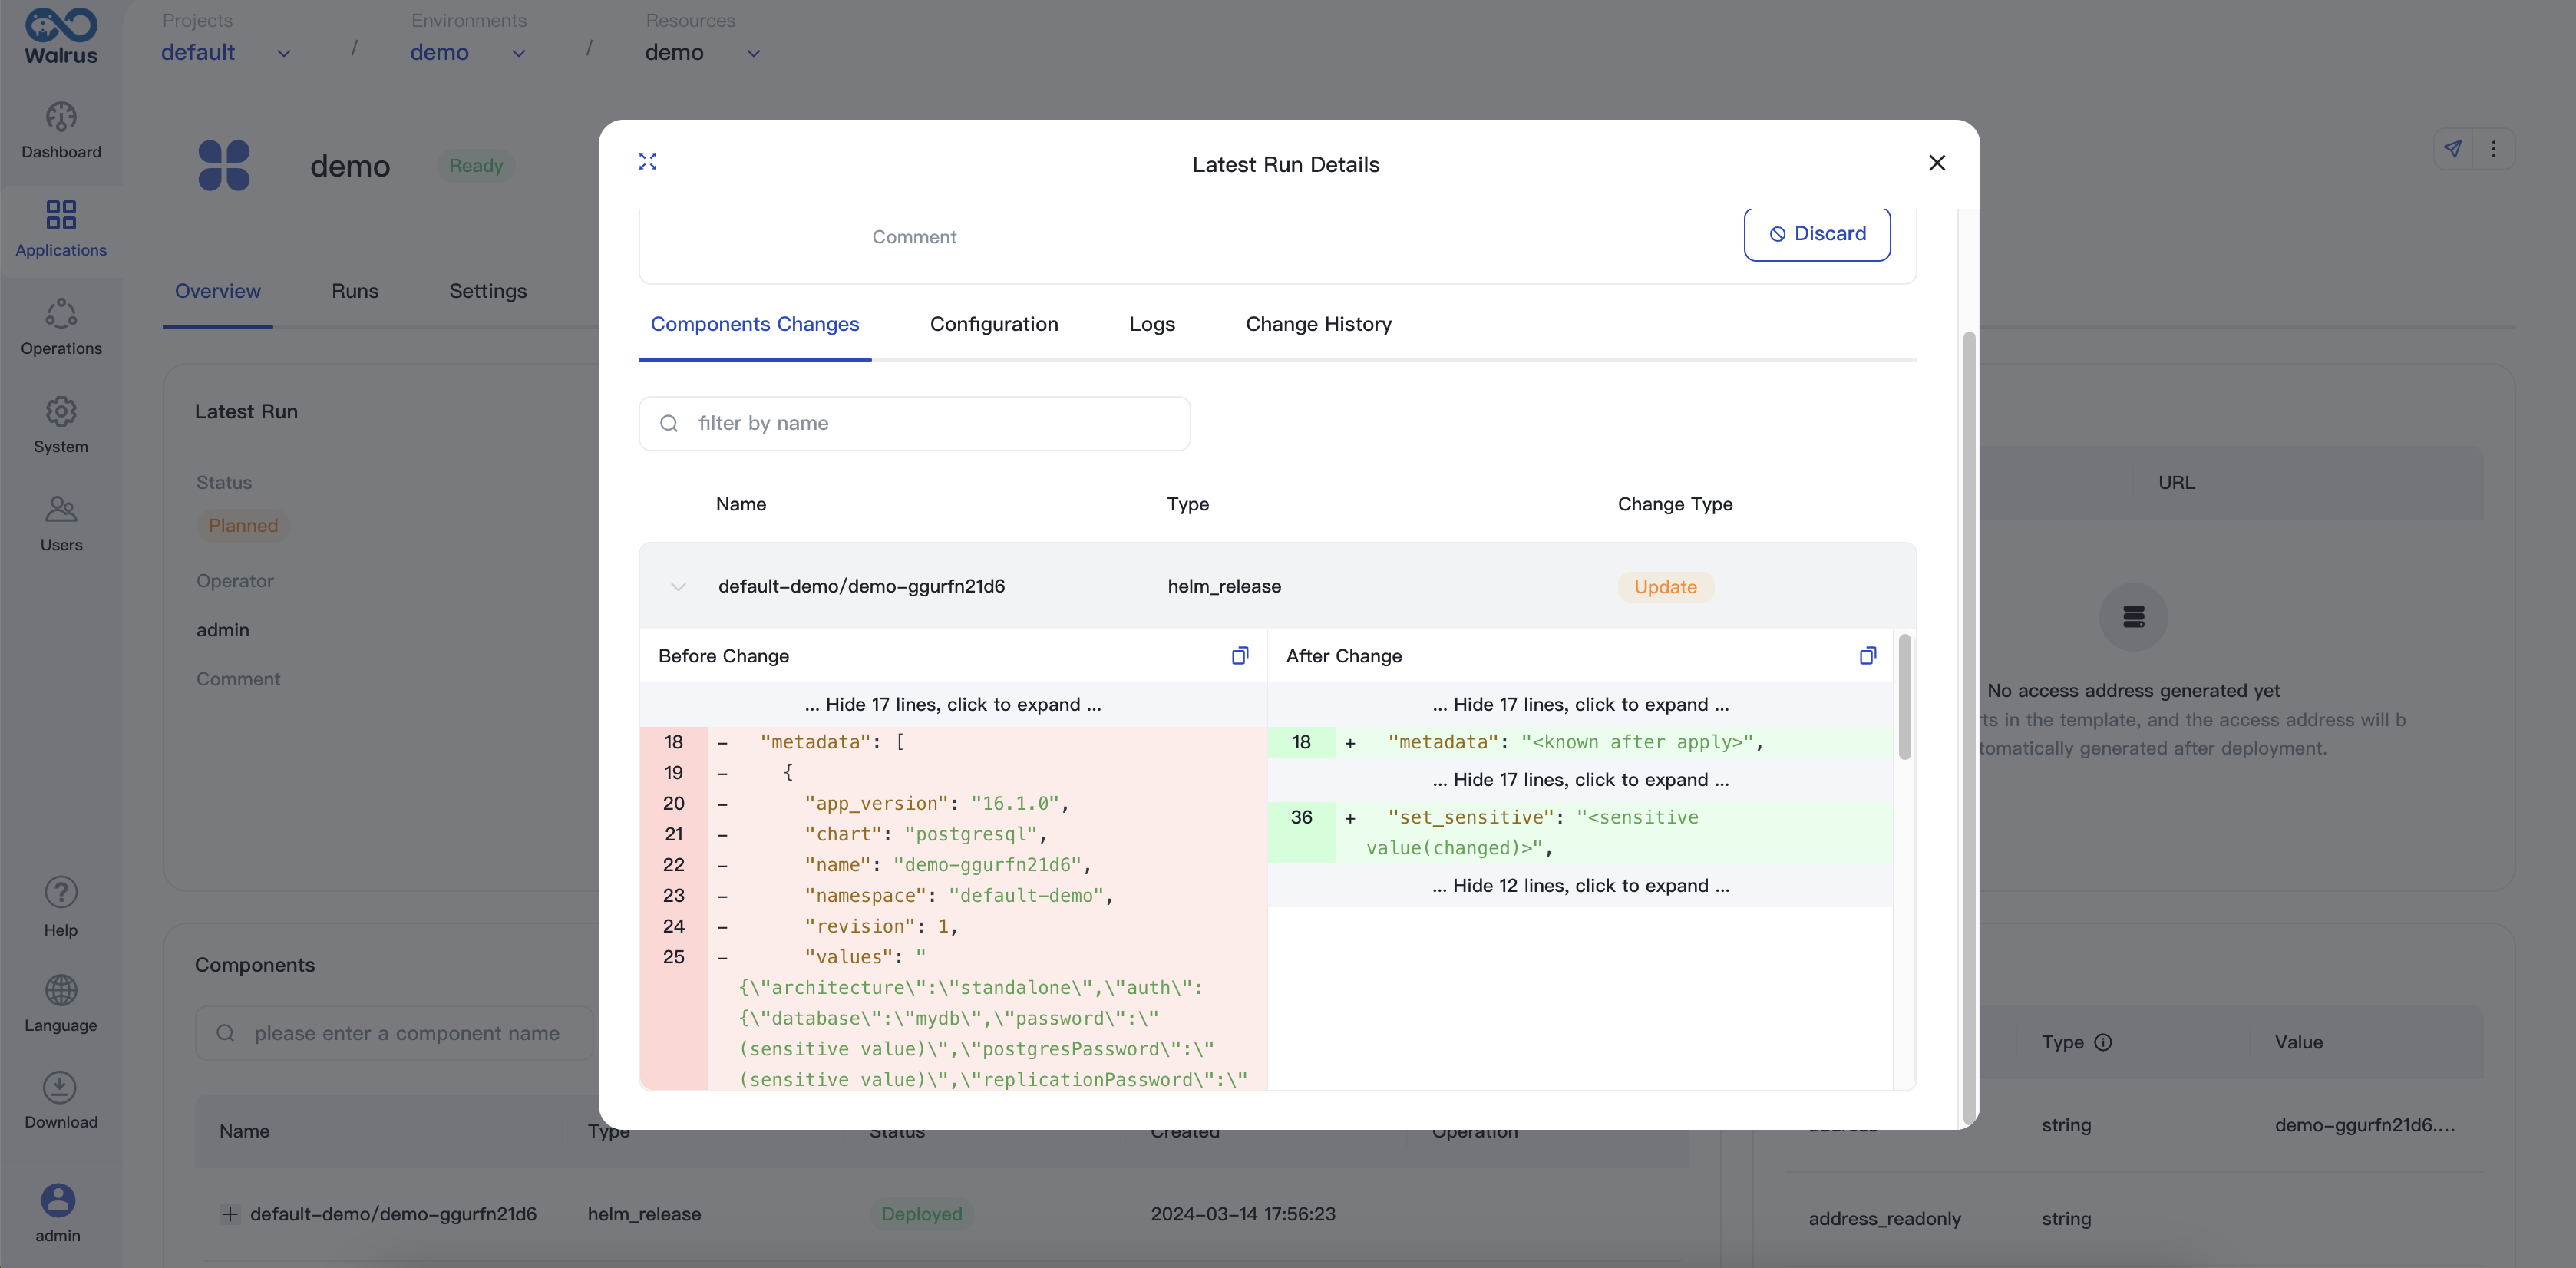
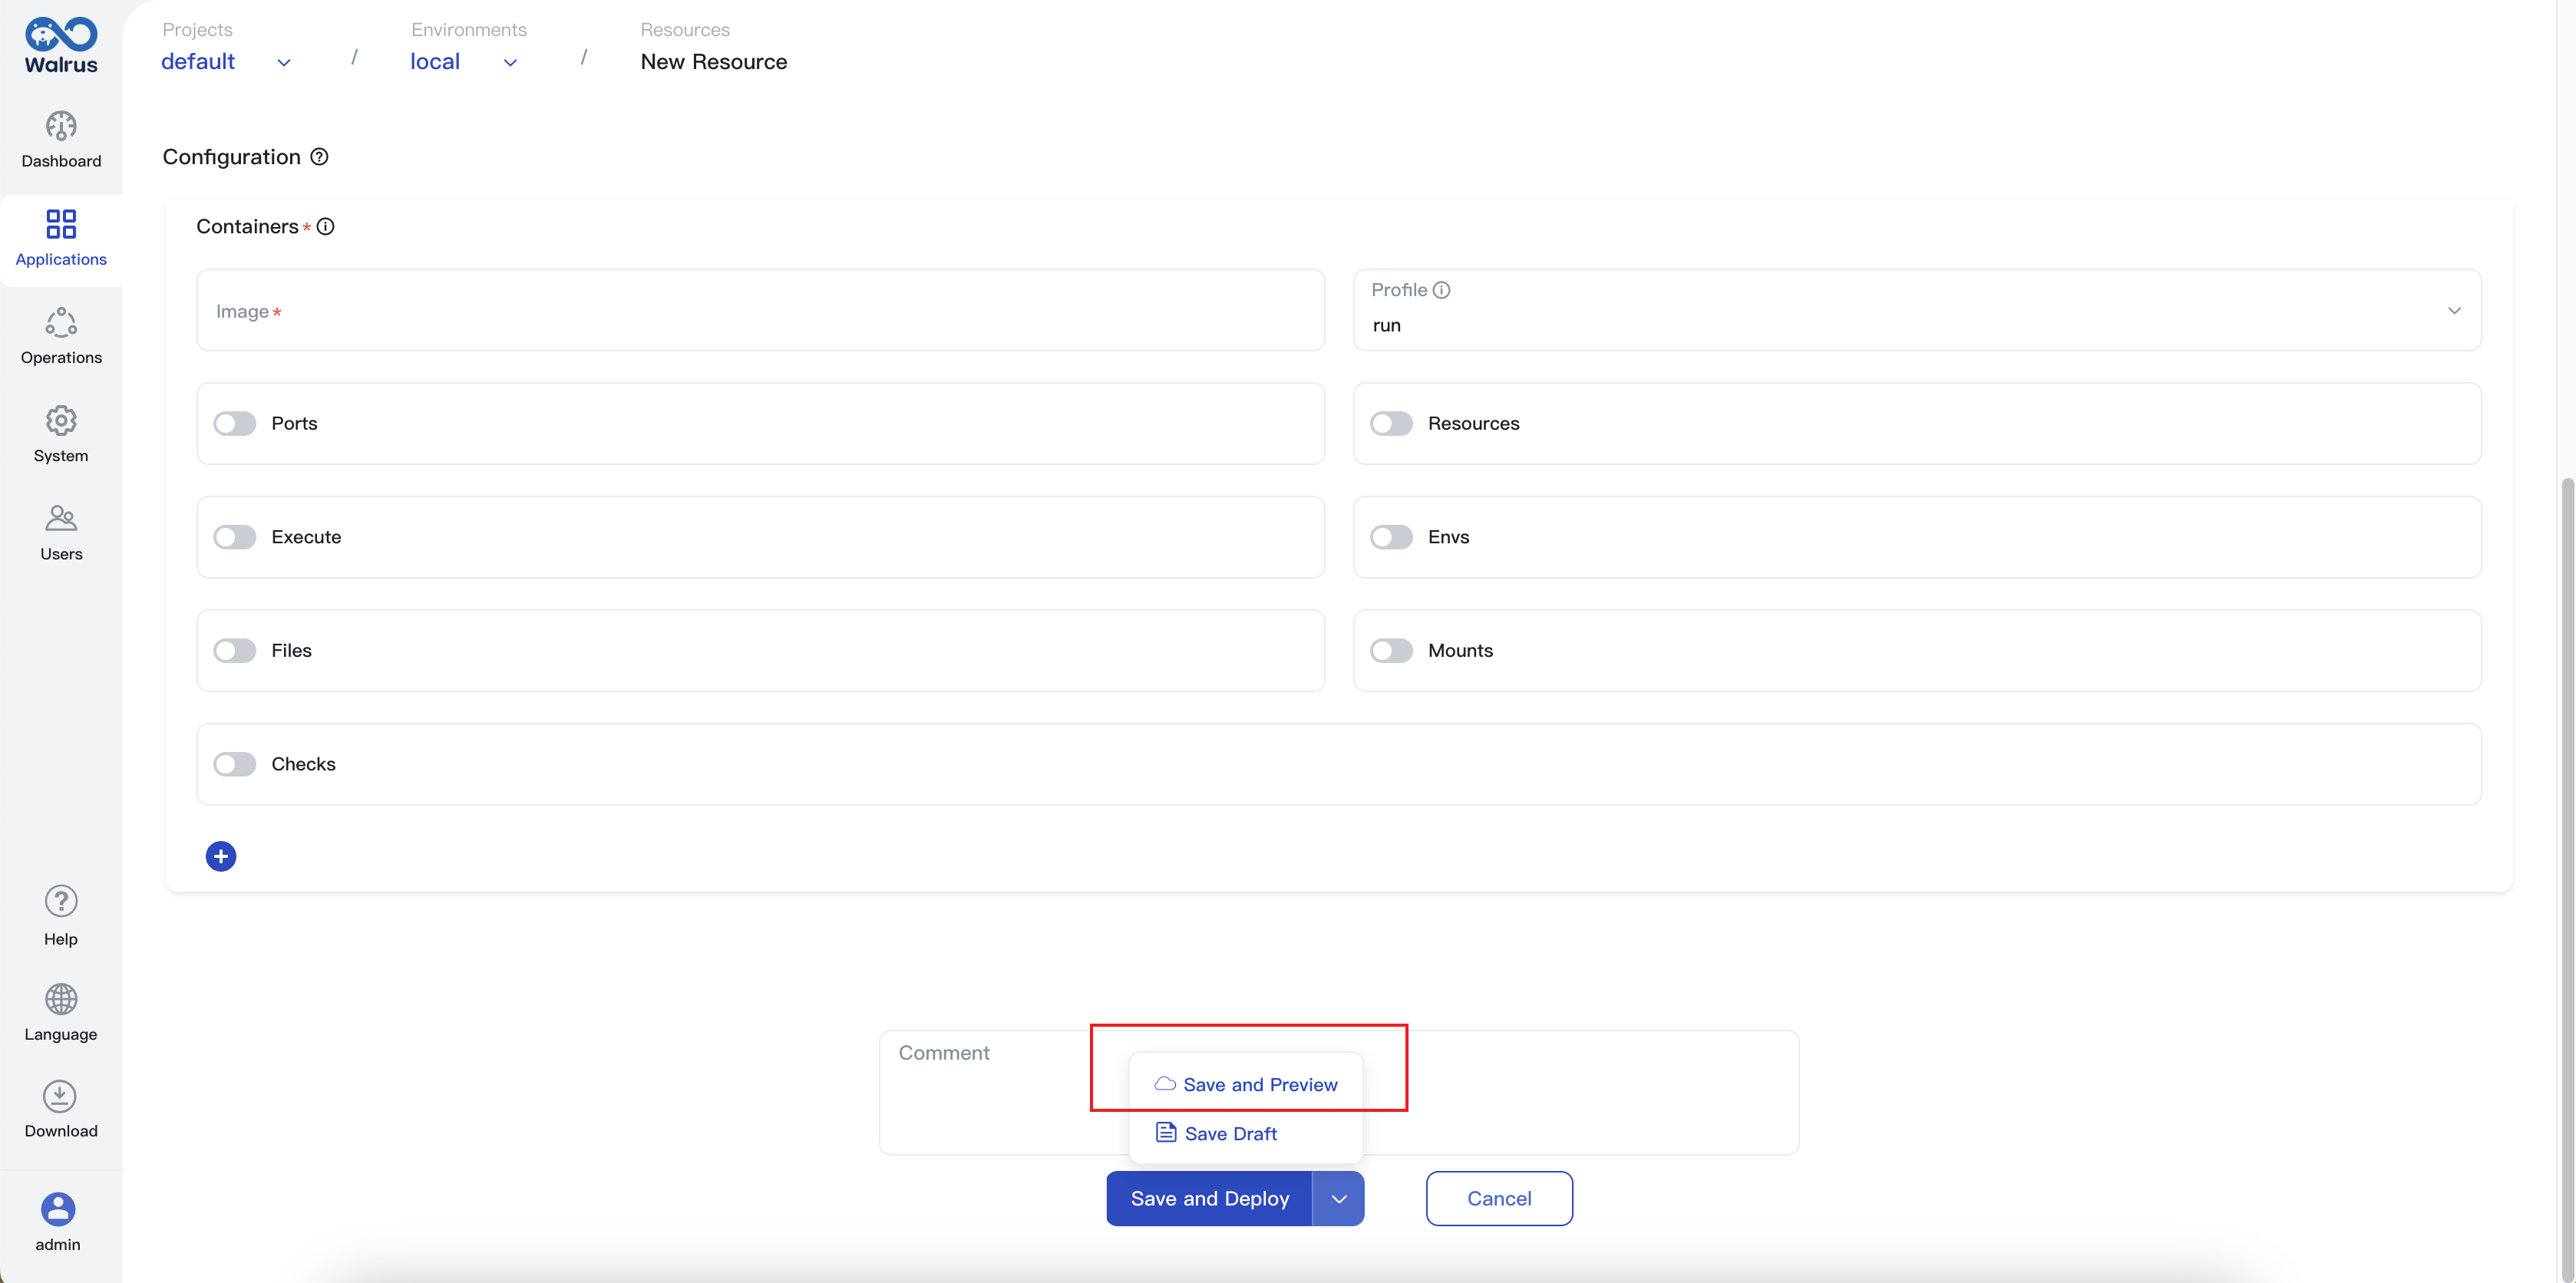
Create Resource Preview
You can choose to save and preview resources when creating or editing them. The resource preview helps you understand the changes to the resource before performing the actual deployment.
- Navigate to the
Resourcestab in the environment view. - Click on
New Resource. - Select the resource type. If you wish to create a resource from a template, enable the
Use Templateoption, then select the desired template and its version. - Enter the
Name,Description, andLabels. Ensure the name is unique within the same environment. - Fill in the configuration form. The configuration items will depend on the selected template or resource type.
- Click the downward arrow next to the
Save & Deploybutton. - Select
Save & Preview.
Edit Resource
- Navigate to the
Resourcestab in the environment view. - Find the resource you need to edit, click
Edit. - Modify the configuration as needed, then click the
Save & Deploybutton. The resource will be deployed once after editing.
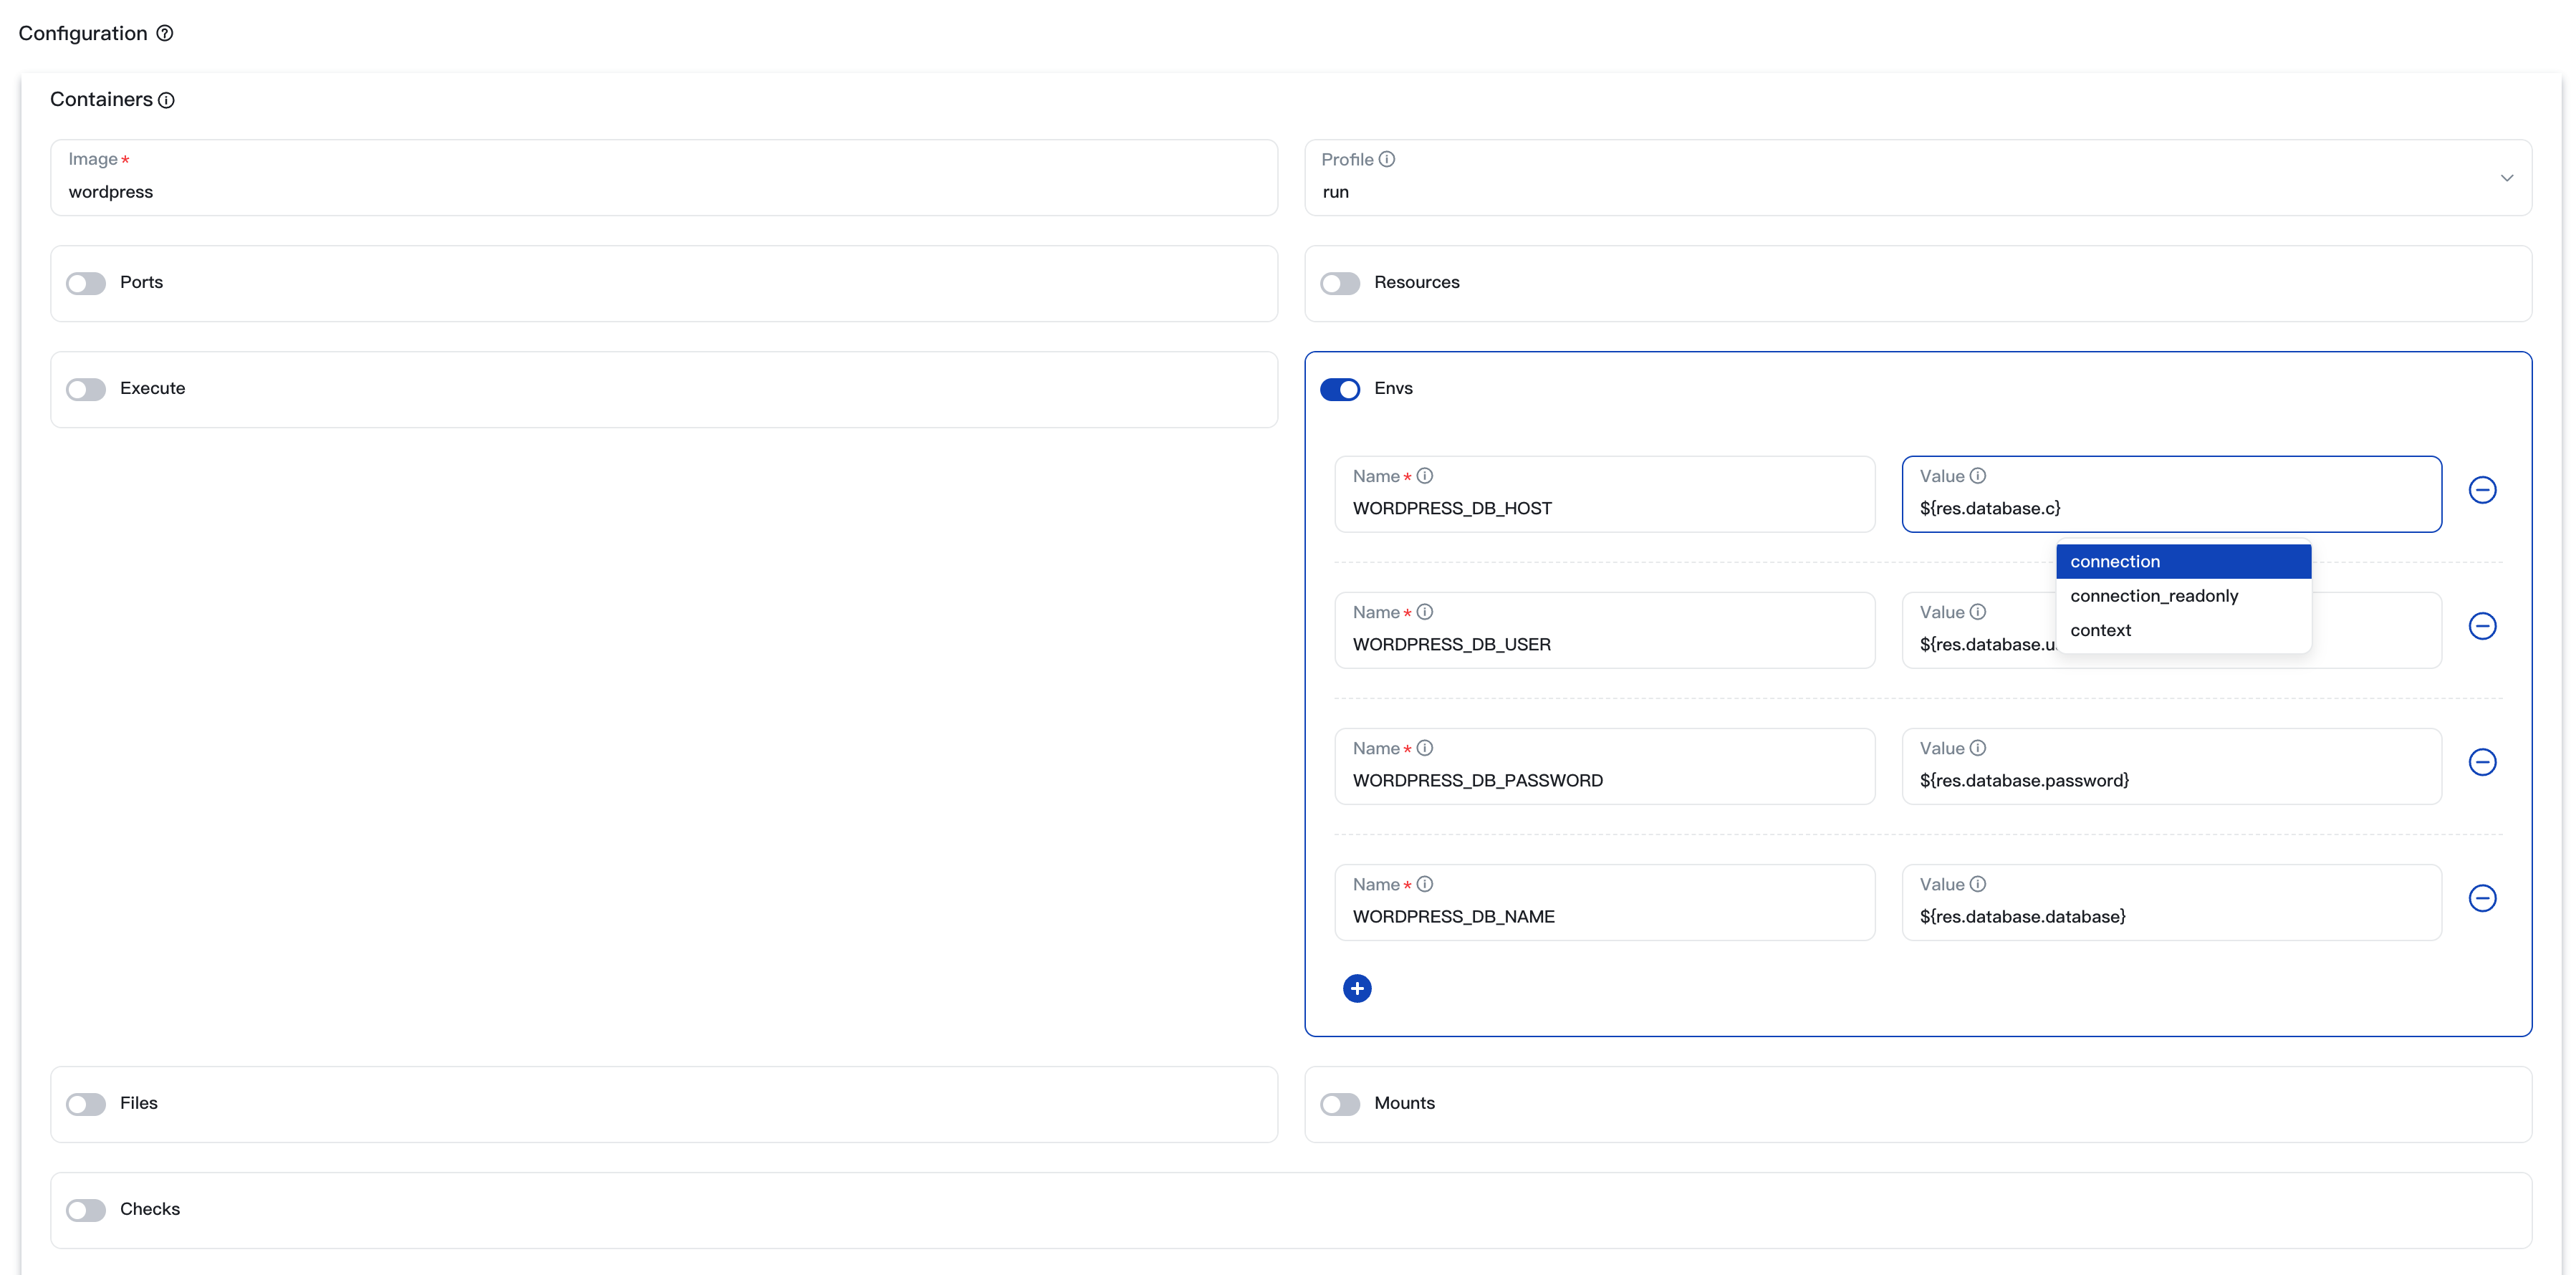
Resource Dependency
Resources can depend on each other by using output references. The referenced entity will be deployed before and deleted after the dependent entities.
For example, if a container service depends on a MySQL resource, the container service can reference the MySQL endpoint in its environment variable as ${res.my-db-name.address}.
The output reference is in the following format: ${res.<Resource Name>.<Resource Output Name>}.
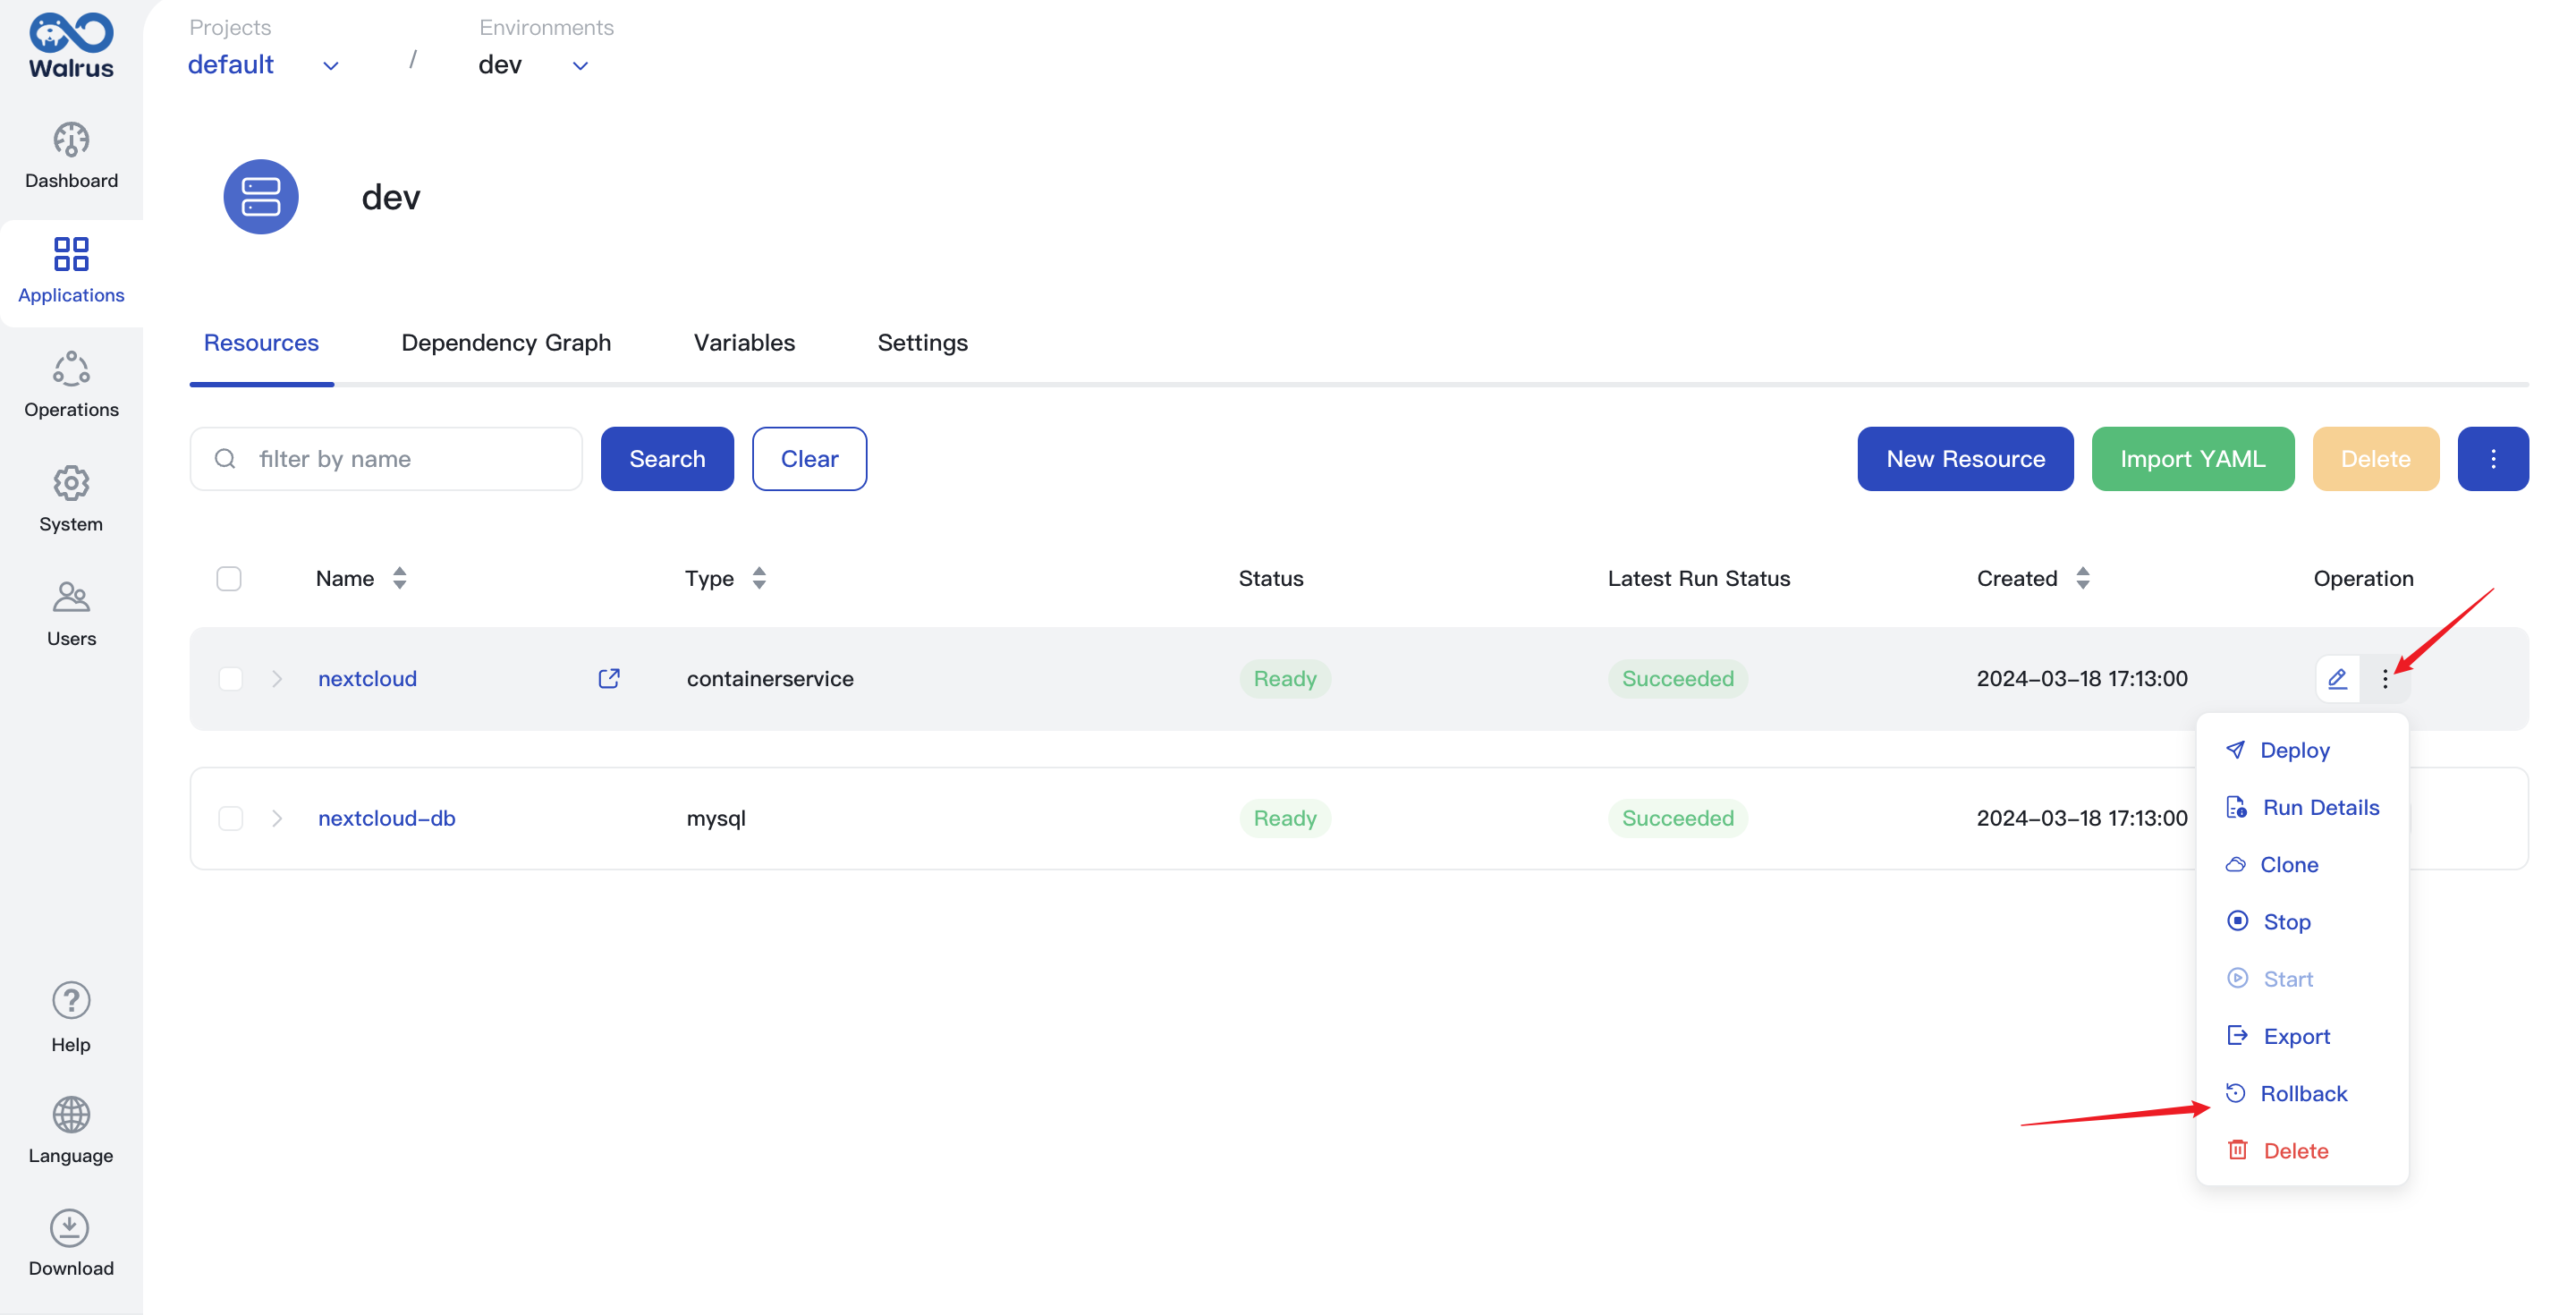
Rollback Resource
- Navigate to the
Resourcestab in the environment view. - Find the resource you need to rollback.
- Click on the operation drop-down button, select
Rollback.
- Choose the historic version you need to roll back to.
- Confirm the configuration changes for the rollback operation, click the
Rollbackbutton to complete the rollback operation.

You can also preview a rollback before applying the changes.
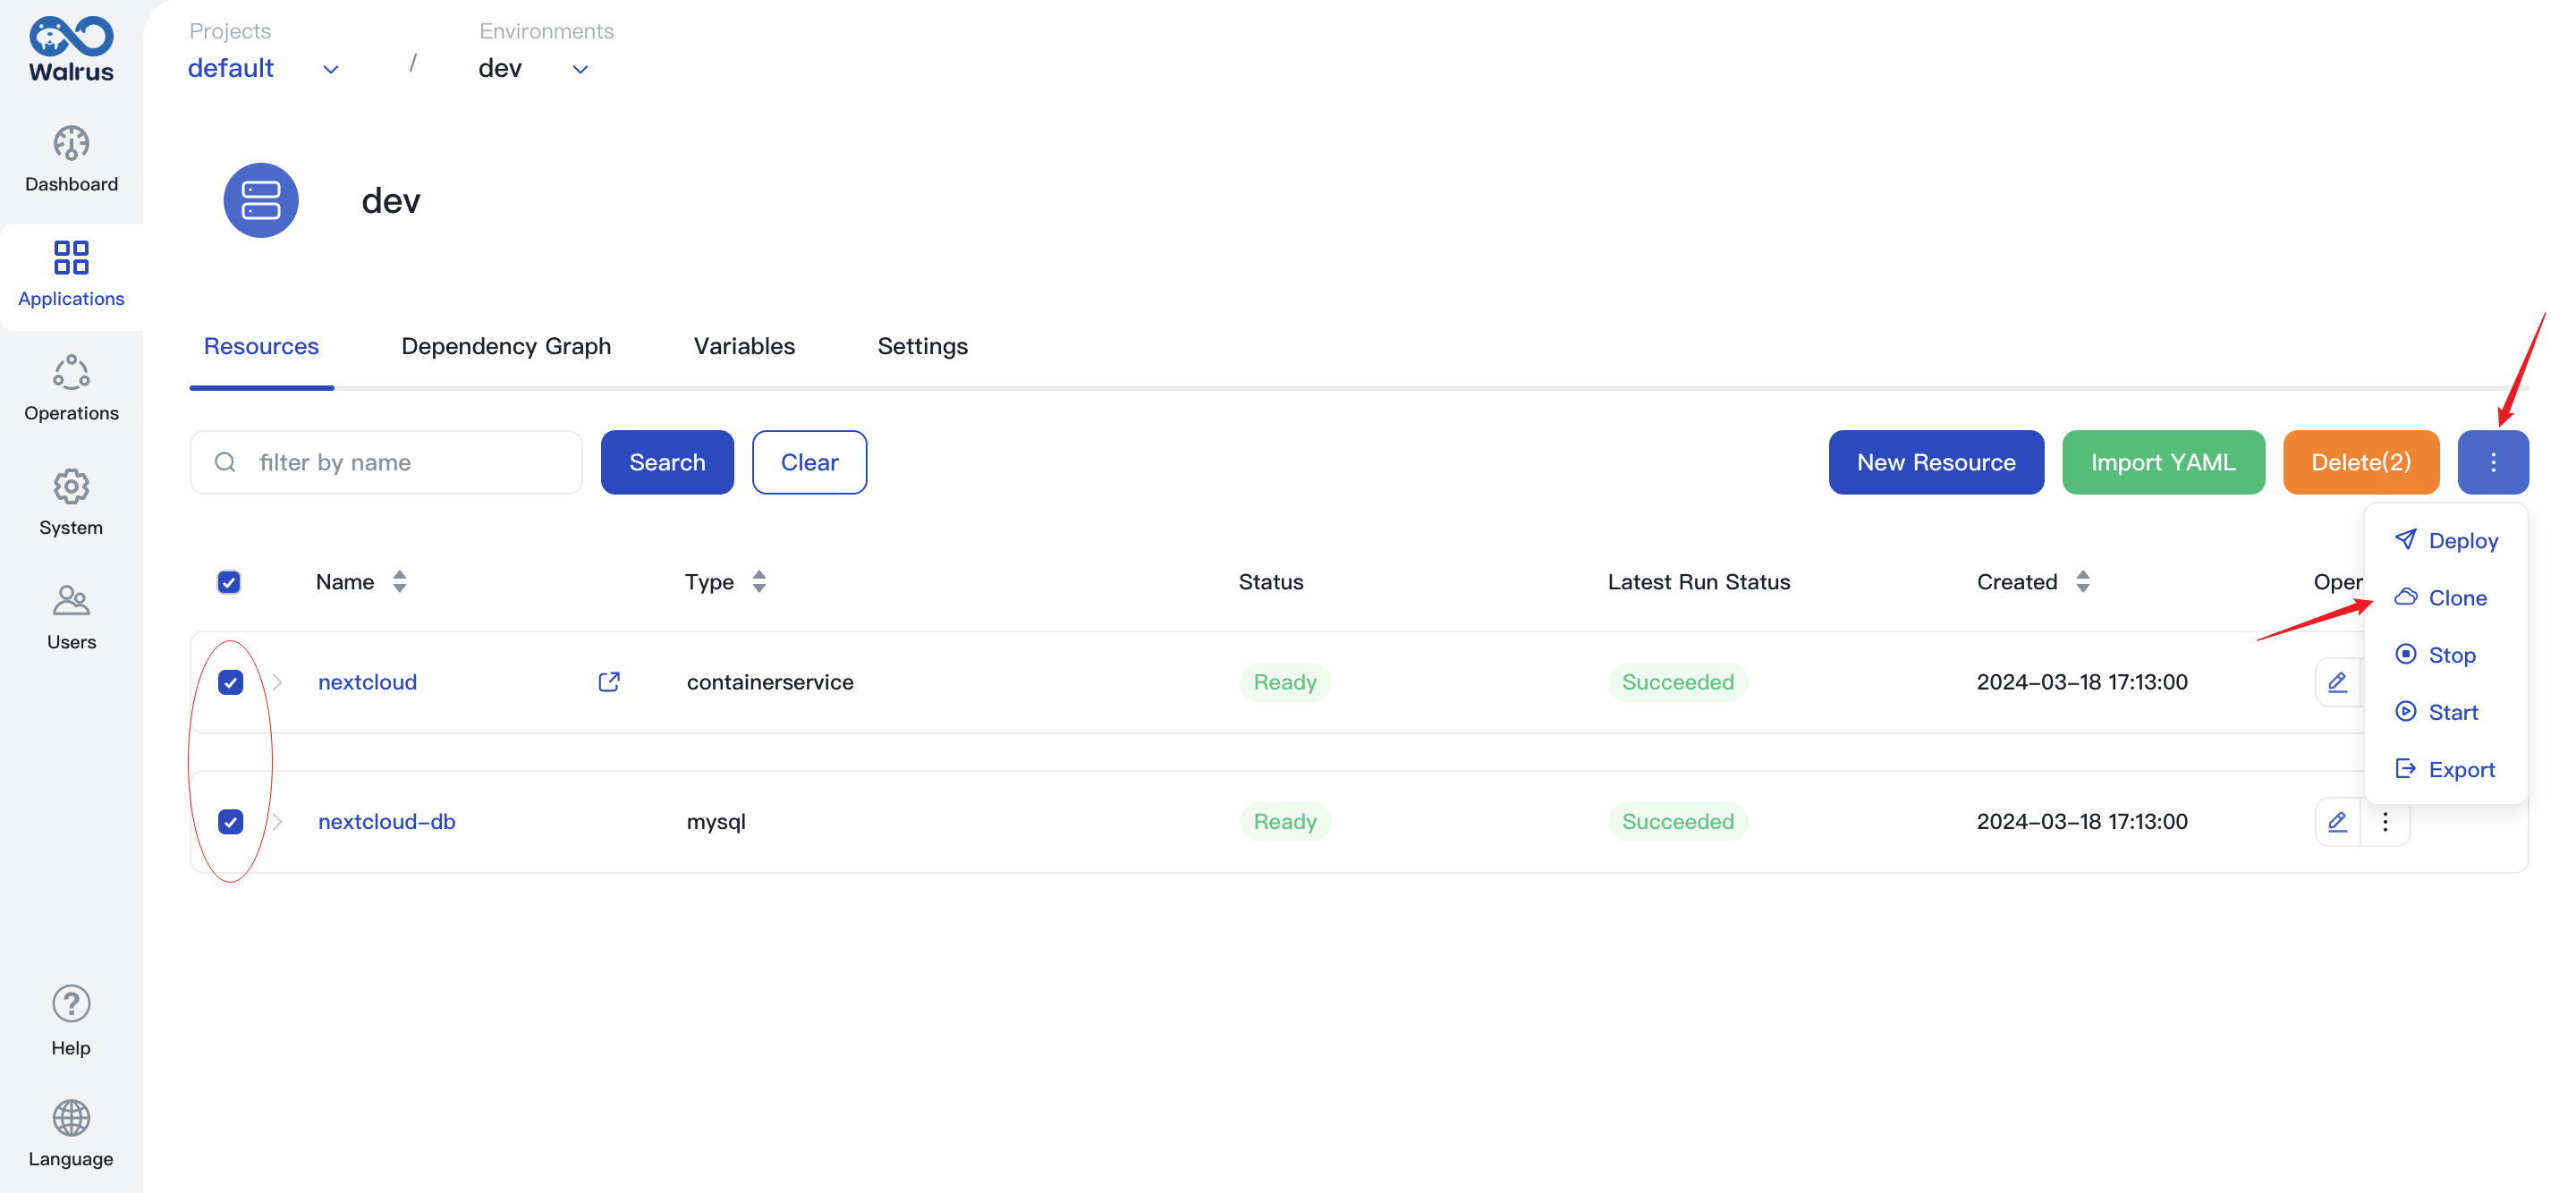
Clone Resources
- Navigate to the
Resourcestab in the environment view. - Select the resources you need to clone, click the
Clonebutton.
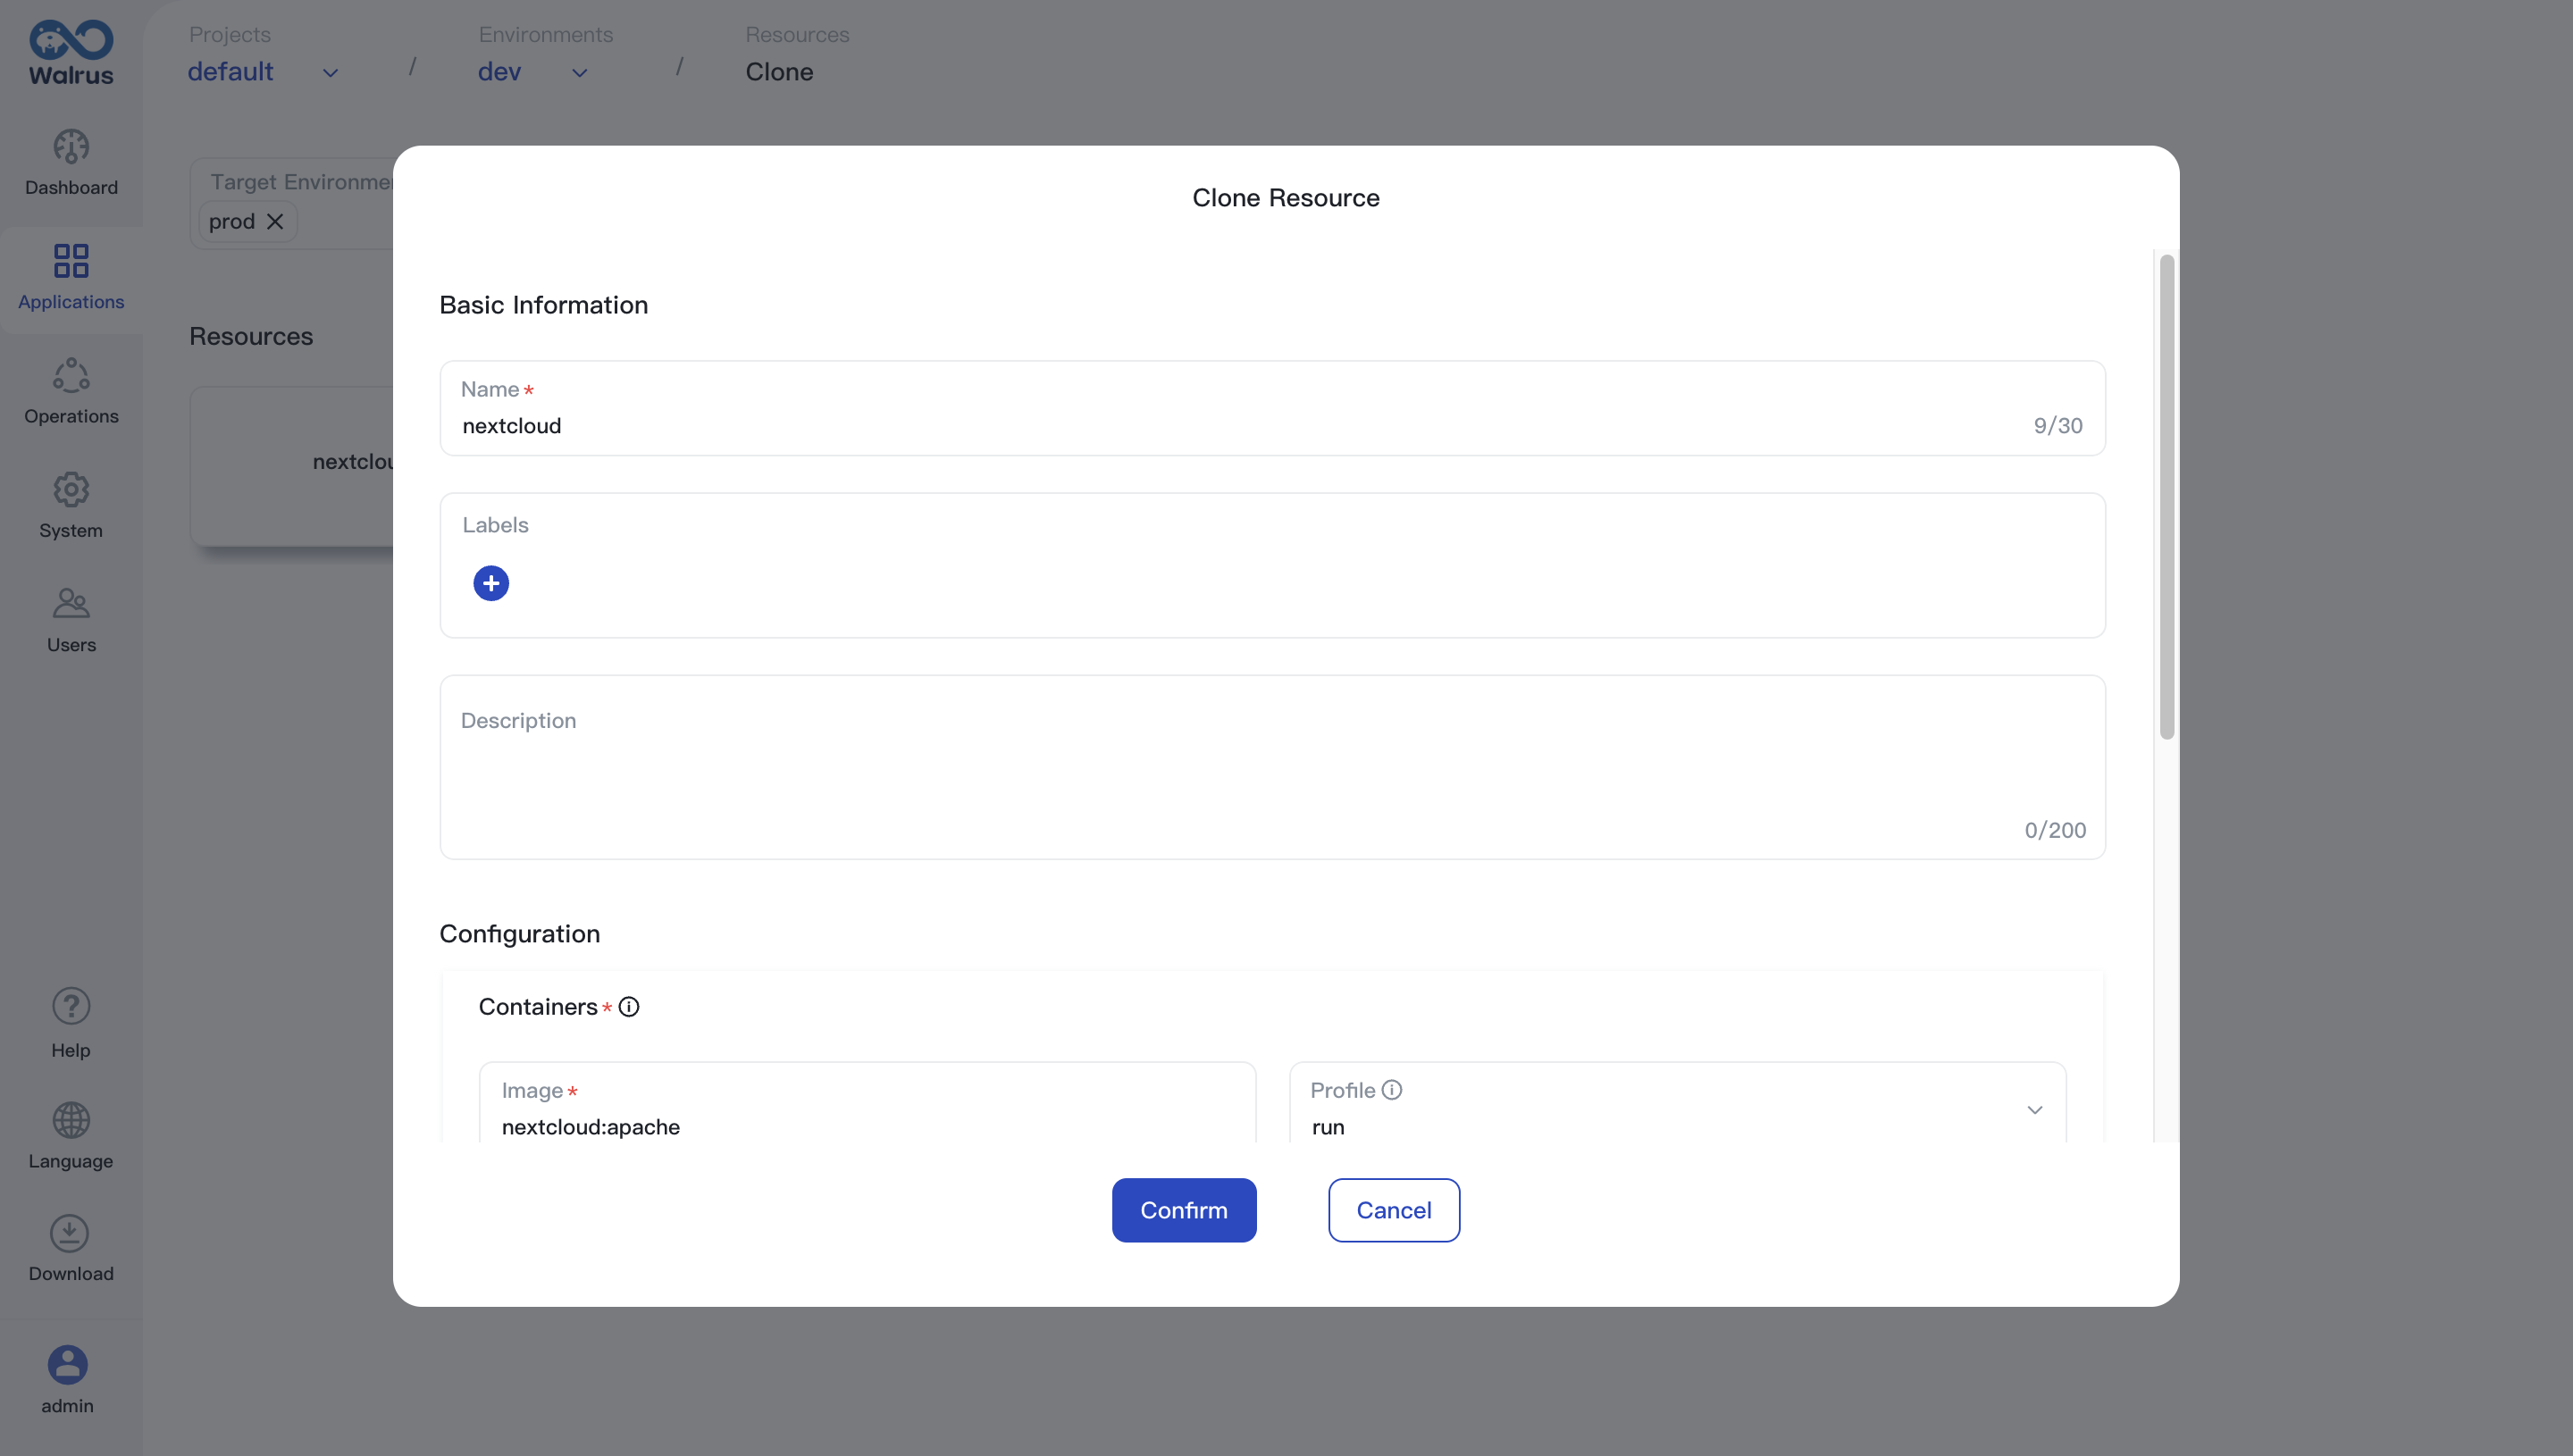
- Select the target environment of the clone.
- If you need to adjust configuration of cloned resources, click the block you want to modify, modify the configuration in the pop-up window, and click the
Confirmbutton. - Click the
Save & Deploybutton to complete the clone.
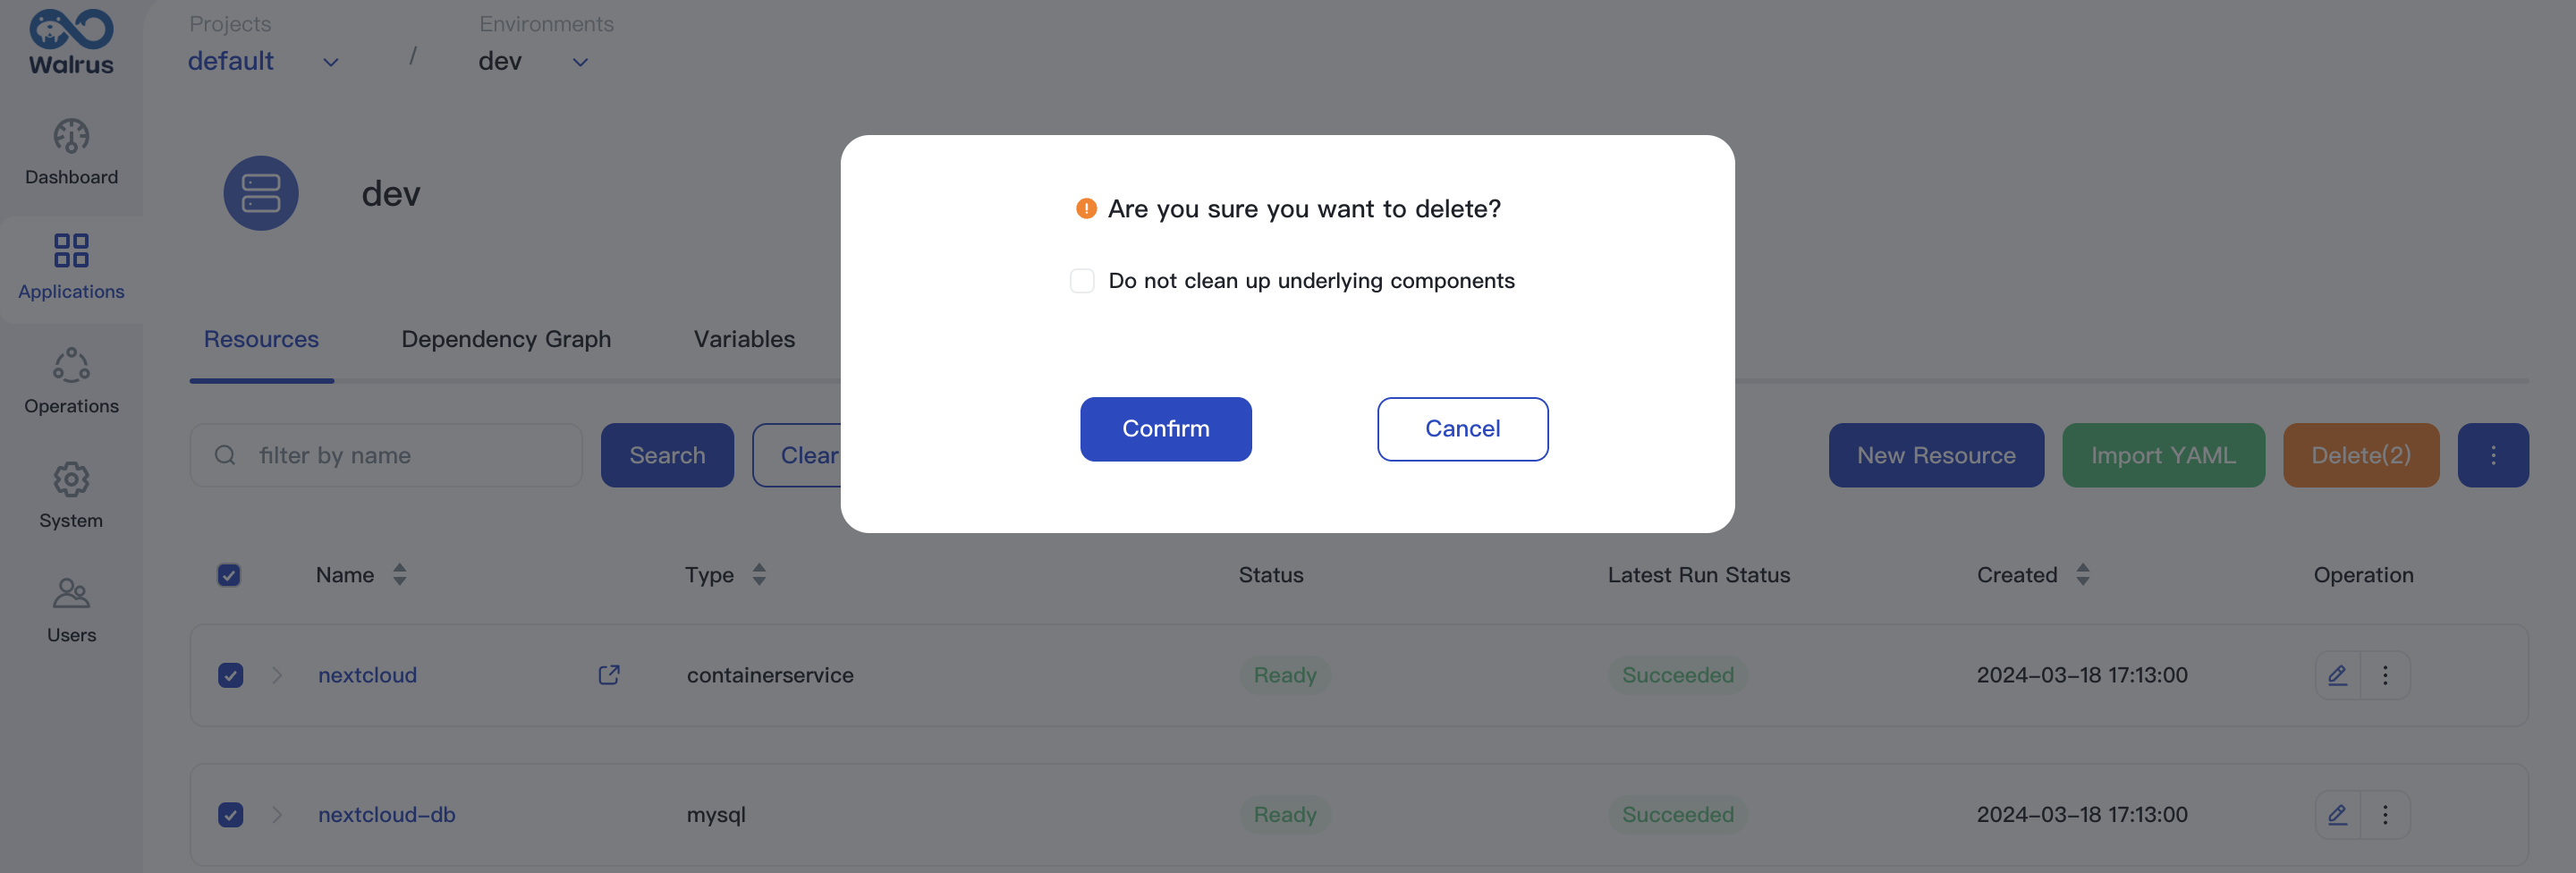
Delete Resource
Delete resource will delete resource configuration in Walrus, and remove all components of the resource.
- Navigate to the
Resourcestab in the environment view. - Find the resource you need to delete.
- Make sure no other resources depend on it. Click the
Deletebutton. - In the pop-up window, you can choose whether to cleanup the components. If you uncheck
Clean up all components, the components of the resource will be retained, but will no longer be managed by Walrus. - Click the
Confirmbutton to complete the deletion.
Start Resource
Start operation will start all components of the resource, used to restore stopped resources or deploy draft resources to the environment.
- Navigate to the
Resourcestab in the environment view. - Locate
StoppedorUndeployedresource you need to start. - Click the
Startbutton.

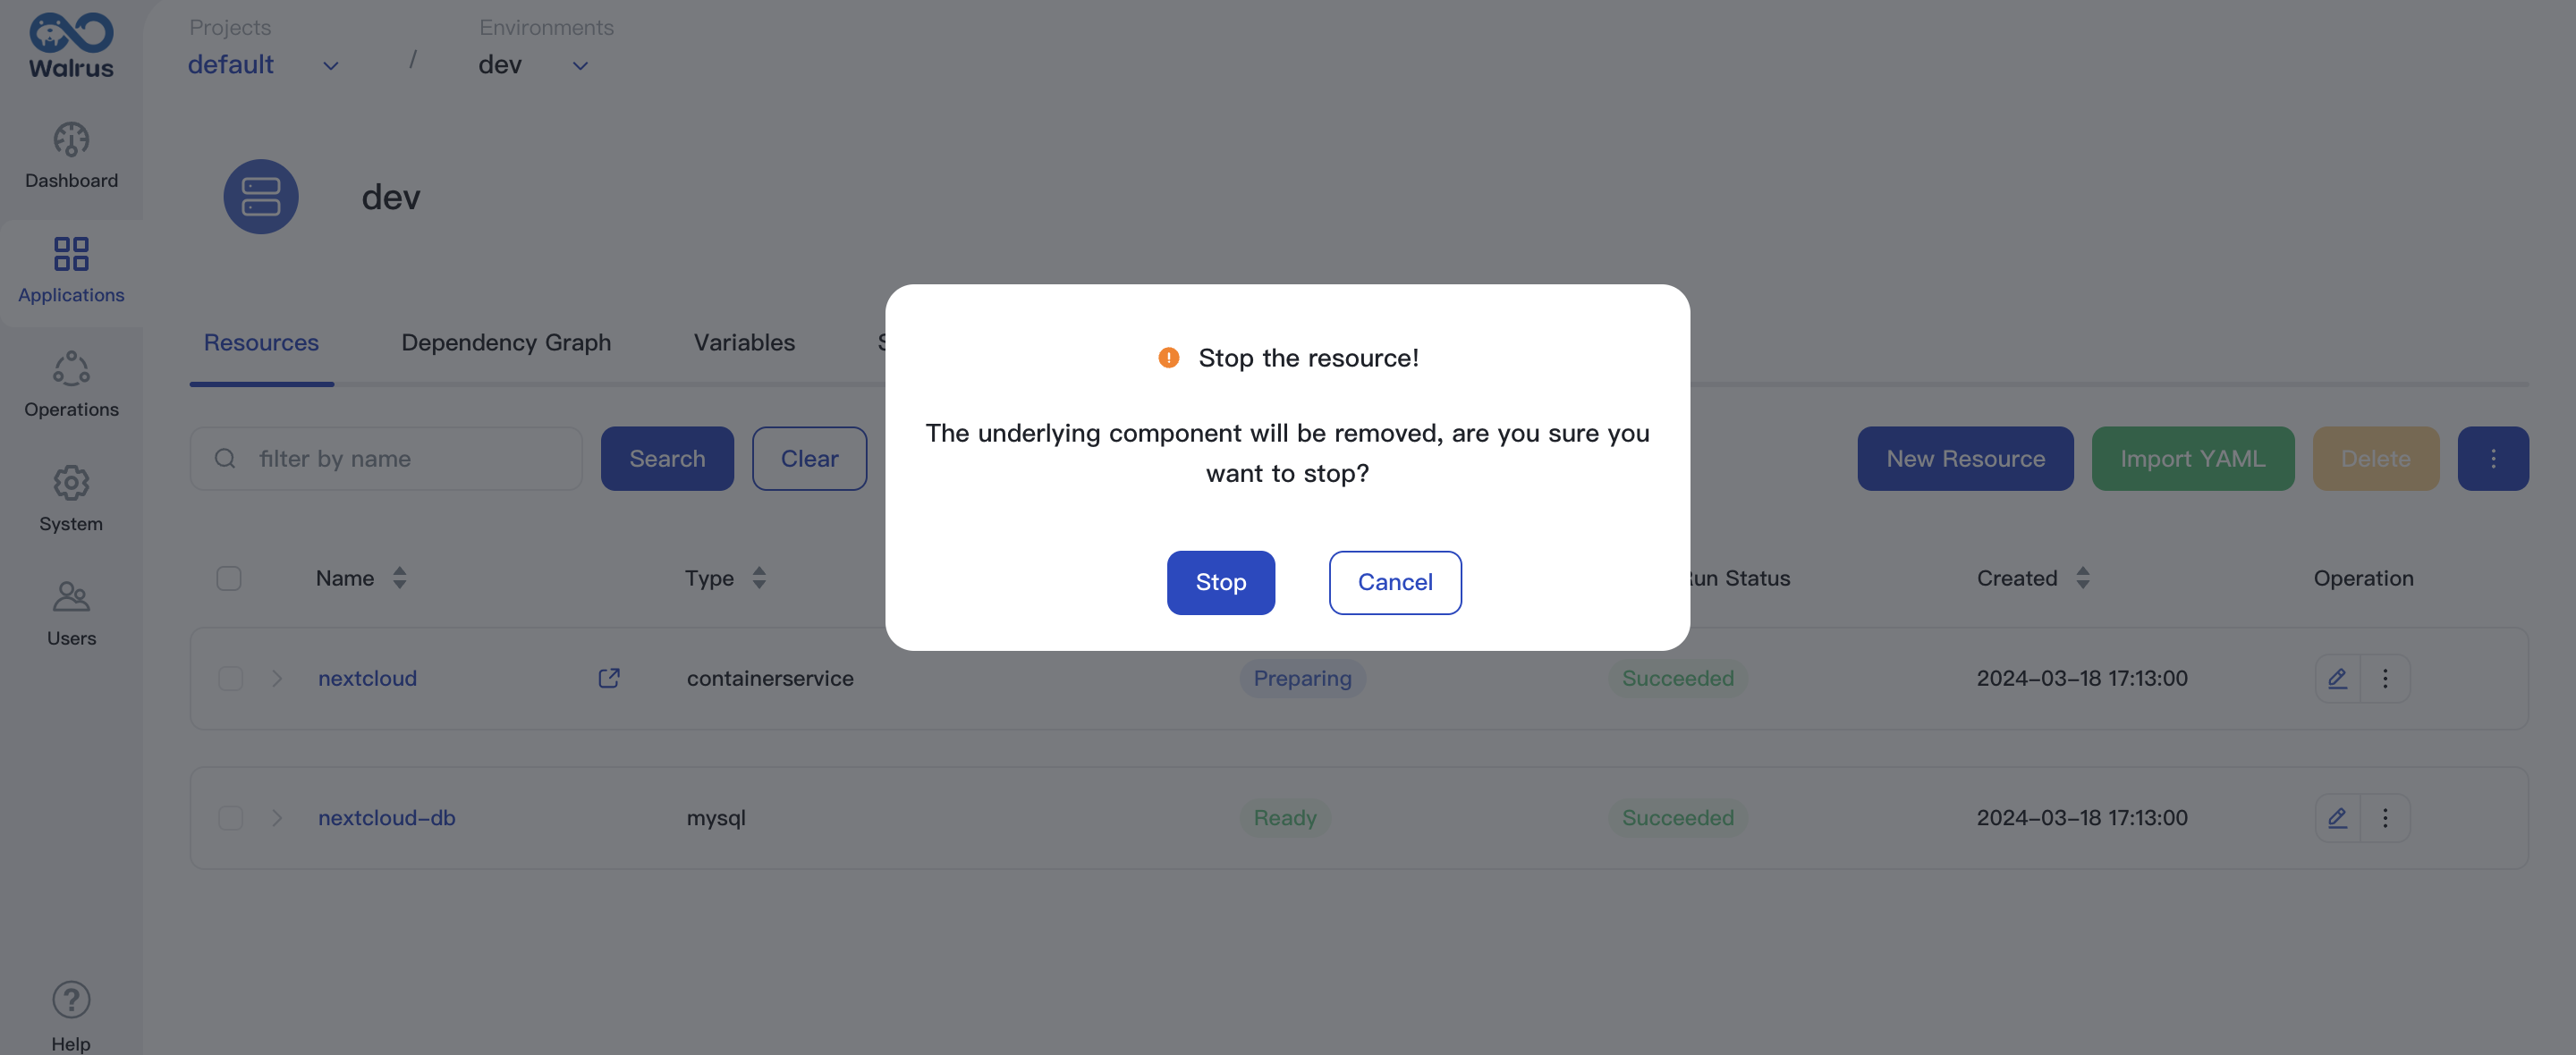
Stop Resource
Stop operation will stop all components of the resource, unlike delete operation, stop operation will not delete the resource configuration in Walrus.
- Navigate to the
Resourcestab in the environment view. - Locate
Readyresource you need to stop.
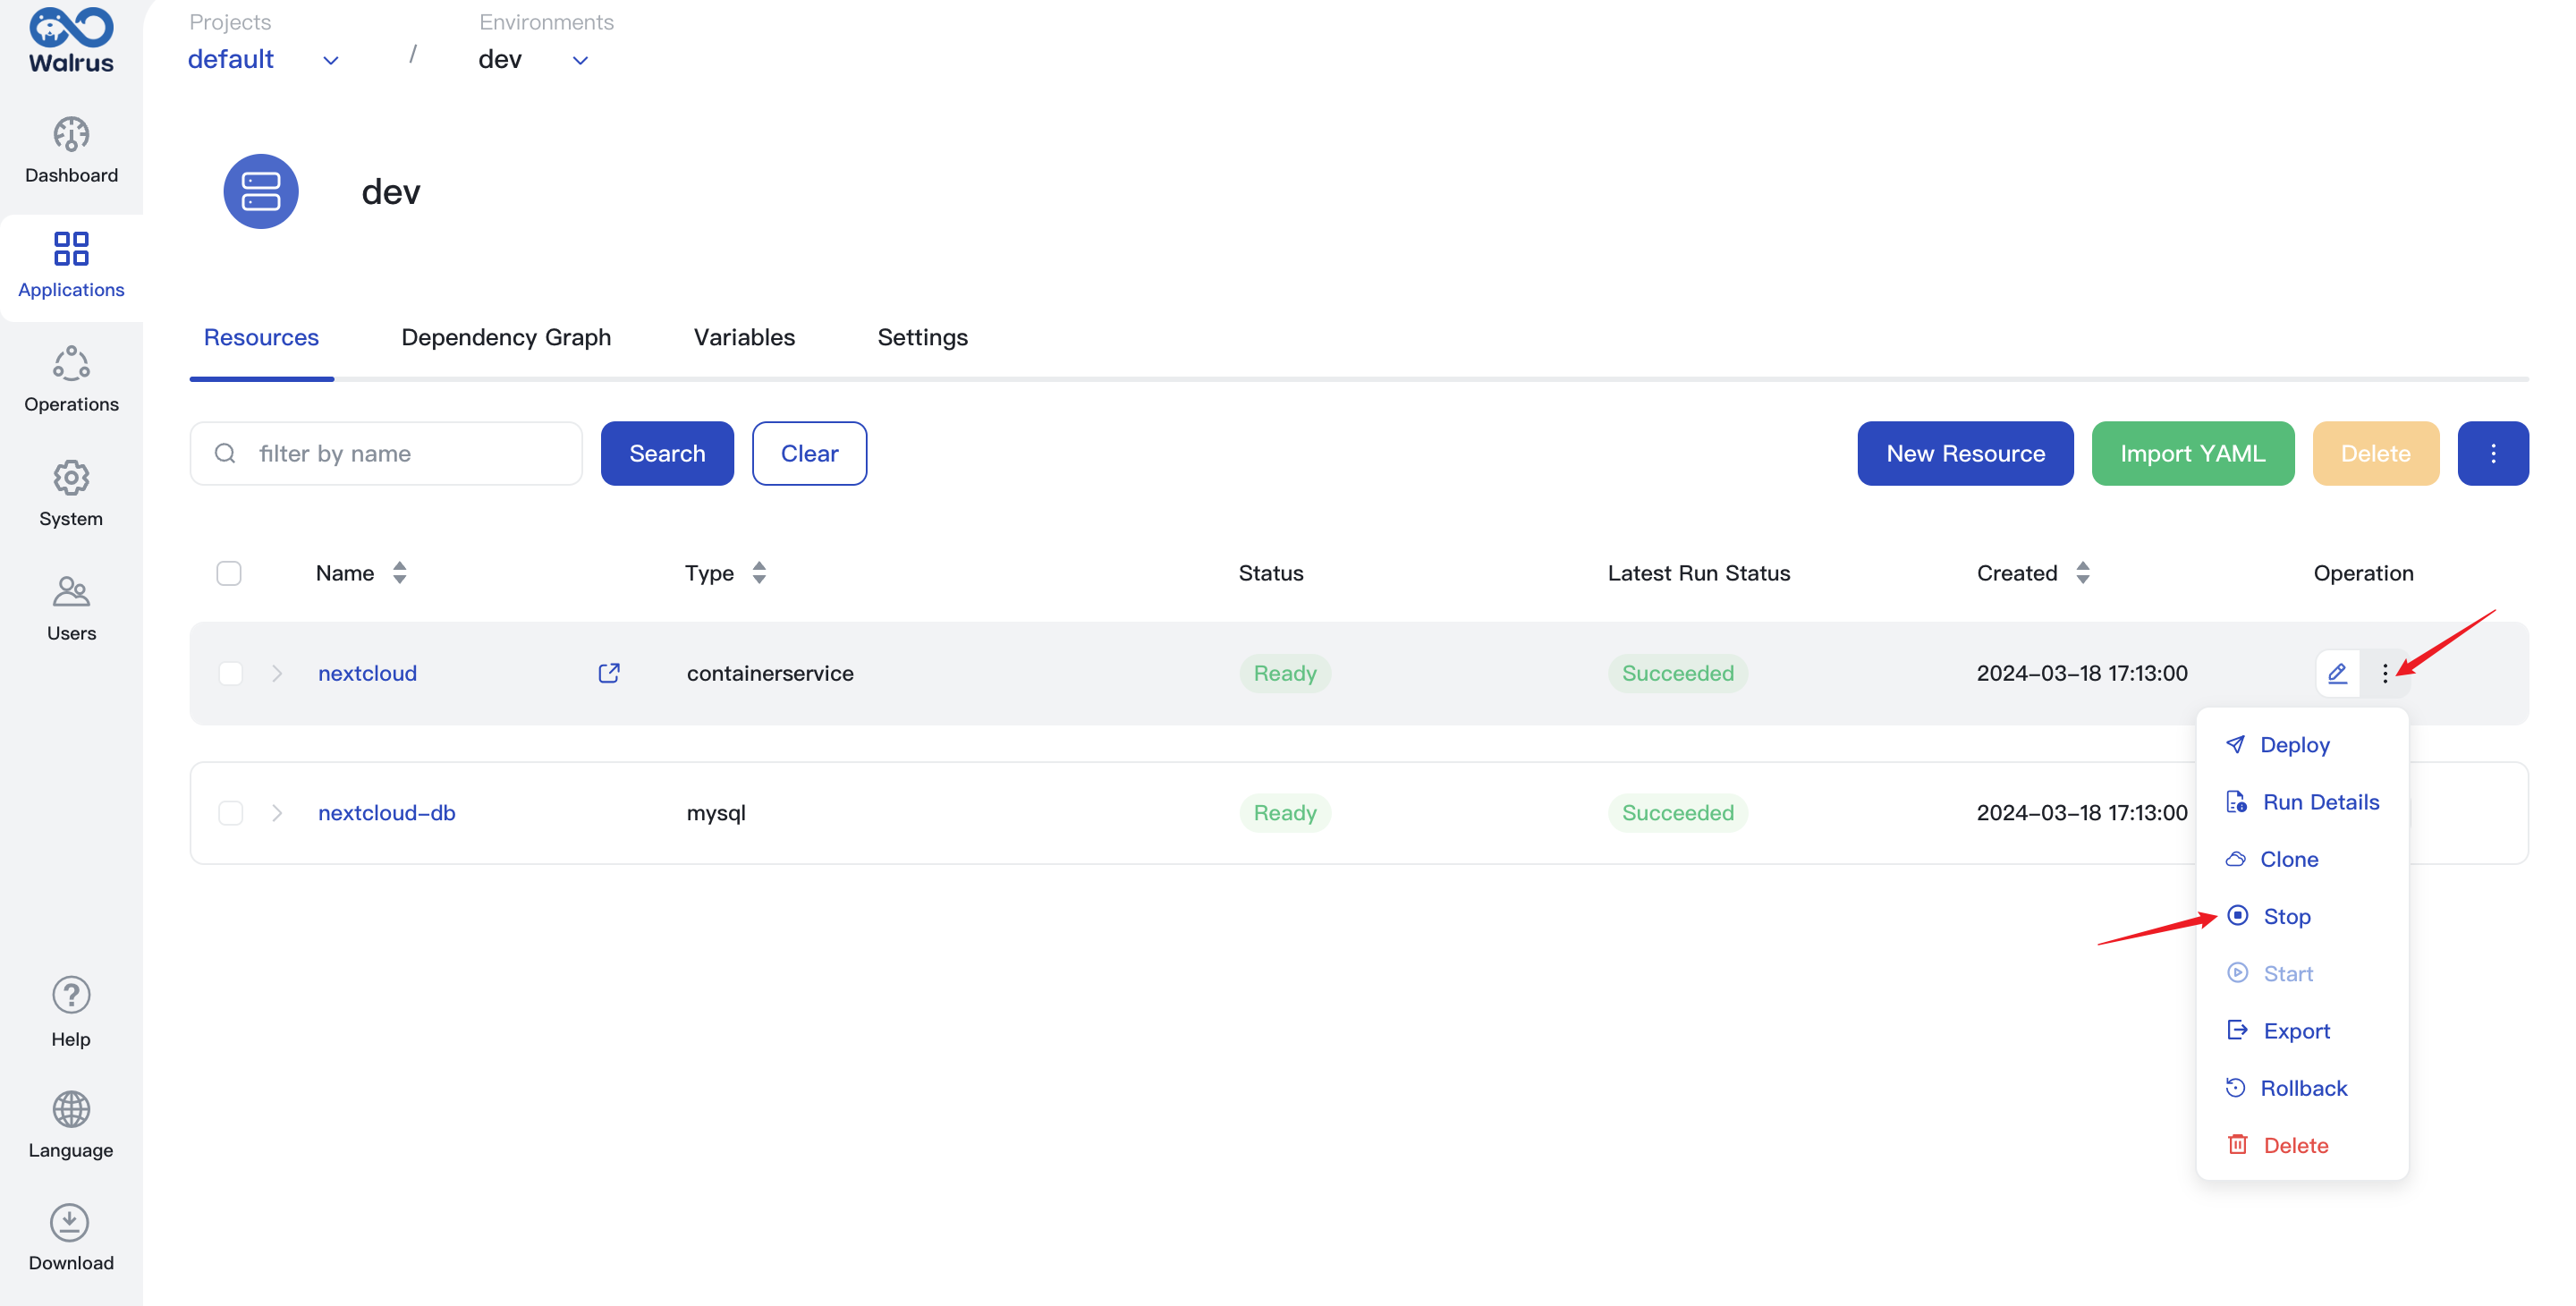
- Click the
Stopbutton,then click theConfirmbutton in the pop-up window to complete the stop operation.
Caution: Whether a resource can be stopped depends on the resource's labels. If the resource's labels contain
walrus.seal.io/stoppable: "true", the resource can be stopped. By default, resources in development or staging environments will automatically add this label when created. You can actively declare this label when creating resources so that resources can be stopped in production environments.
Components
Components are the entities generated by the resource deployment. In the resource list or detail page, you can view its components, including component name, type, status, create time, etc. You can operate components as needed, such as viewing logs, connecting to the terminal, etc.
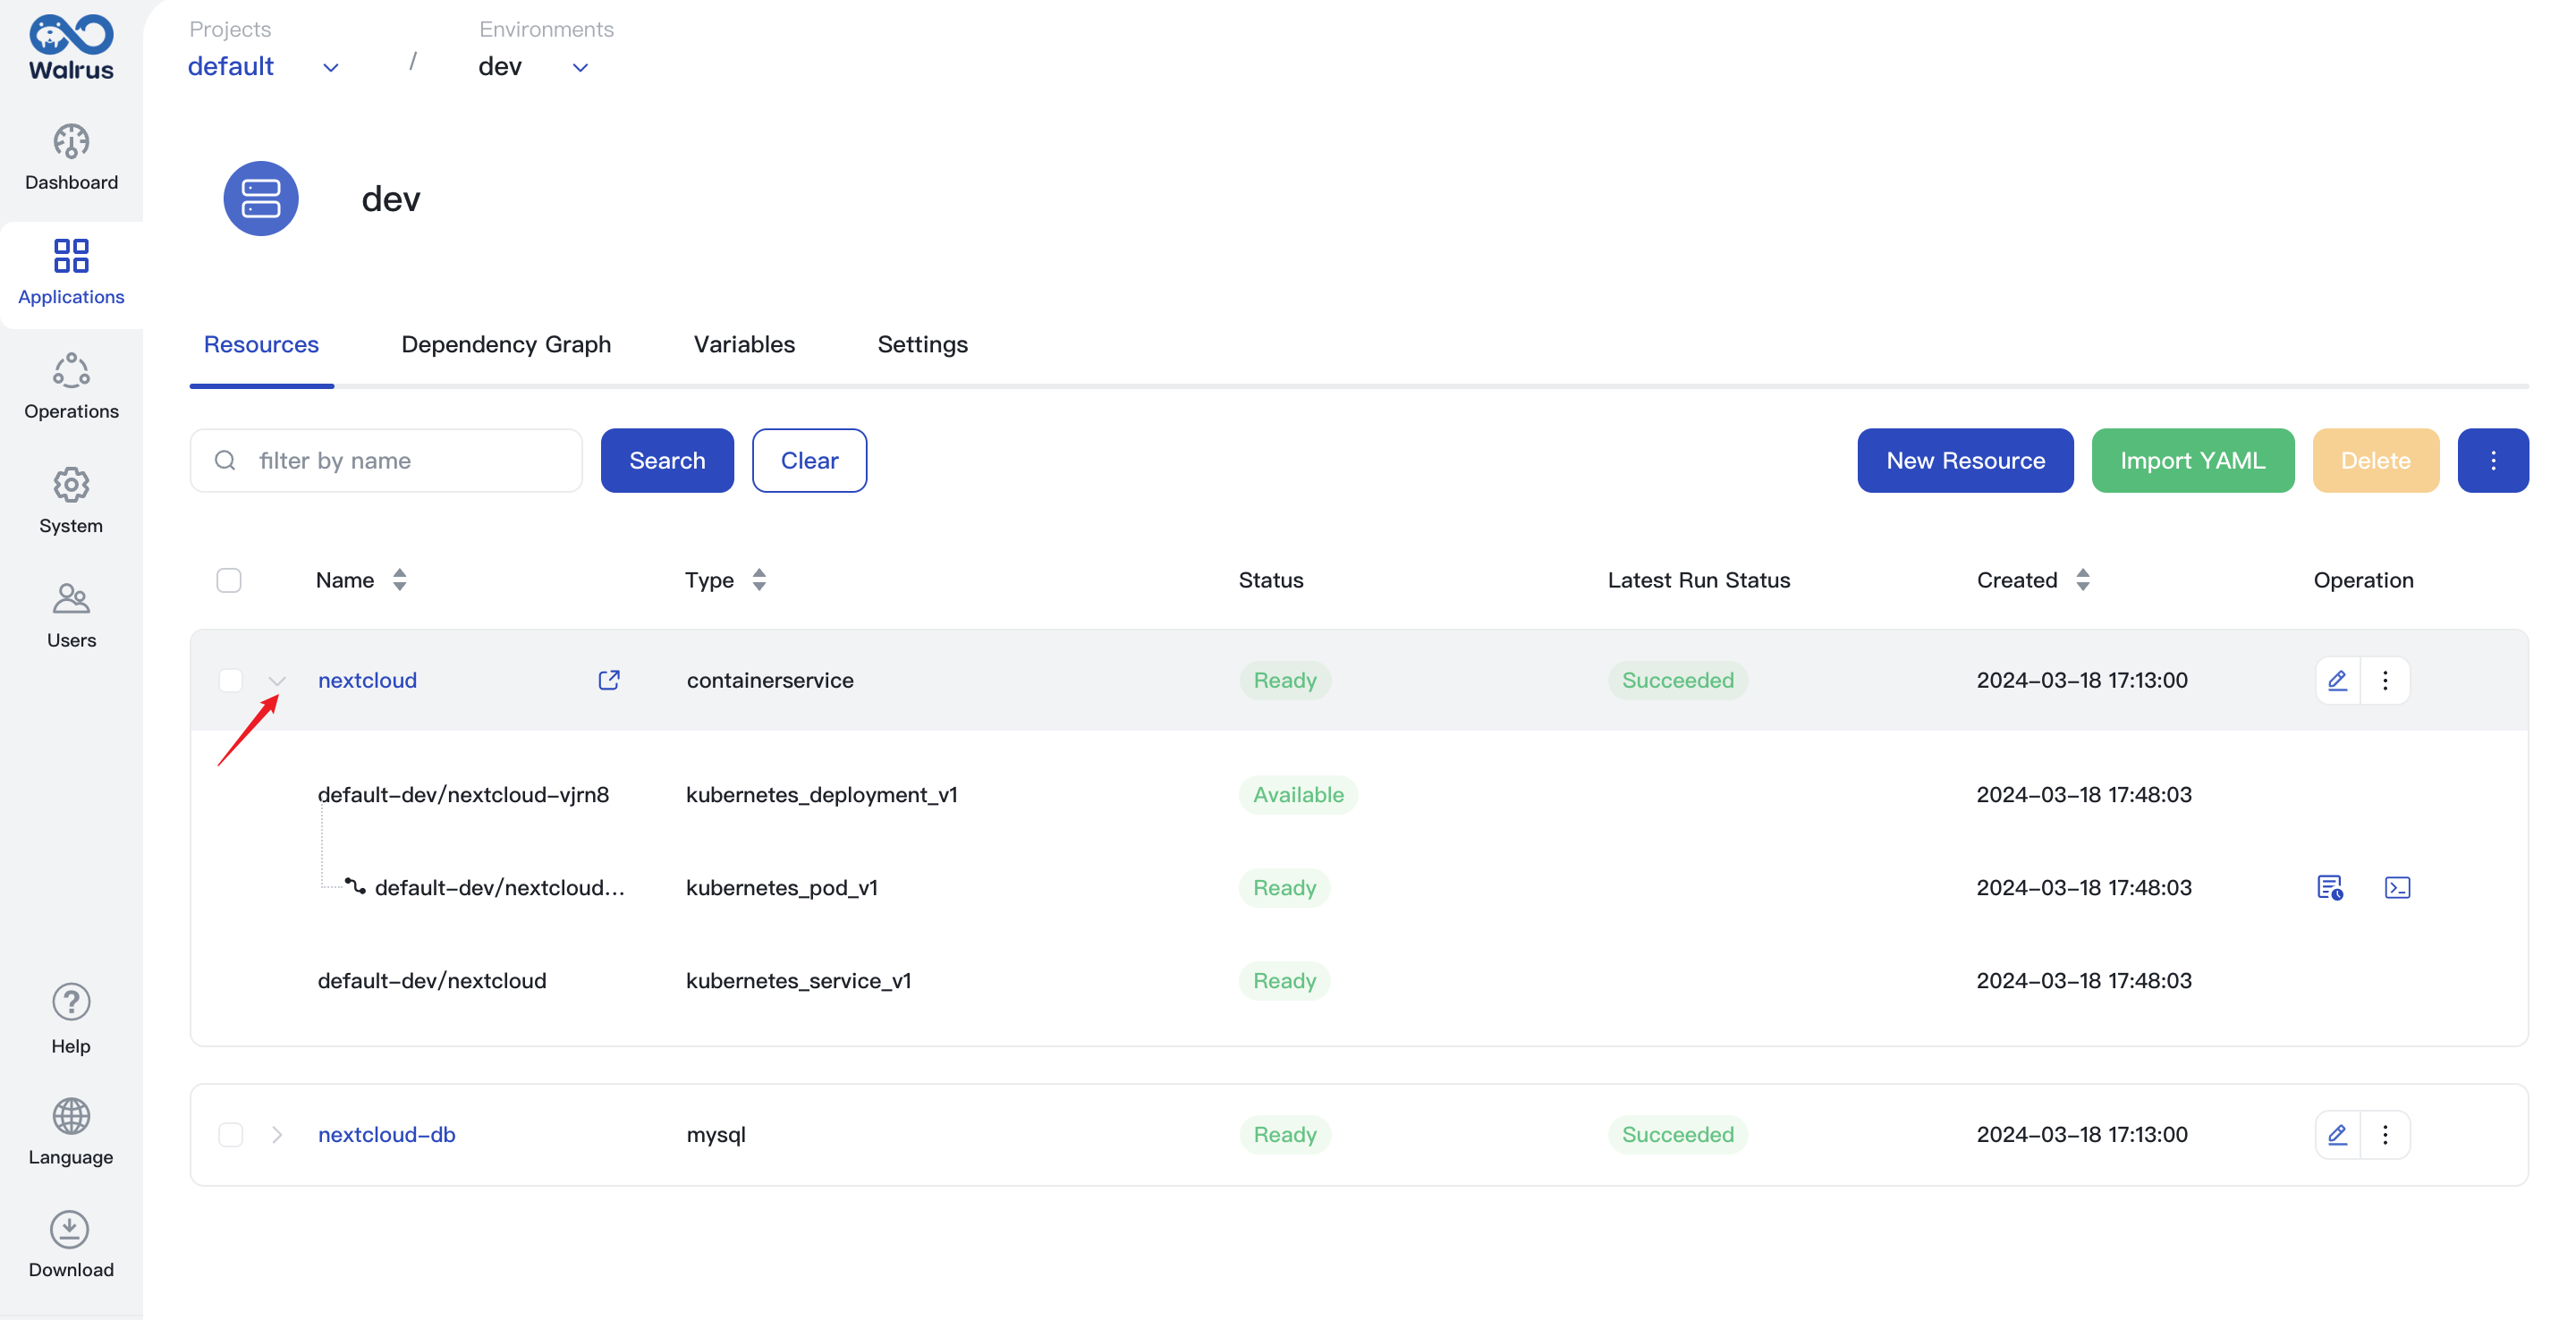
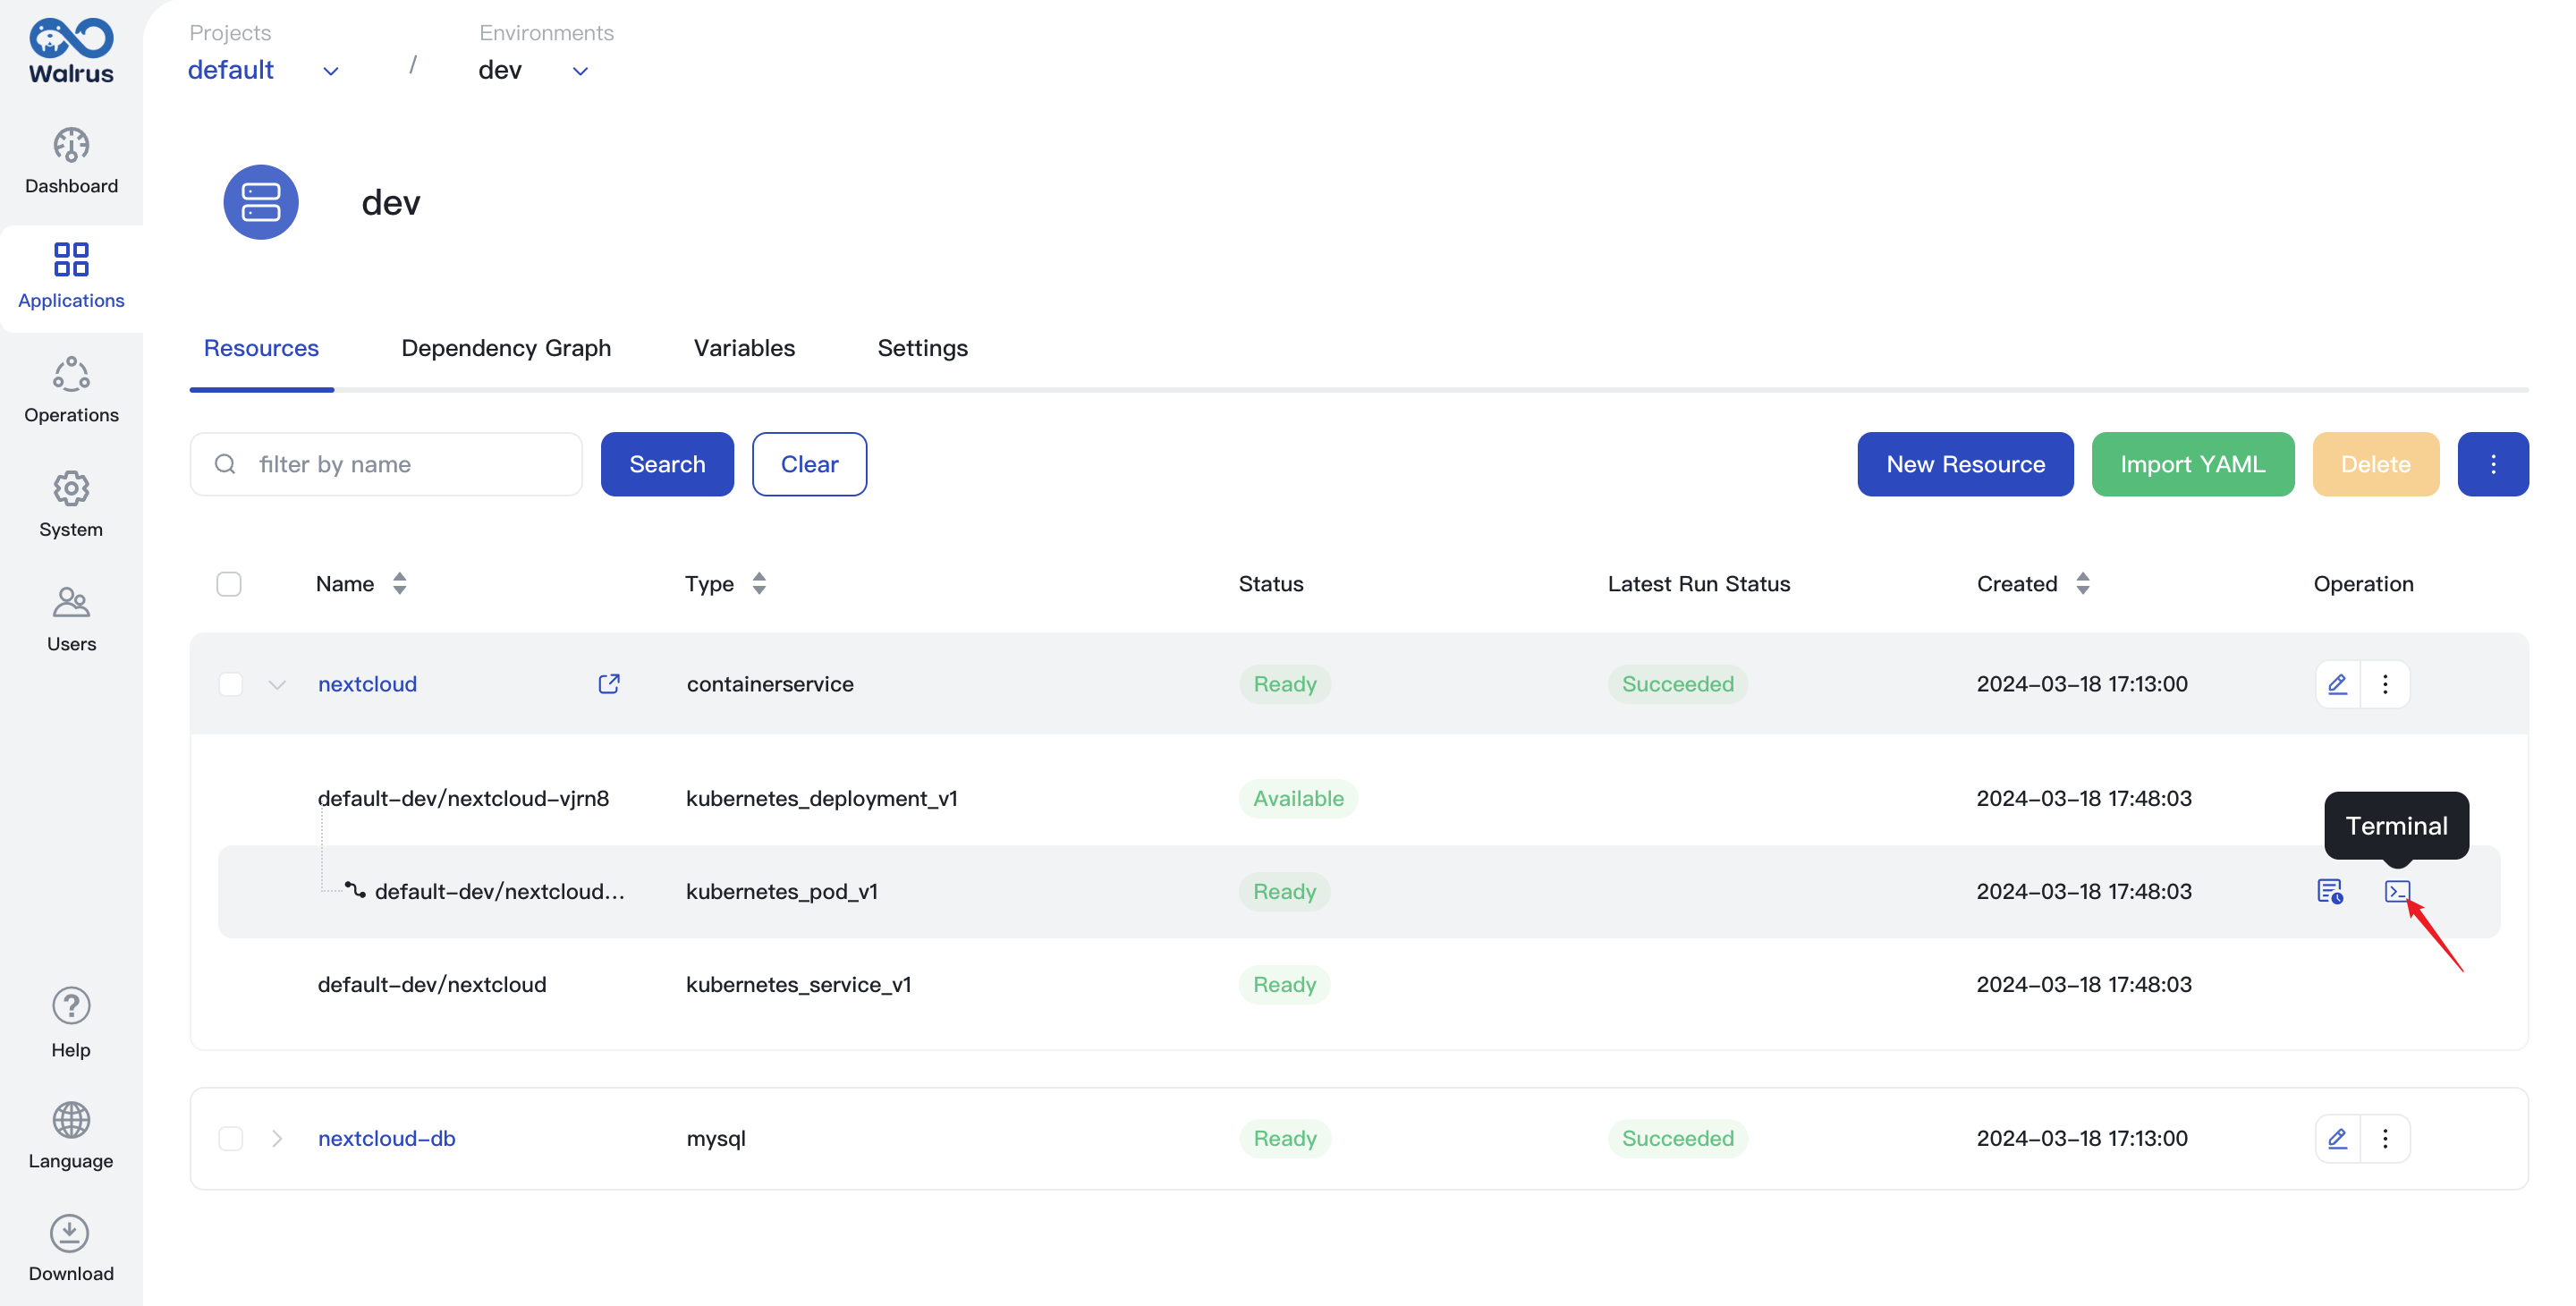
View Component List
View the component list in the resource list page:
- Enter the
Resourcestab of the environment view. - Find the resource you need to view the component list, click the arrow besides the resource name to expand the component list.
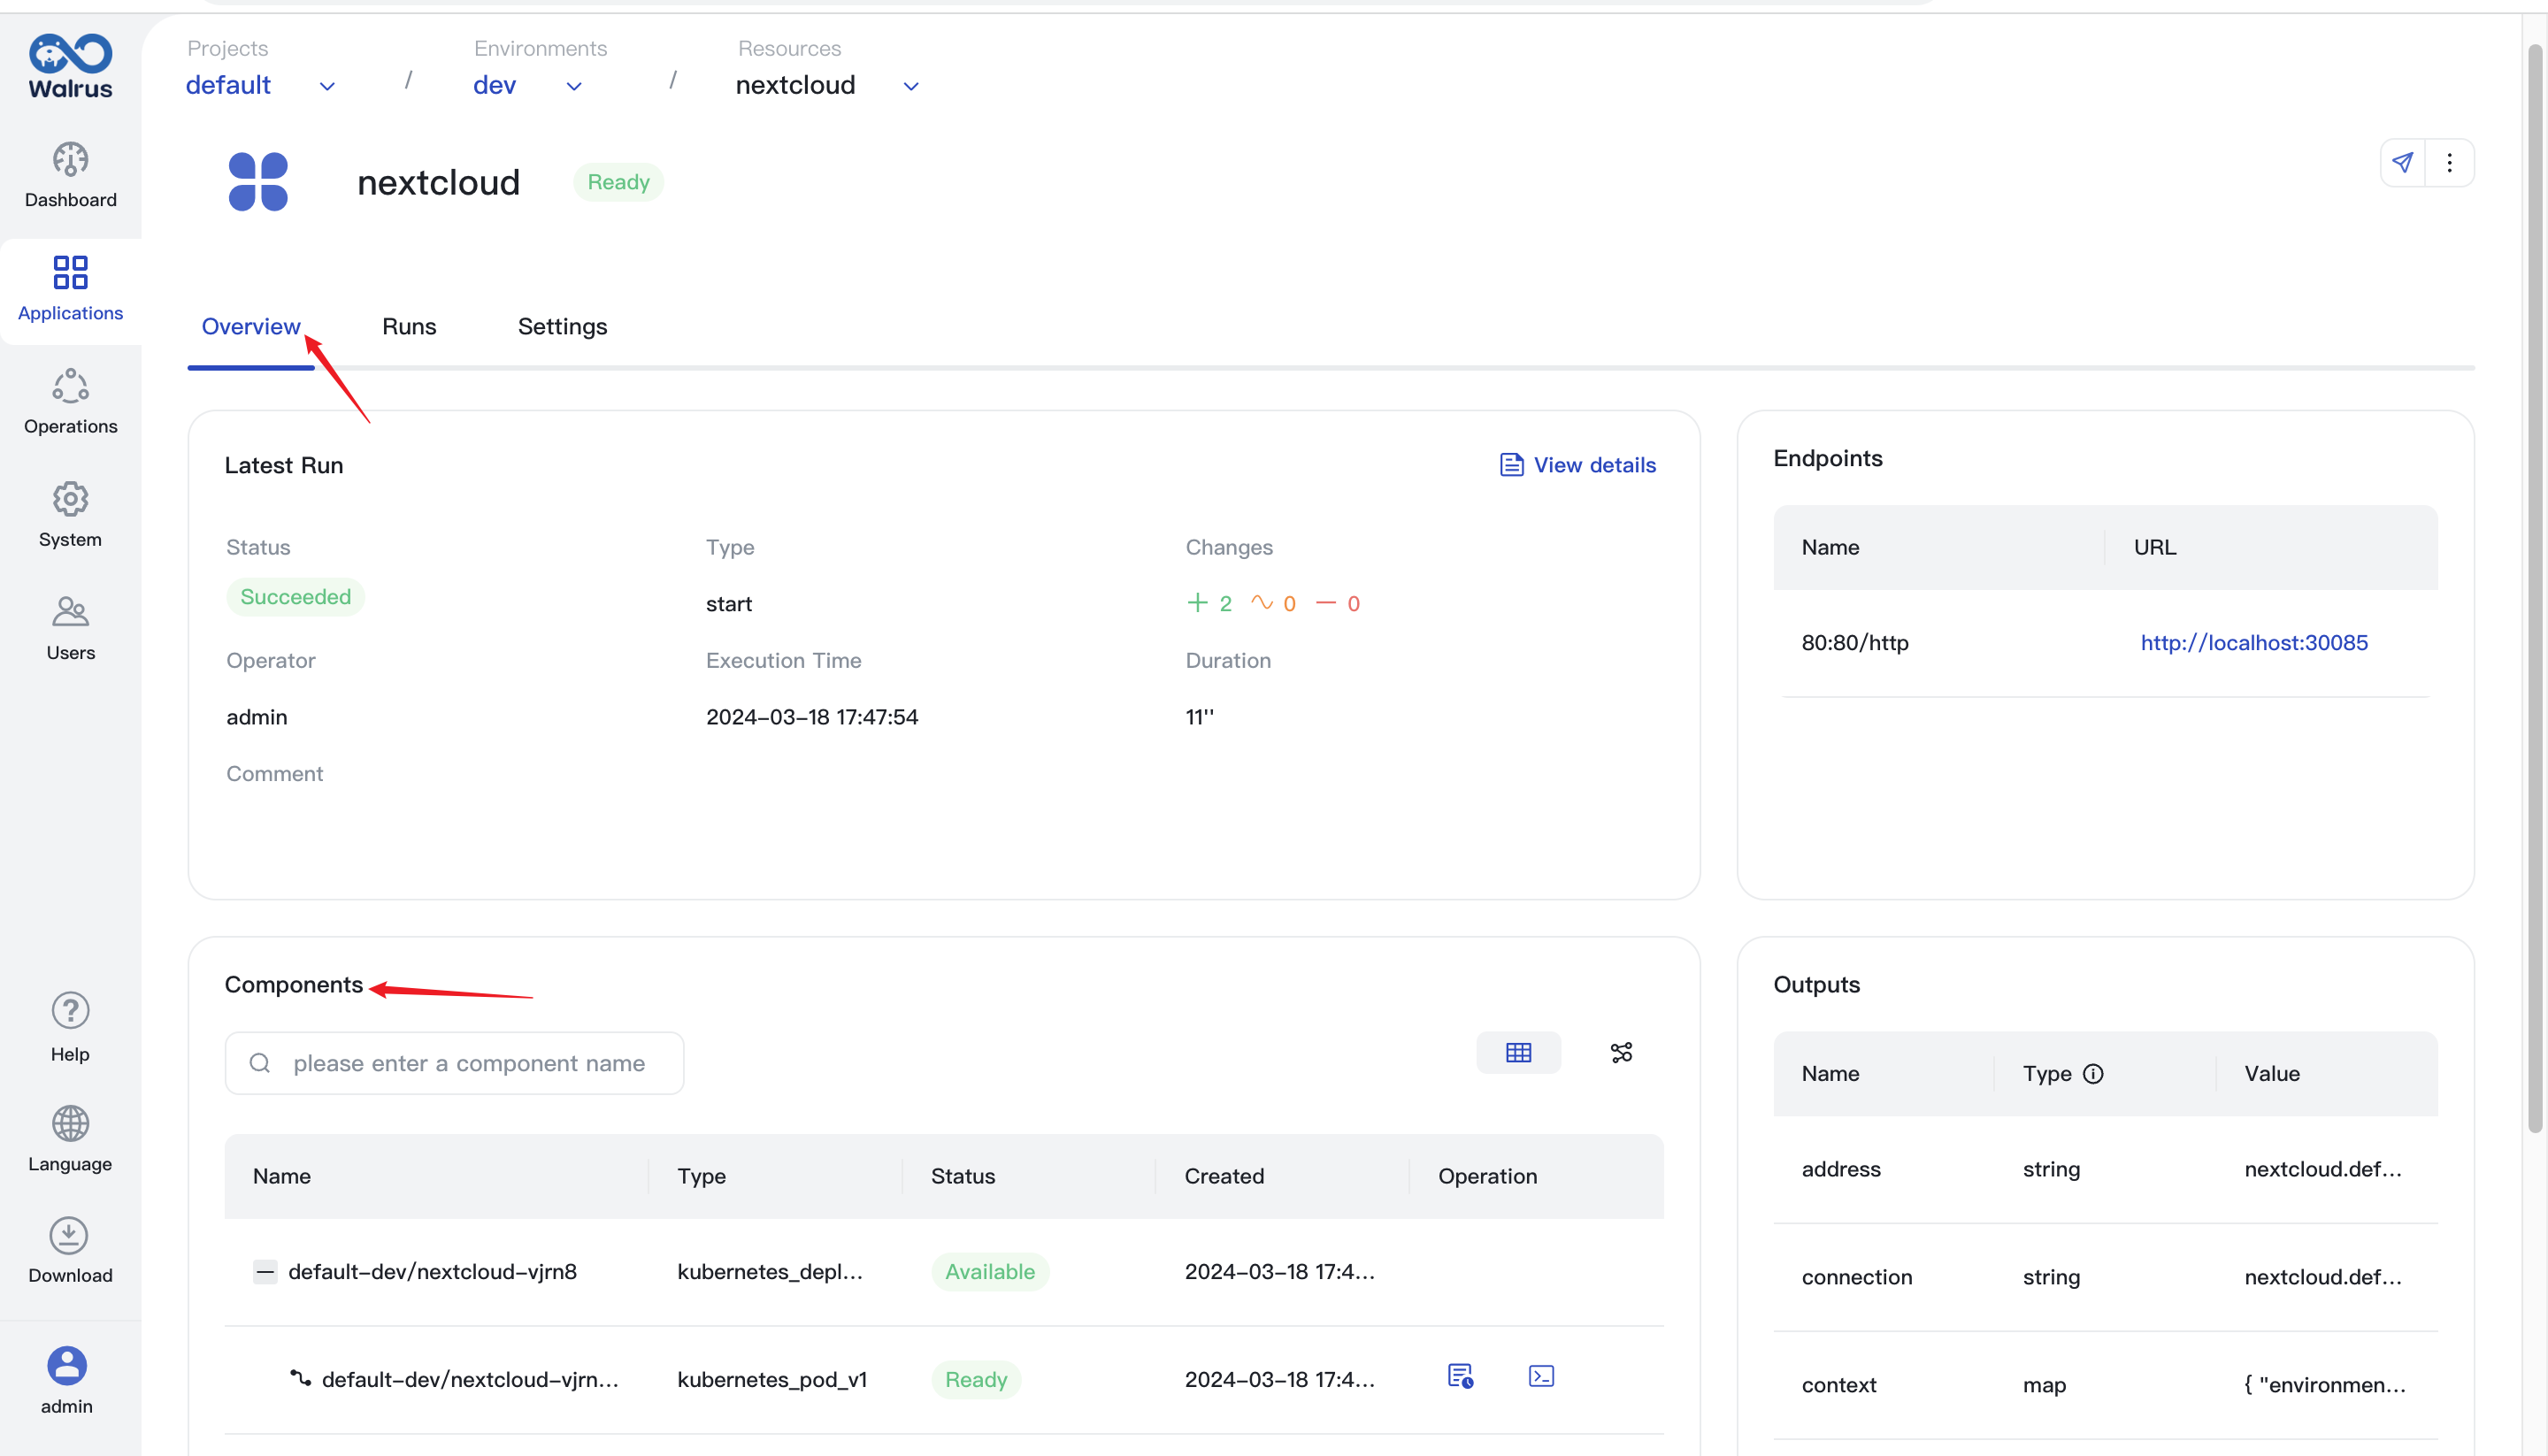
View the component list in the resource detail page:
- Enter the
Resourcestab of the environment view. - Find the resource you need to view the component list, click the resource name to enter the detail page.
- Click the
Overviewtab to view the component list.
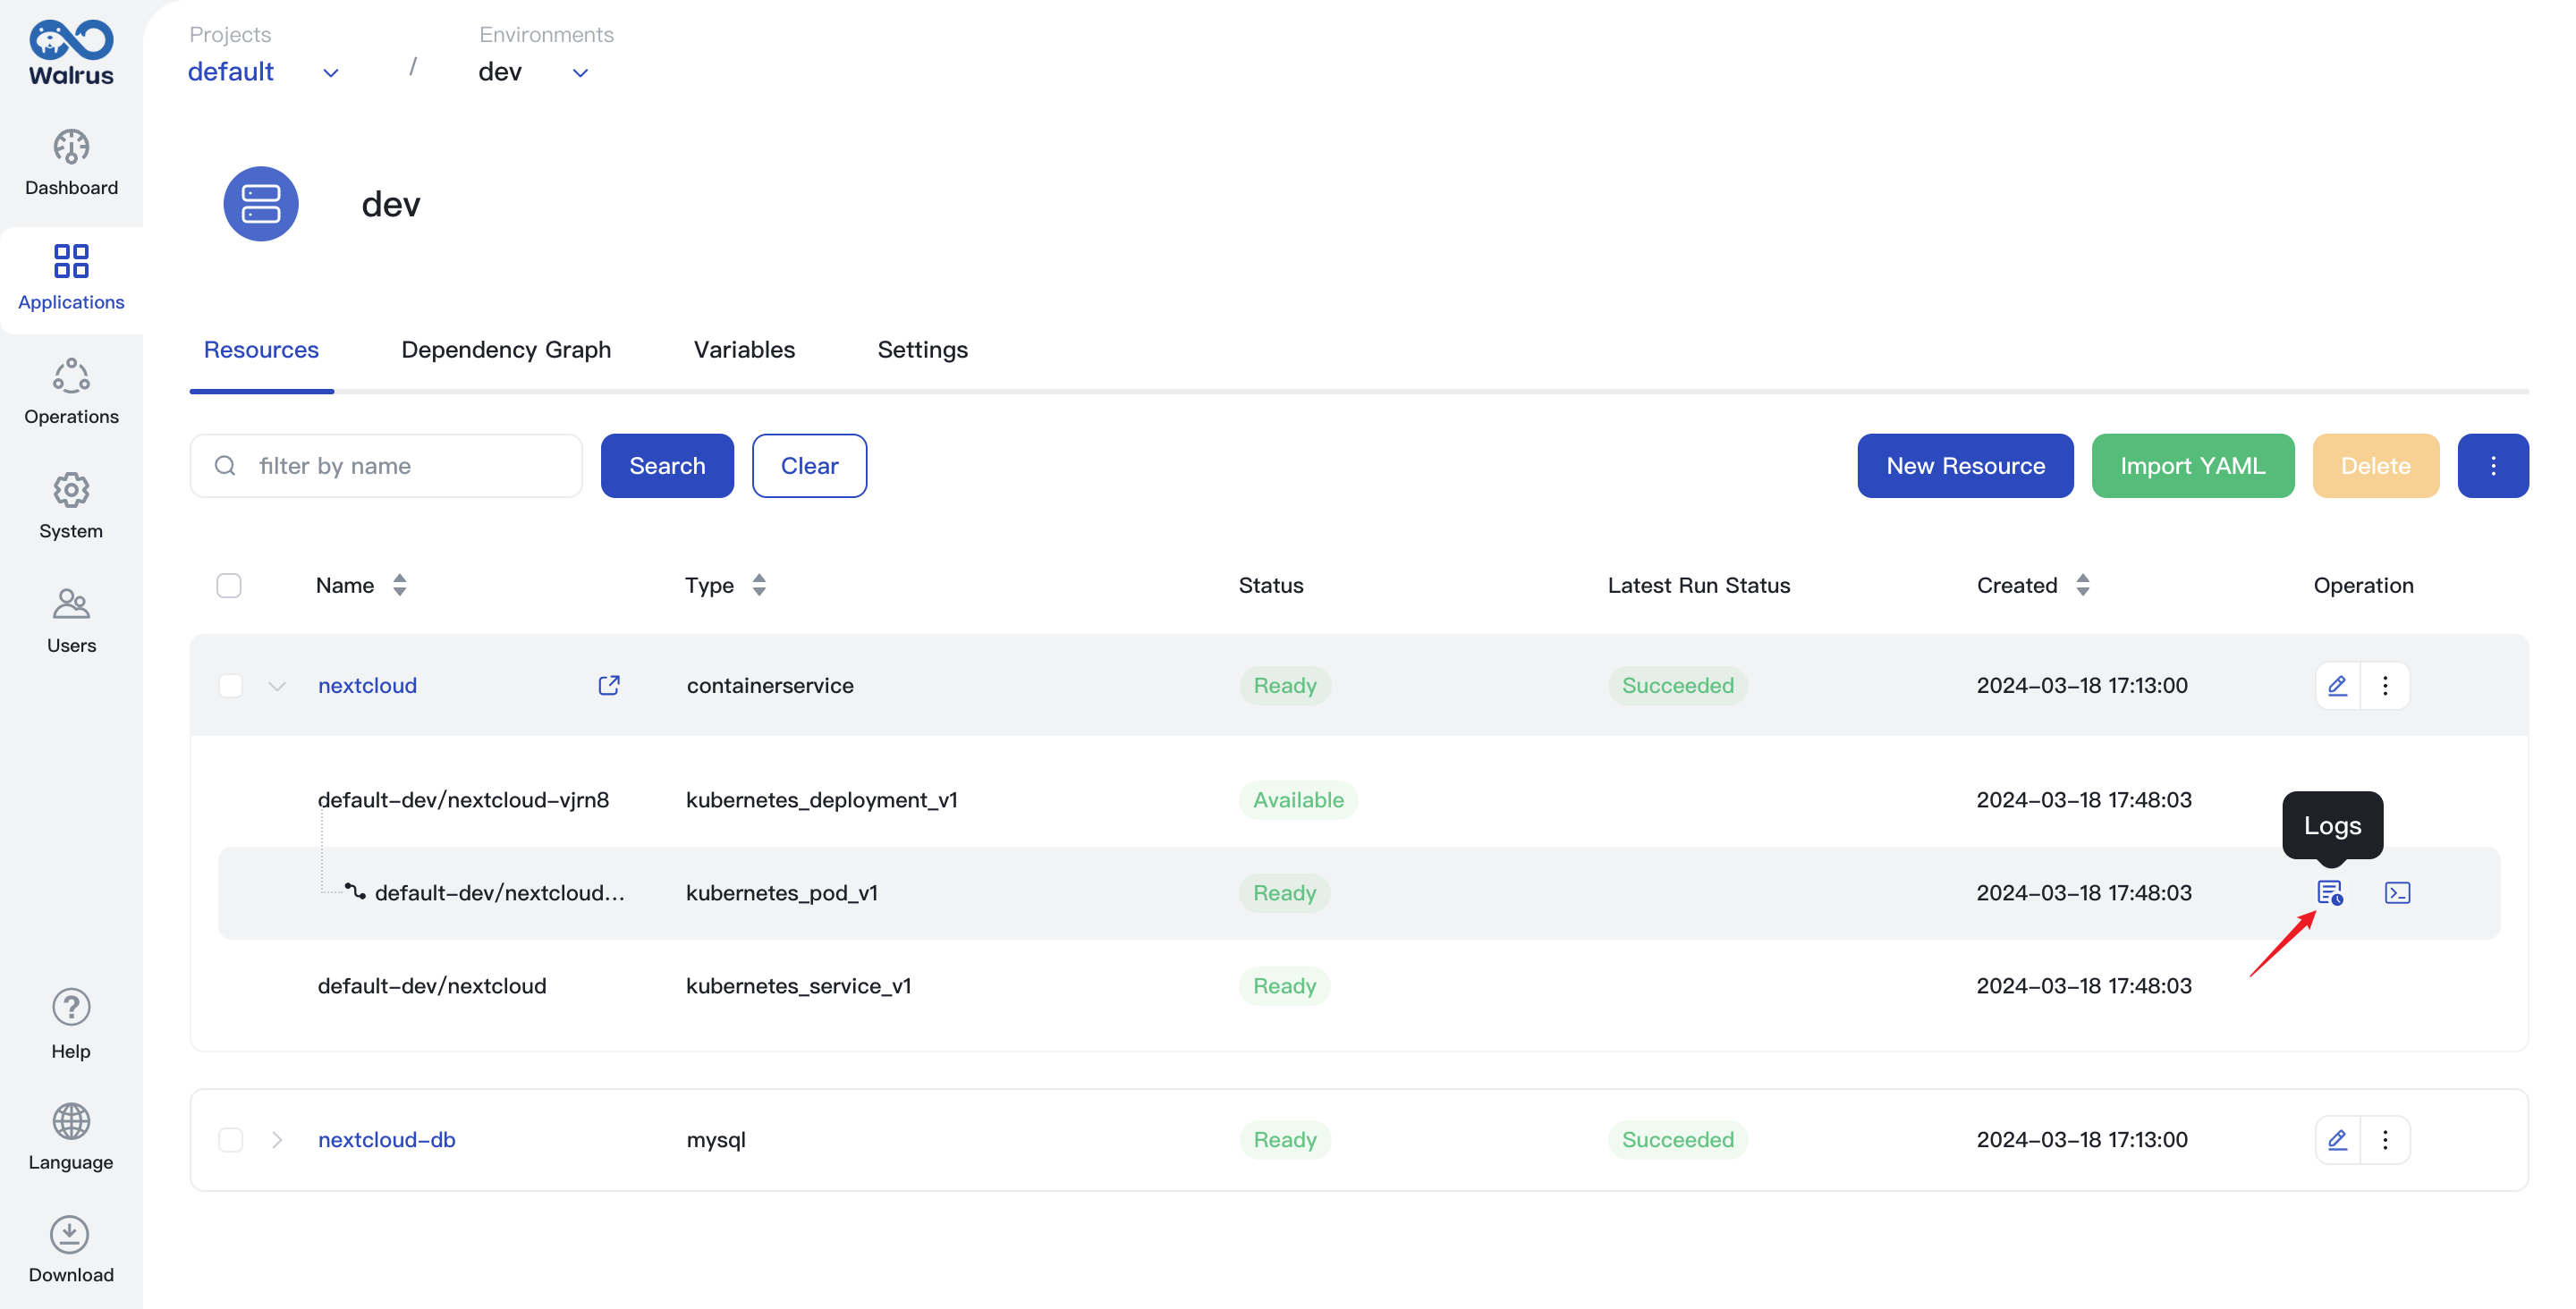
View Component Logs
Note: The operation to view logs is available for specific component types.
- View the component list.
- Find the component whose logs you need to view and click the
Logsoperation.
Connect to the Component via Terminal
Note: The terminal operation is available for specific component types.
- View the component list.
- Find the component you need to connect to the terminal and click the
Terminaloperation.
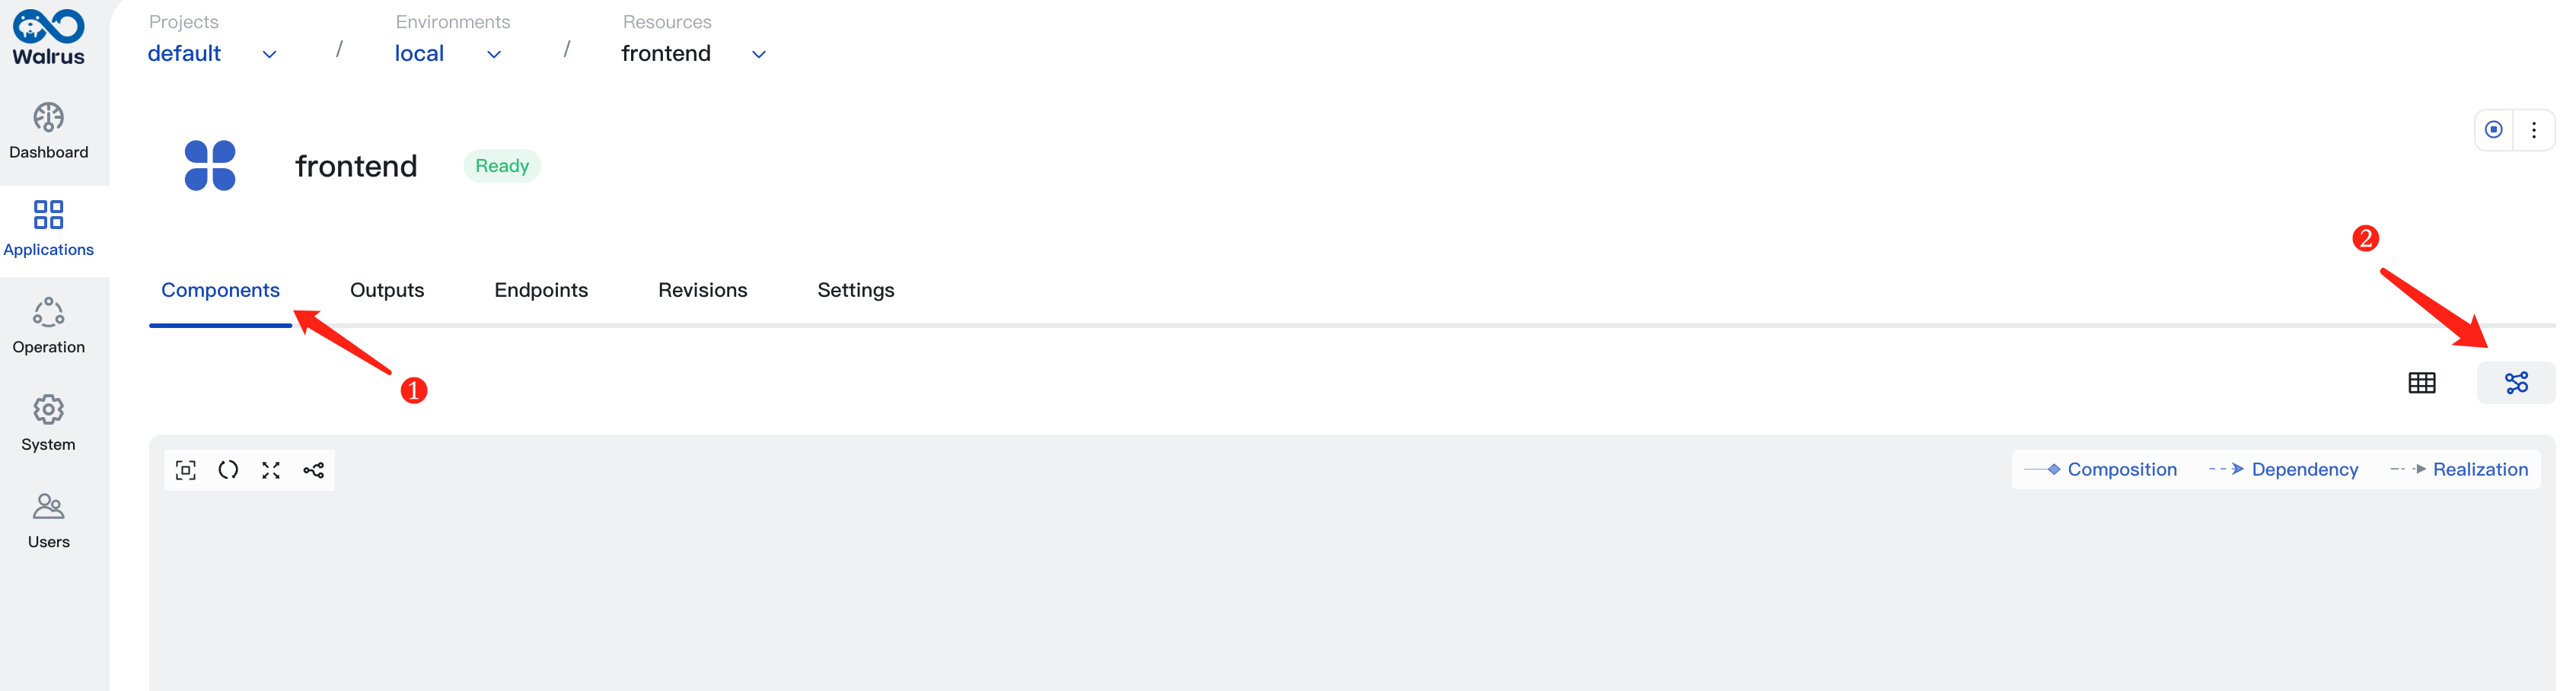
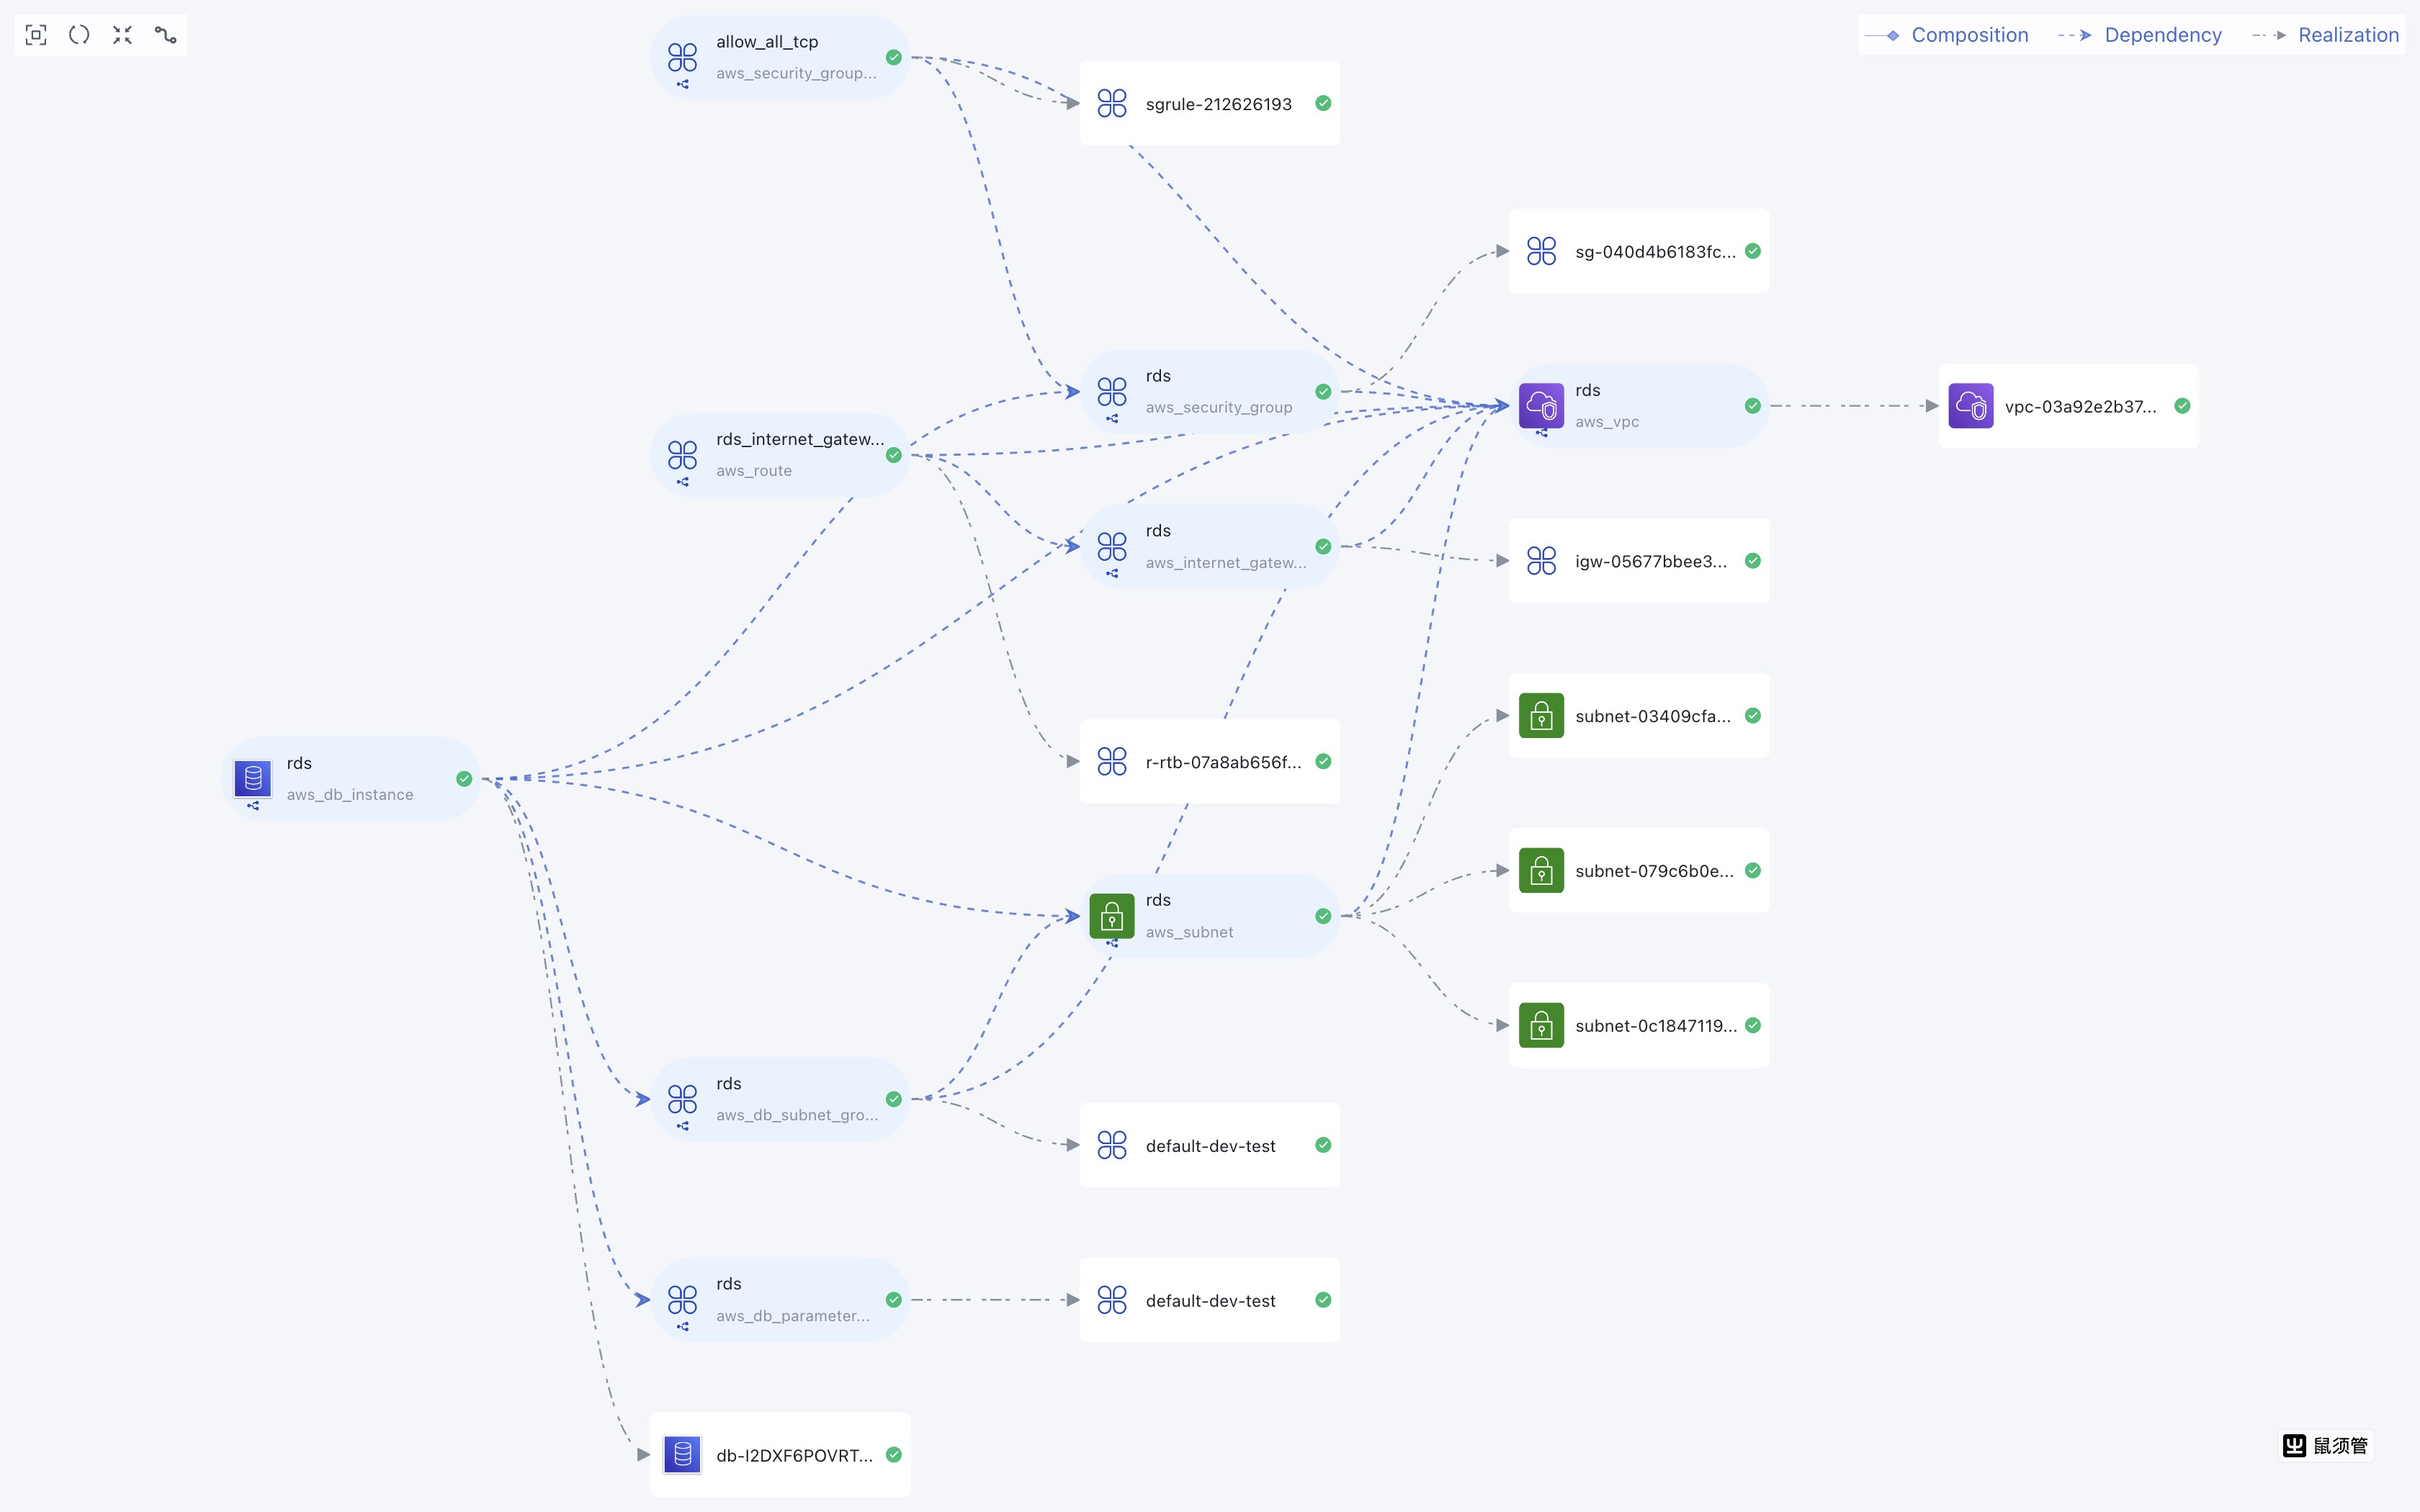
View Components' Dependency Graph
- Enter the resource detail page.
- Click the
Componentstab to view the component list. - Switch to the graph view to see dependency graph under the current resource.
For more details on dependency graphs, please refer to Dependency Graph.
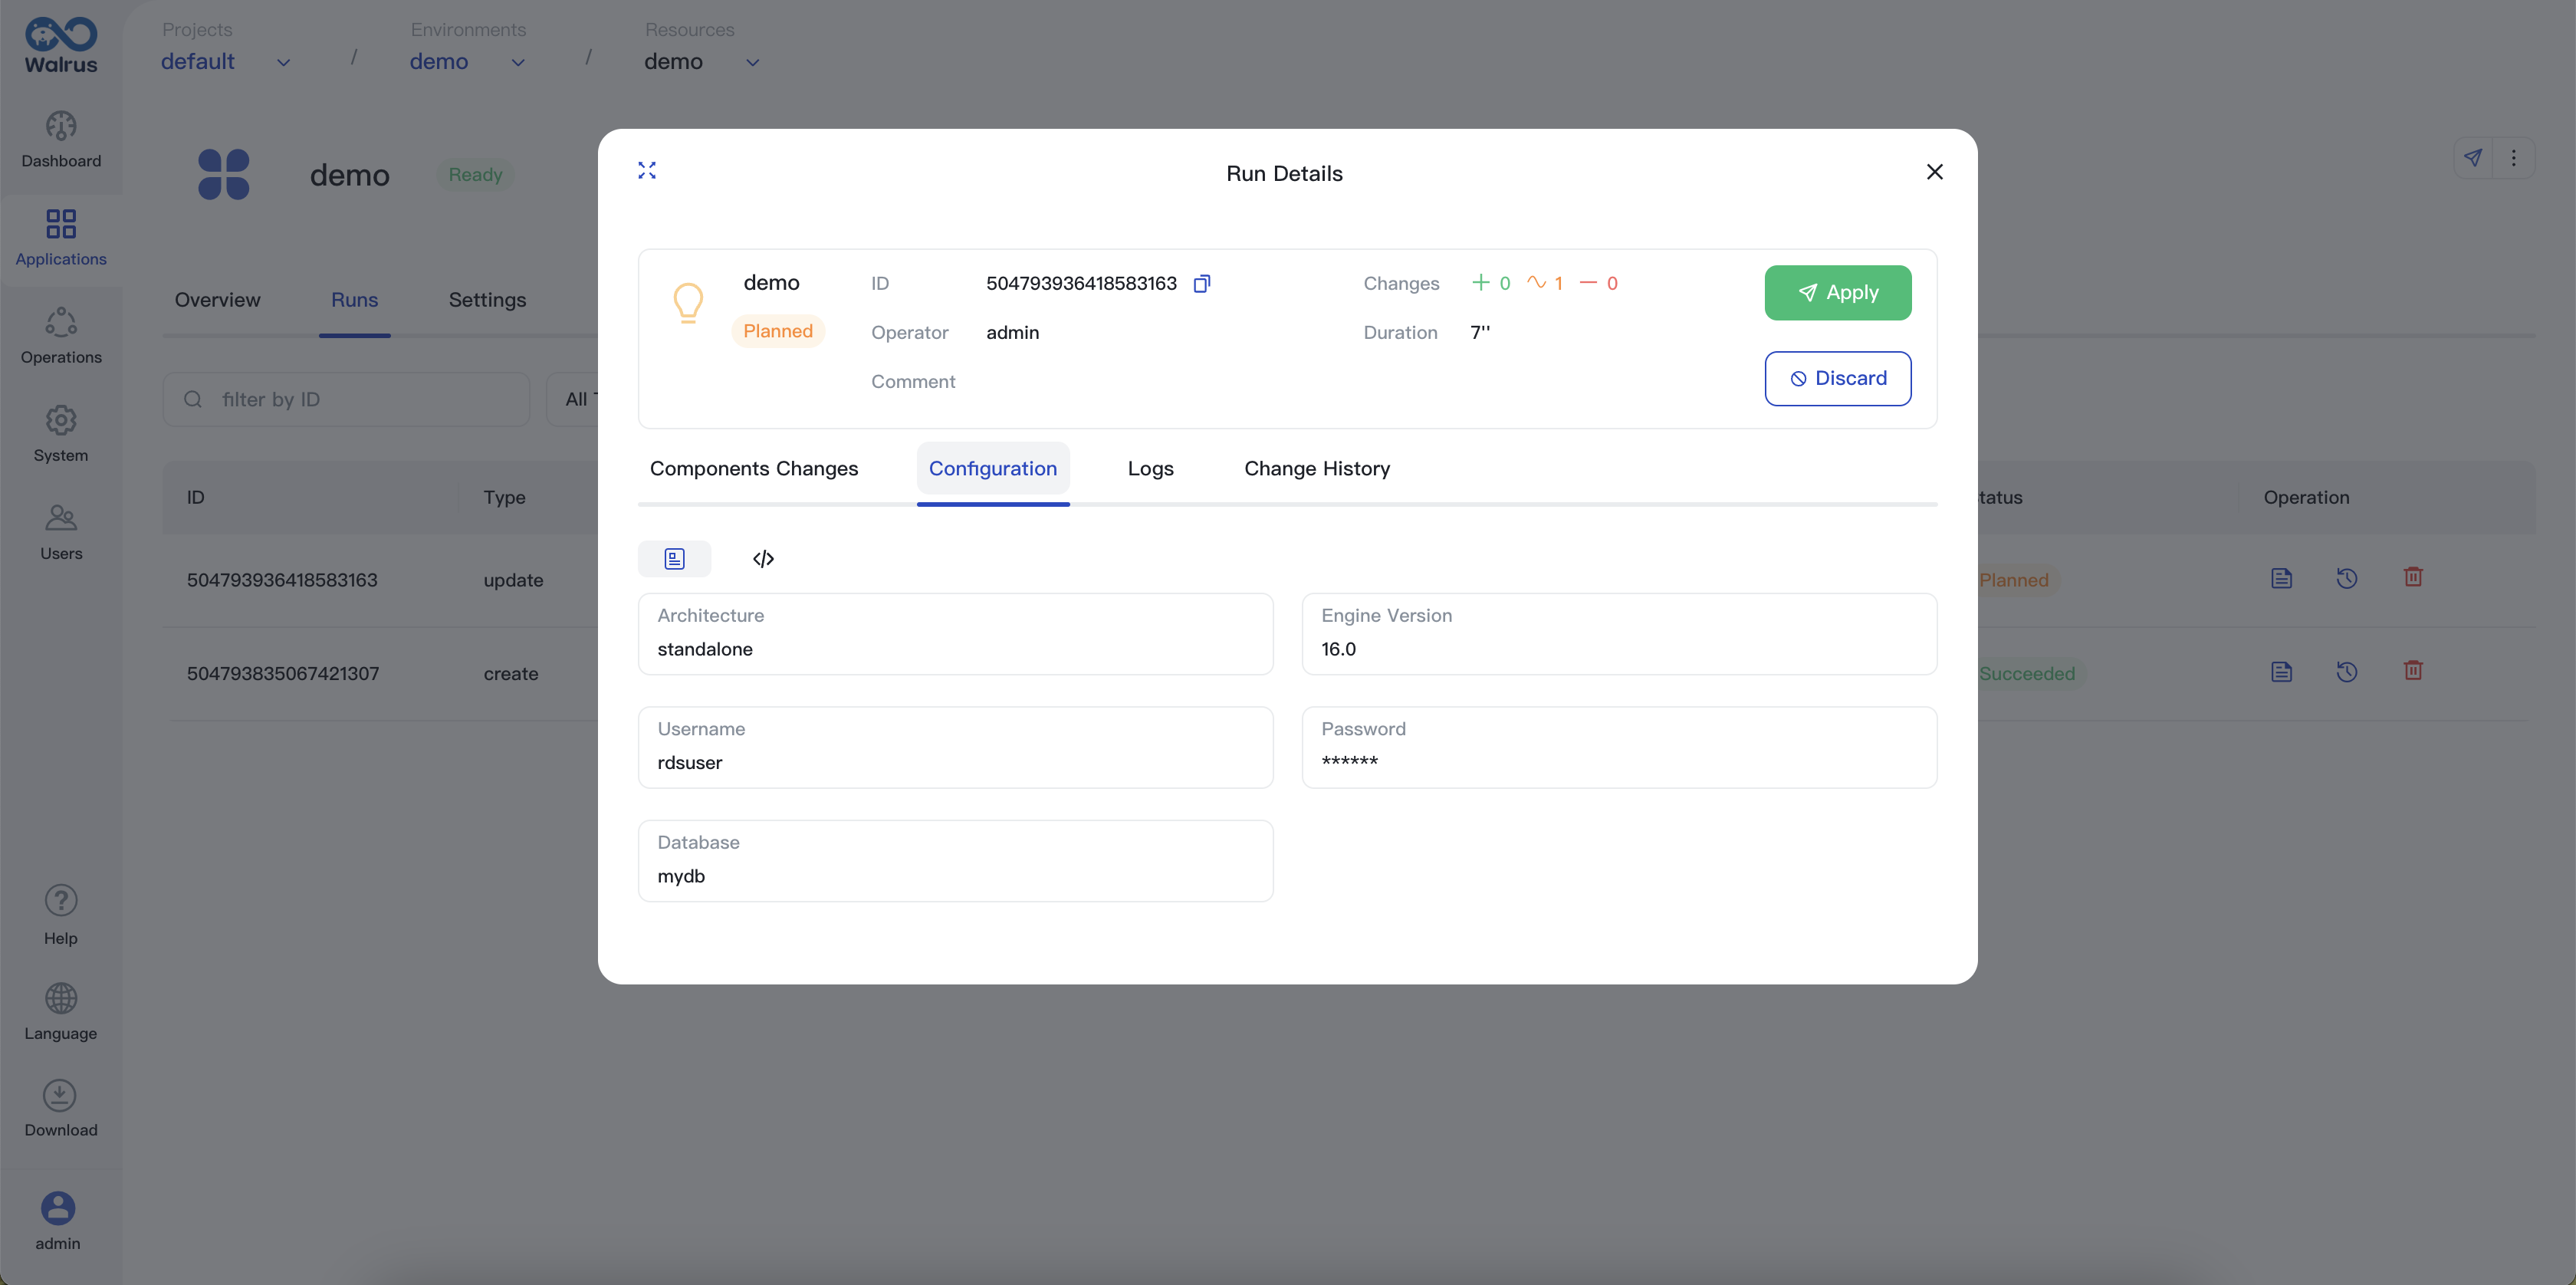
Resource Runs
Every operation, including deployment, rollback, starting, and stopping a resource, generates a run record.

The resource run includes information such as the run's status, start time, duration, operation type, operator, component changes in resources, resource configuration, logs, change history, and more. You can view detailed information about the run by clicking the operation button.