Connectors
Walrus offers connectors on the following two levels:
- Project Connectors: Applied to a specific project
- Global Connectors: Can be applied to all projects
Viewing the Connectors List
Global Connectors List
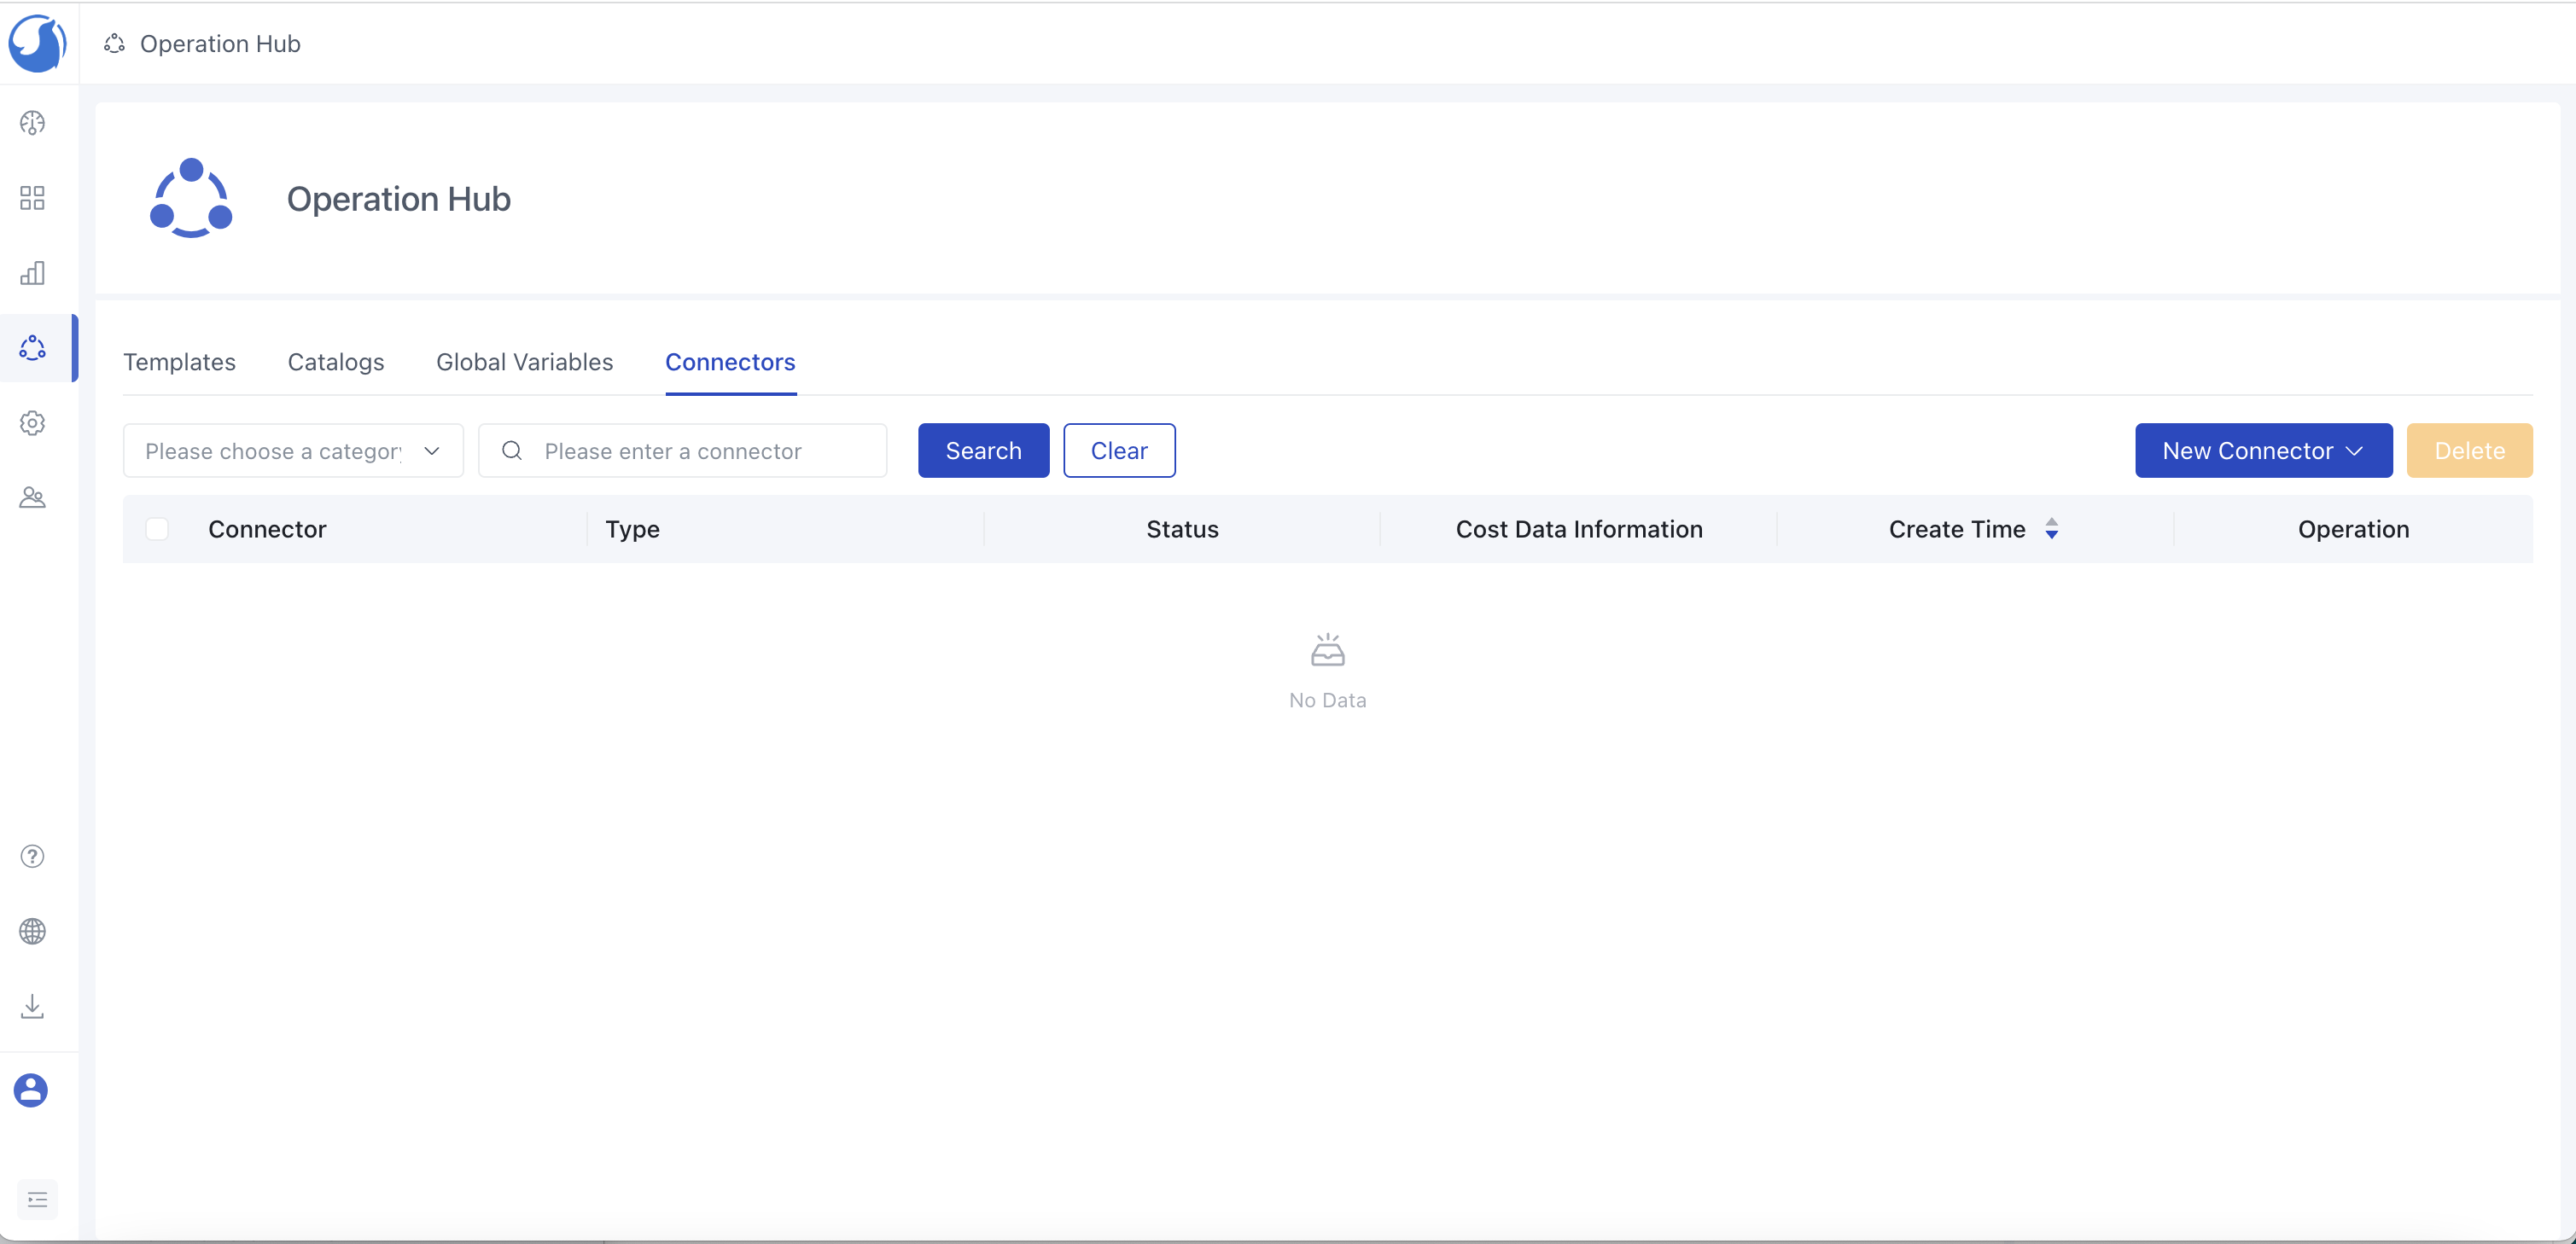
- Click on
Operation Hubin the left-hand sidebar. - Click on the
Connectorstab to view the connectors list.
Project Connectors List
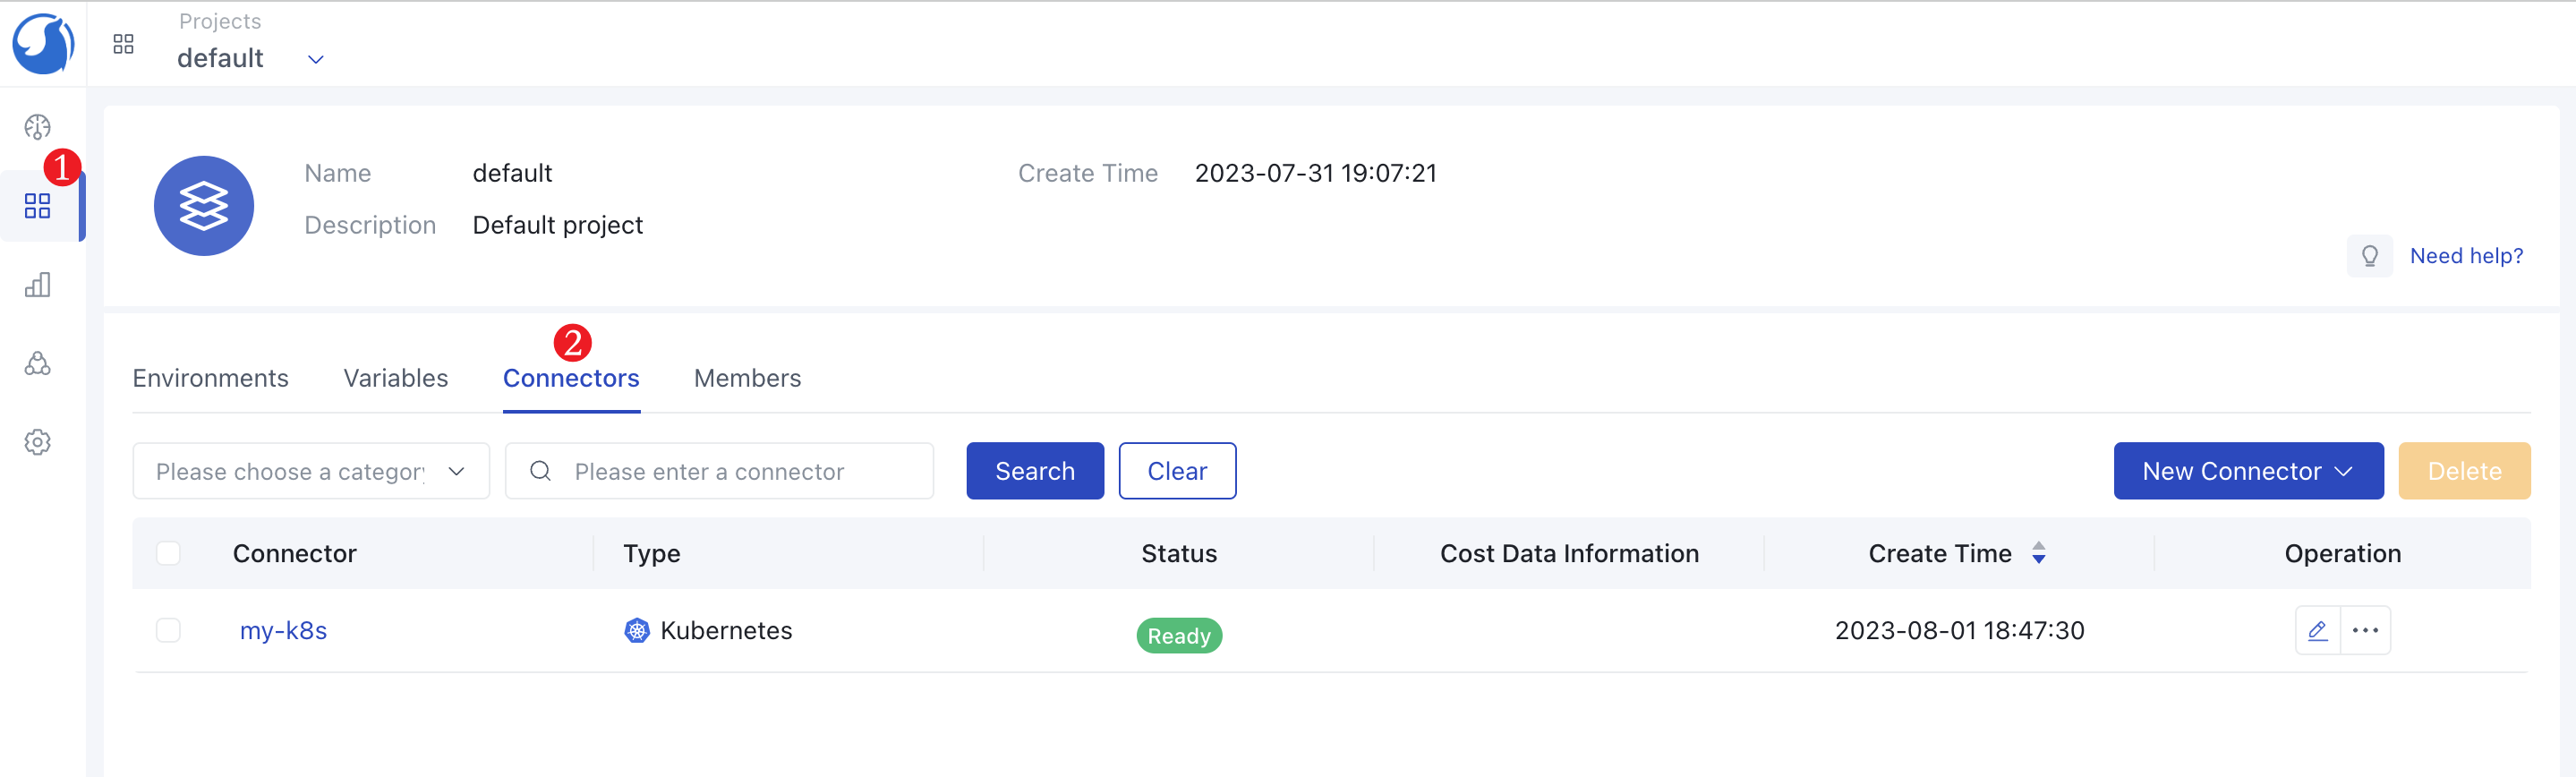
- Click on
Application Managementin the left-hand sidebar and select the appropriate project. - Click on the
Connectorstab to view the connectors list.
Viewing Connector Details
- Click on
Operation Hub->Connectorsin the left-hand sidebar to go to the connectors list. - Find the connector you need to view and click on its name to enter the connector's detail page.
Creating a Connector
Note: Since v0.4.0, connector creation needs choose
Applicable Environment Type, please check Environment Type for more details.
Creating a Kubernetes Connector
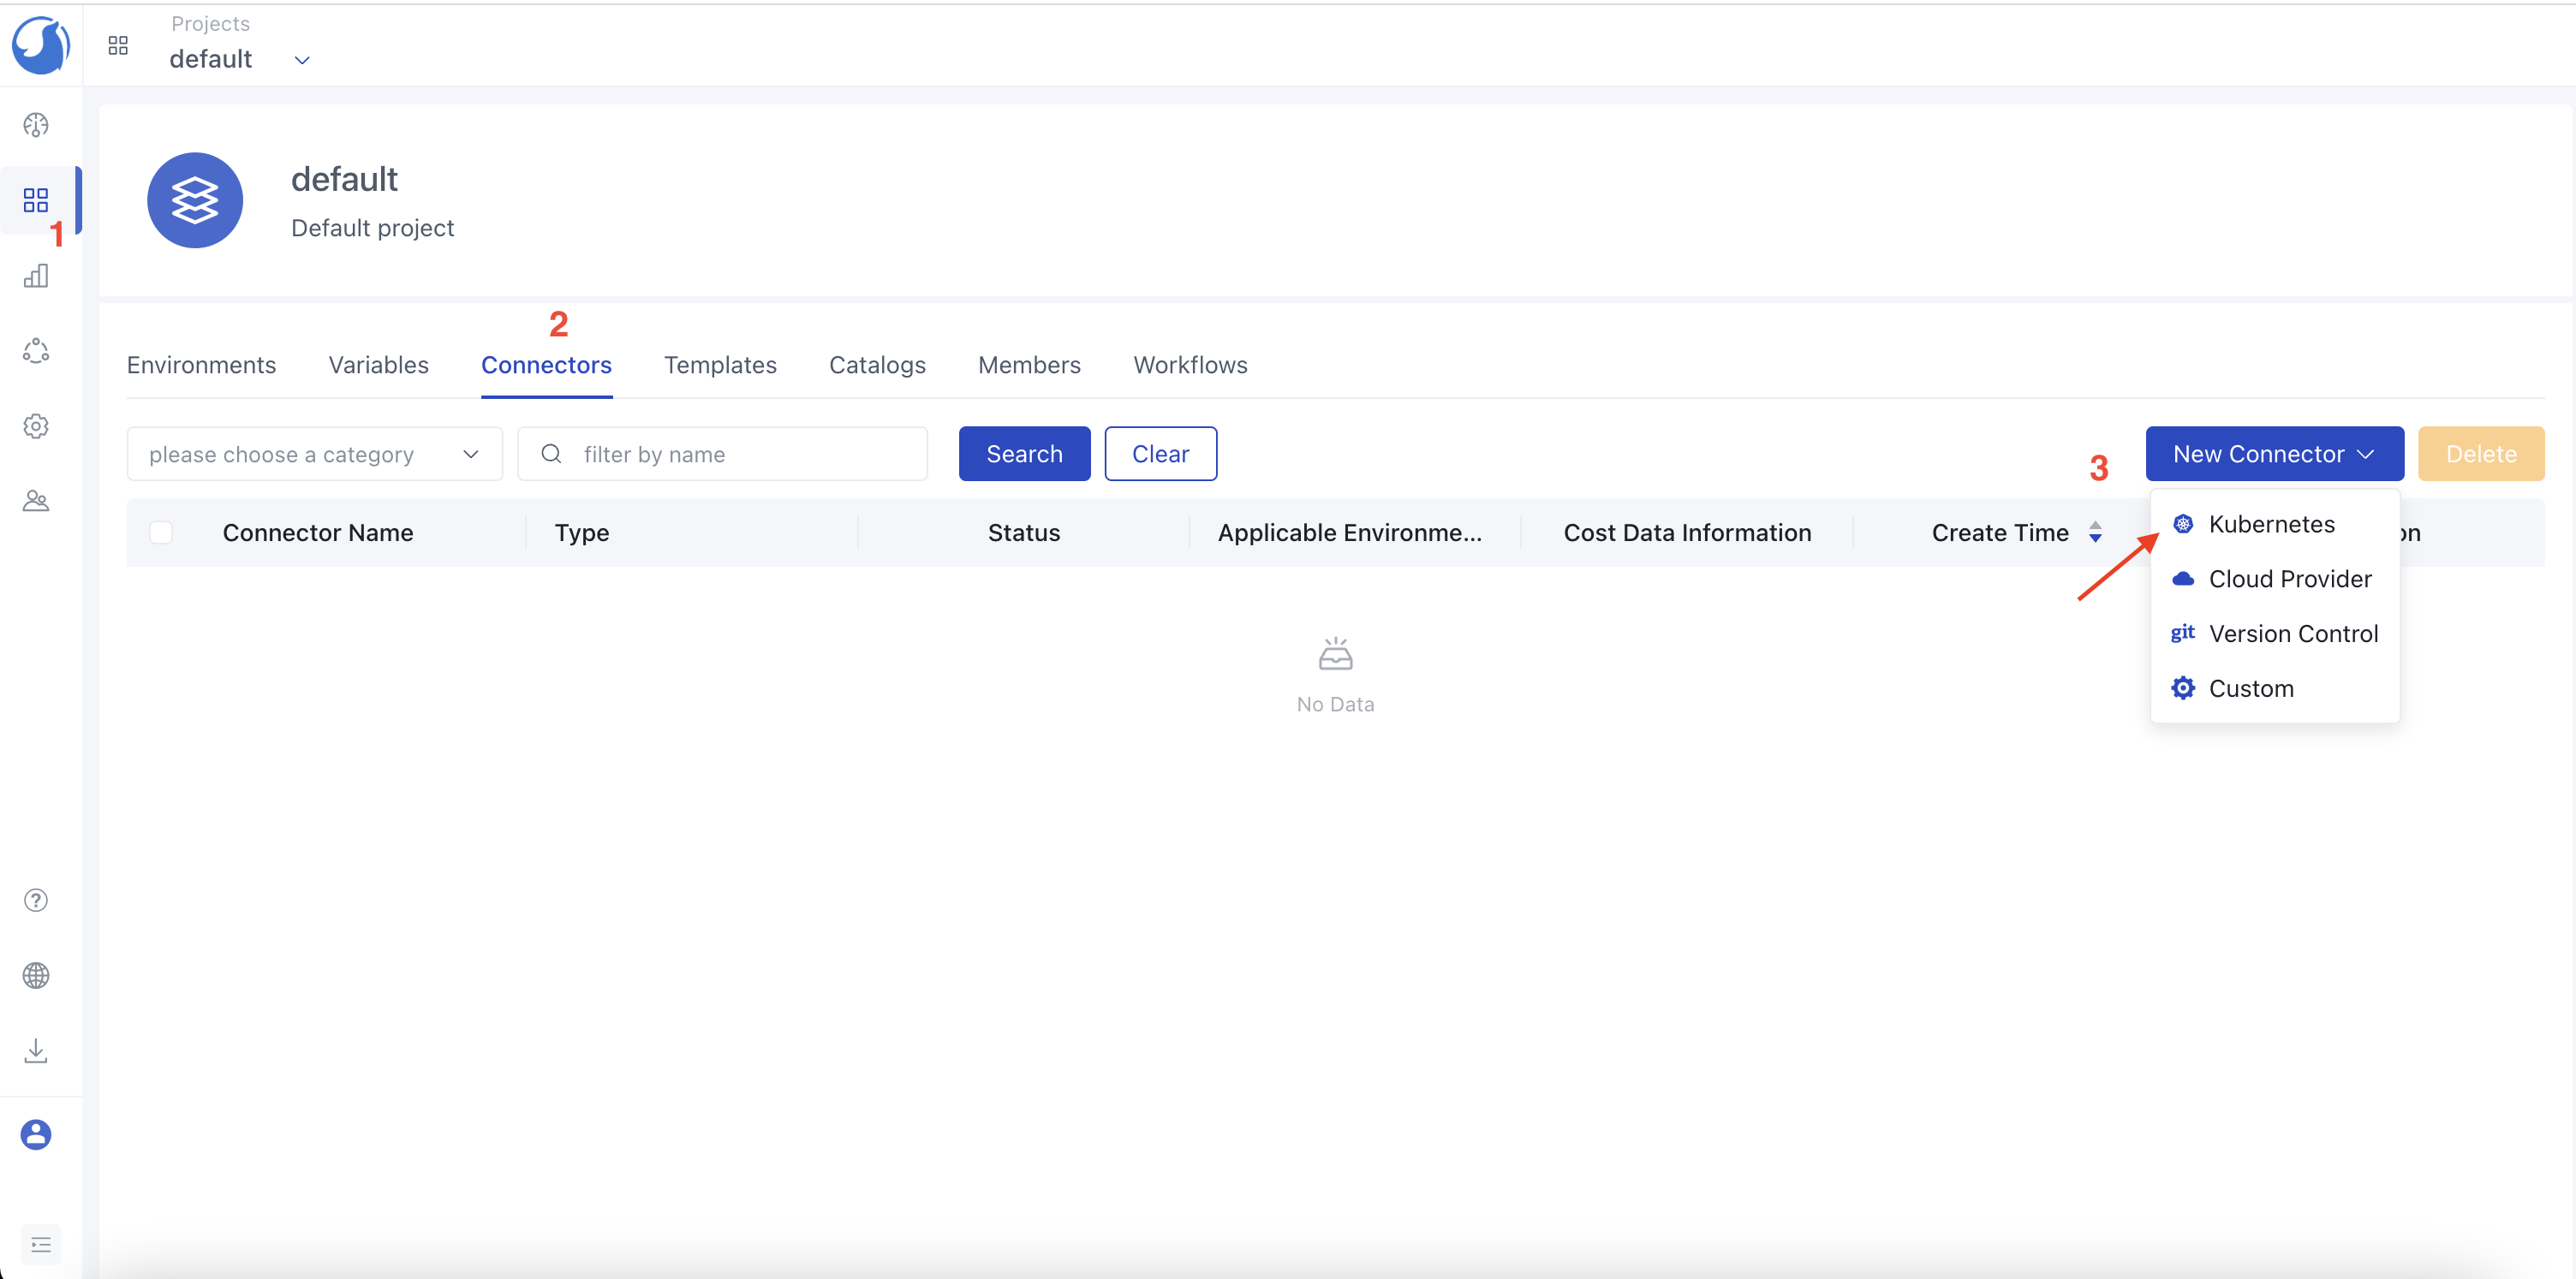
- Click on
New Connectorin the connectors list and selectKubernetes.
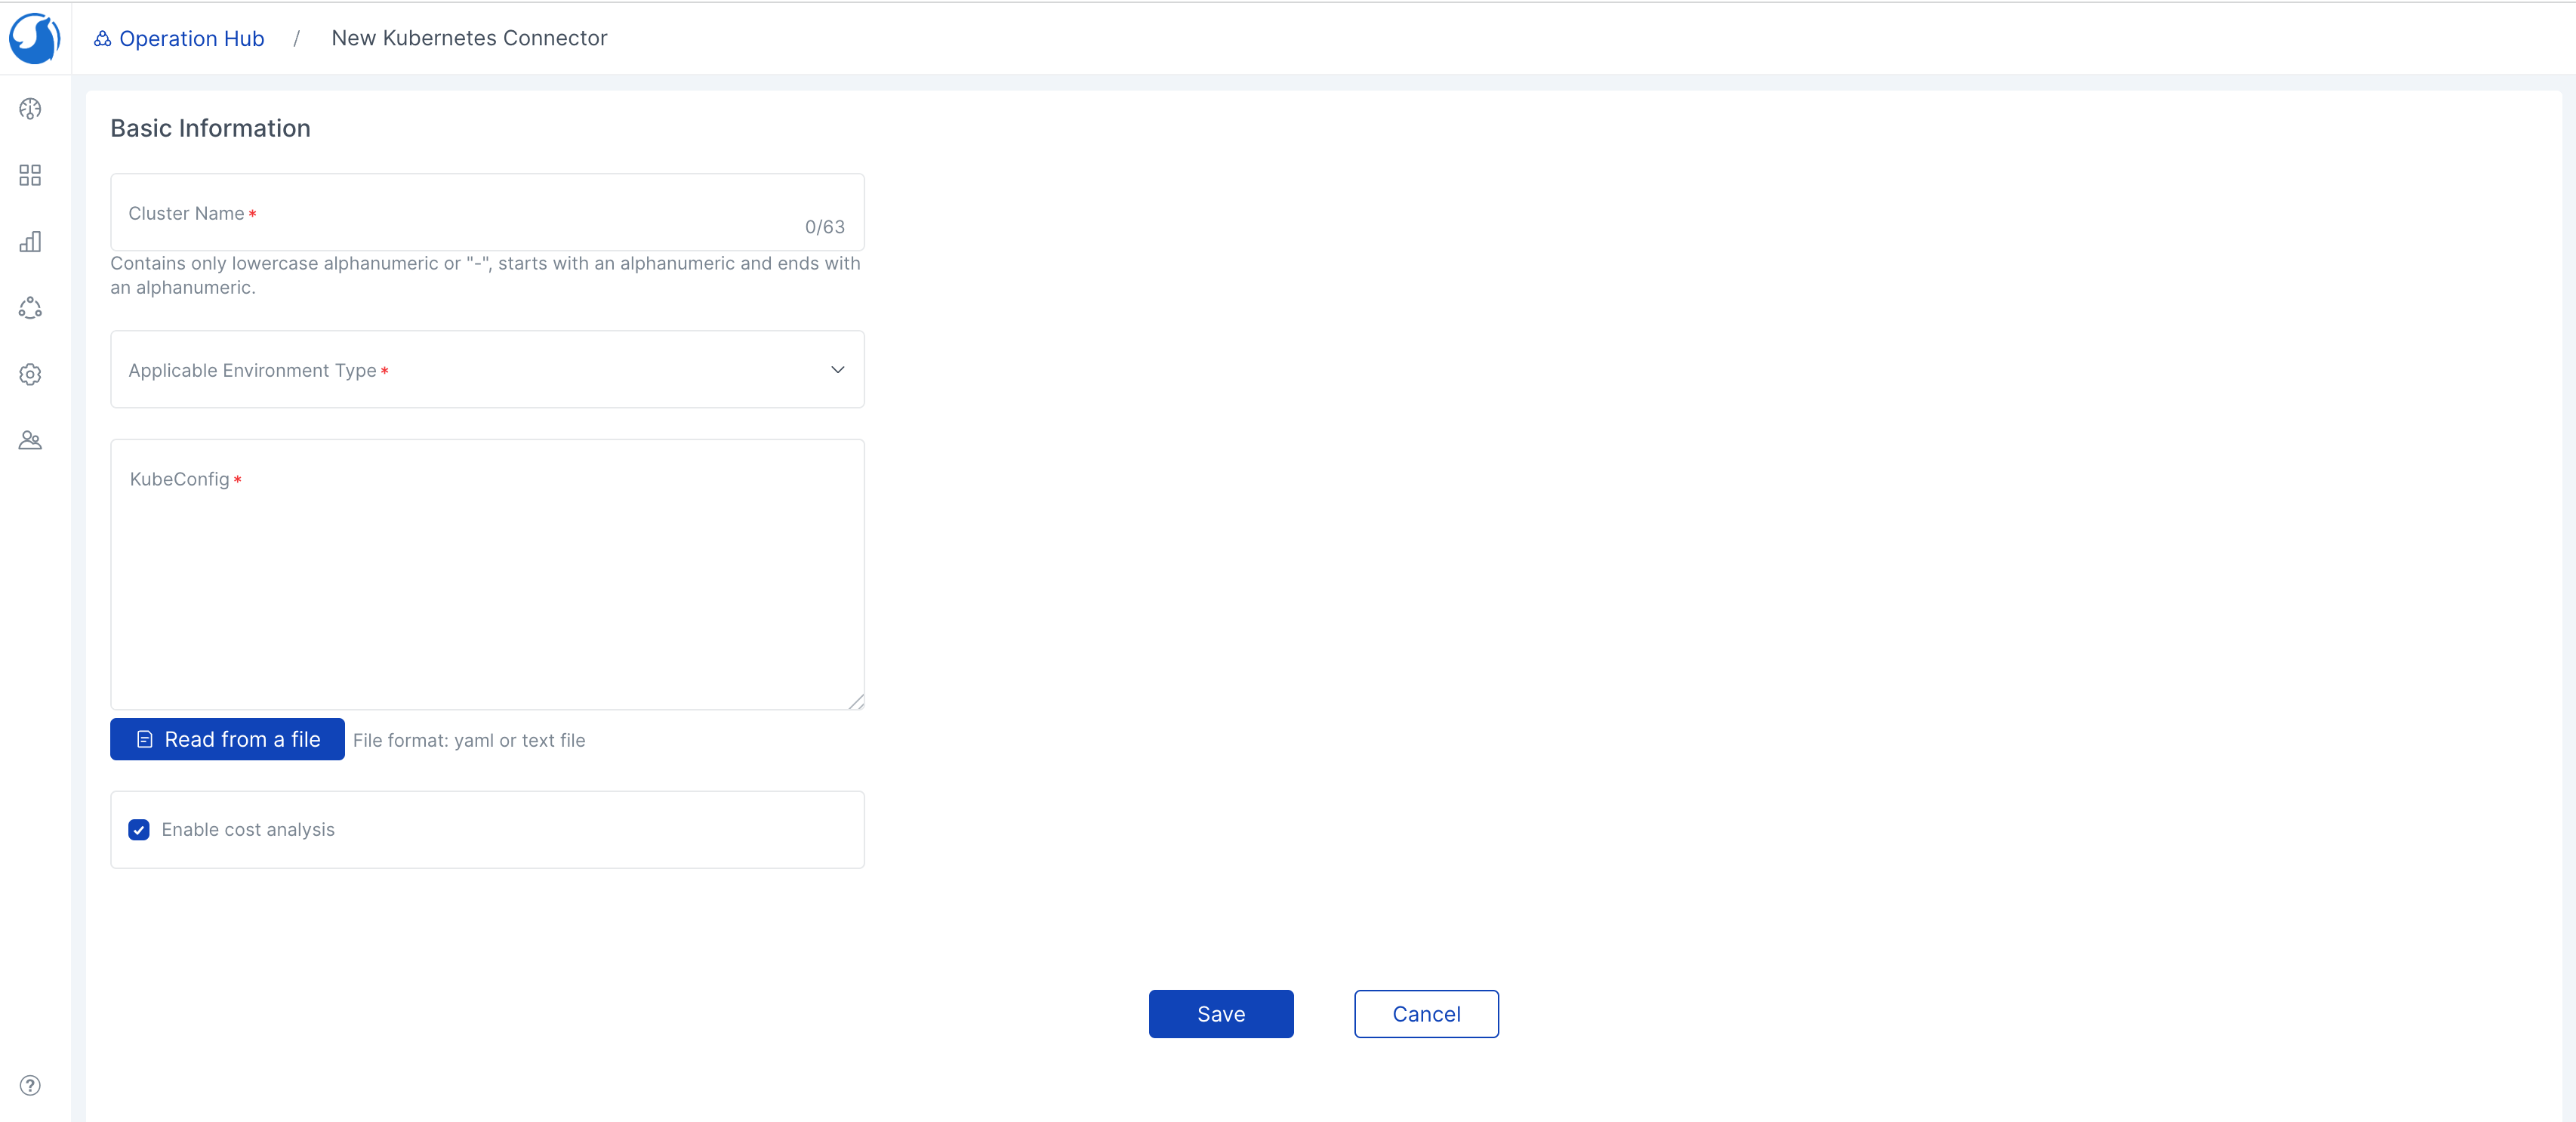
Enable Cost Analysisis turned on by default. Once enabled, you can create related views in theCost Managementmenu on the left-hand side to view the related expense statistics.- Choose
Applicable Environment Type. - Fill out the form. After
Saveis successful, the Kubernetes connector is created.
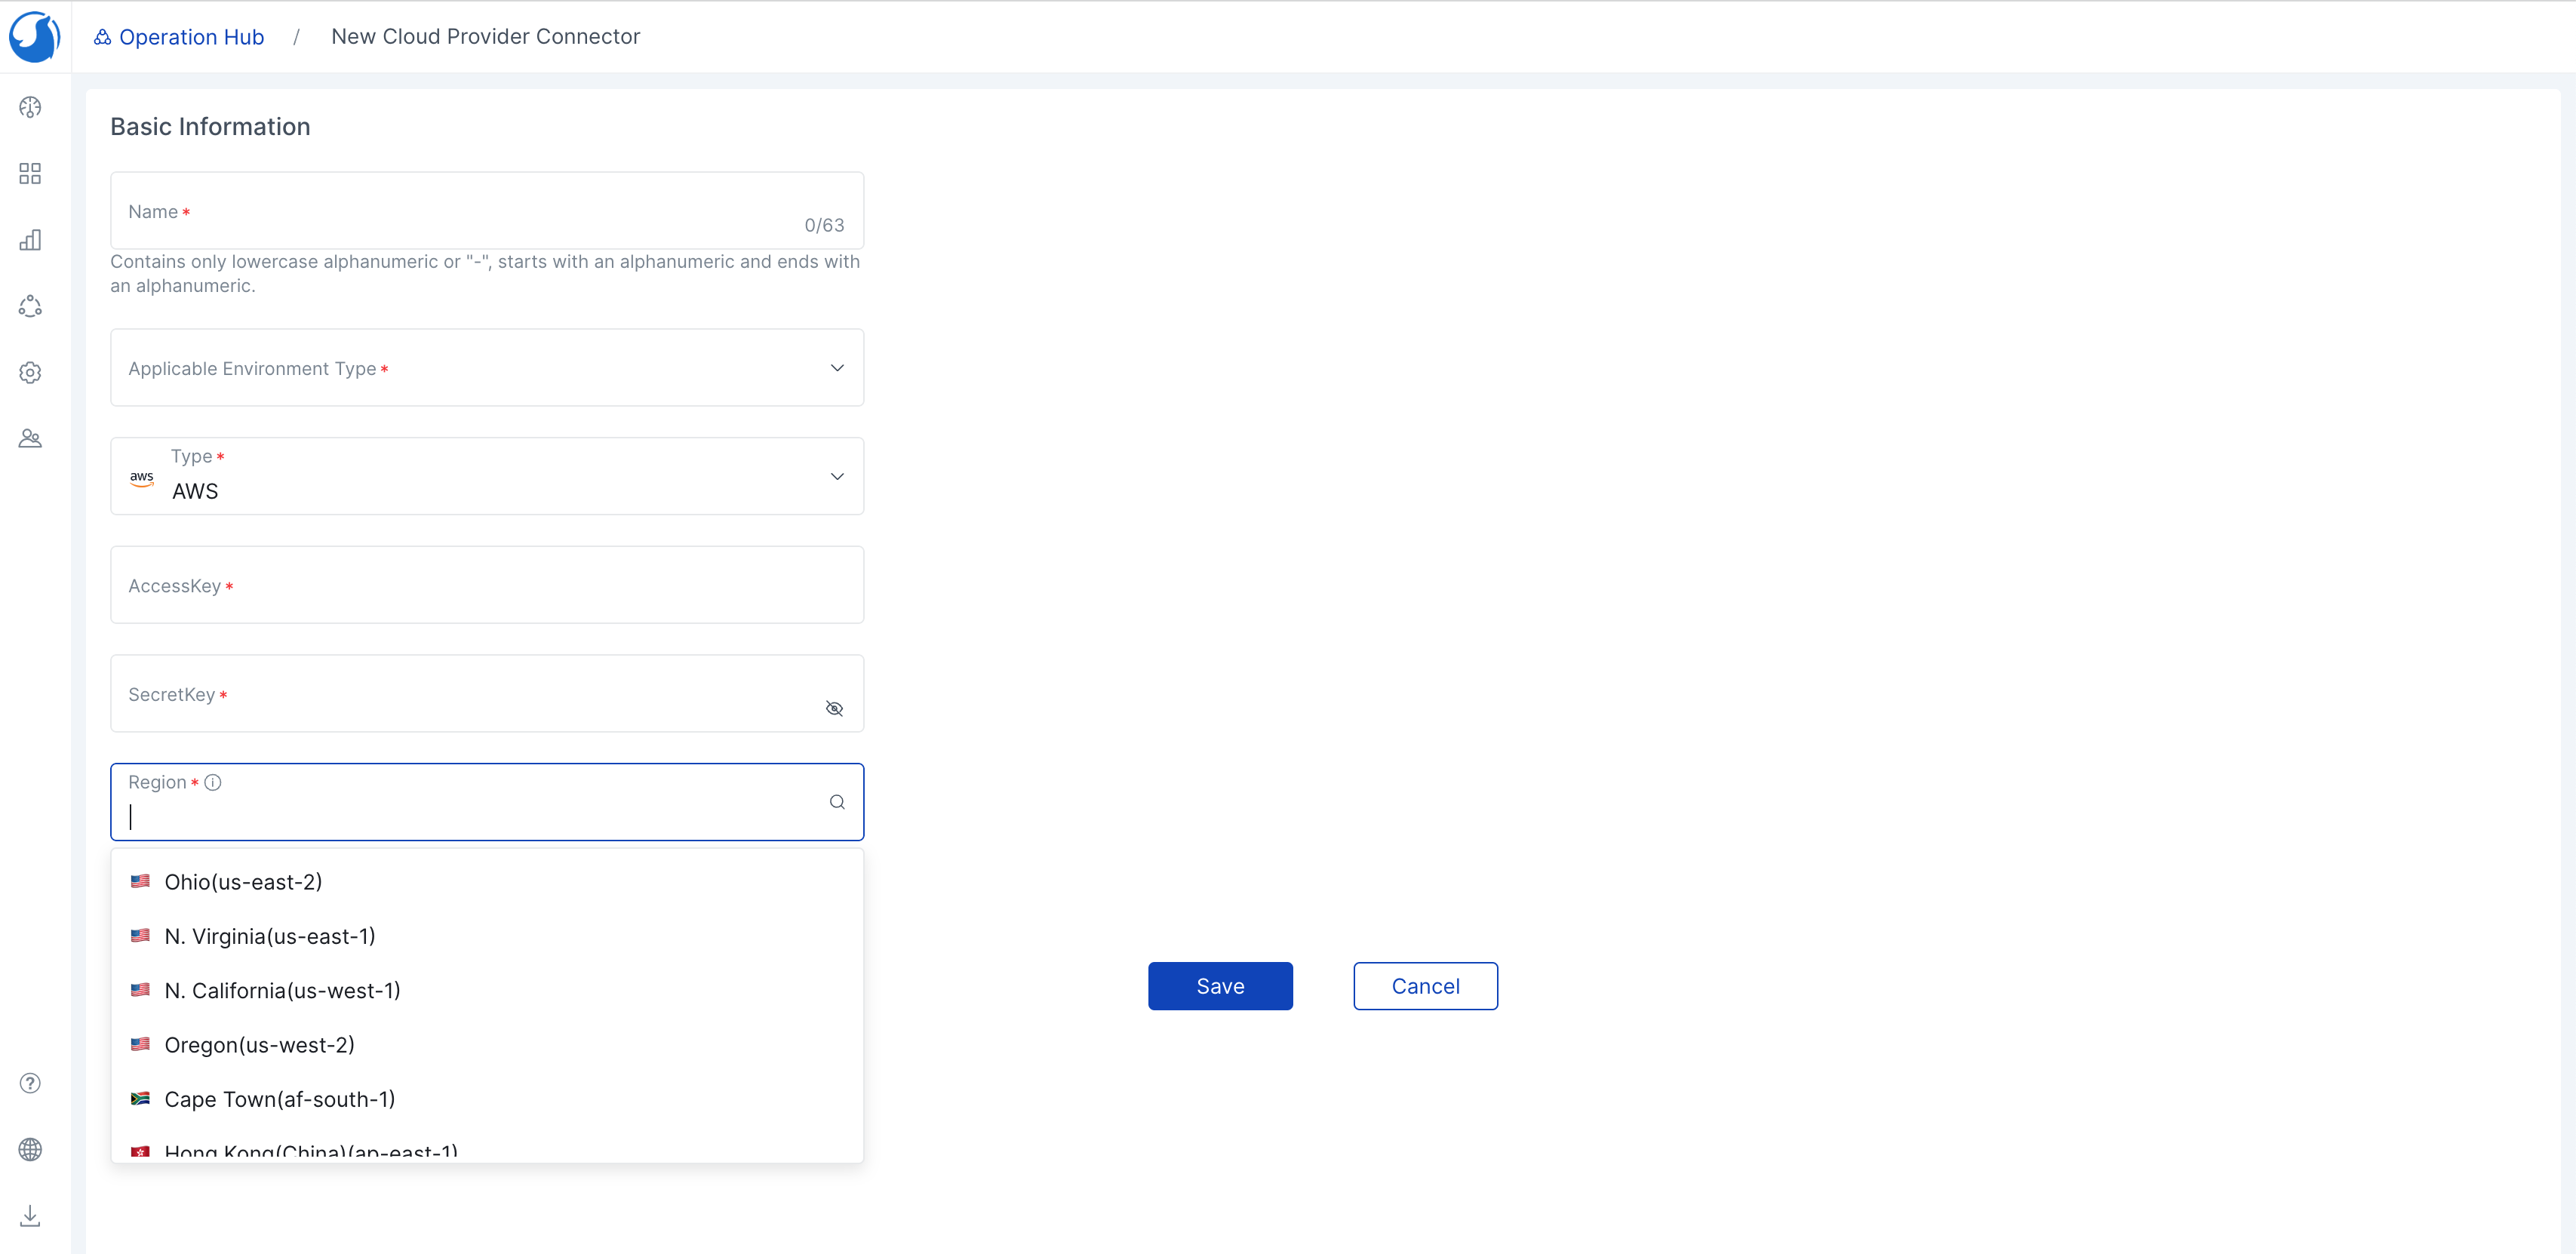
Creating a Cloud Vendor Connector
- Click on
New Connectorin the connectors list and selectCloud Vendor. - Configure
Name,Type,AccessKey,SecretKey,Regionconnections. - Choose
Applicable Environment Type. - Fill out the form. After
Saveis successful, the cloud vendor is created.
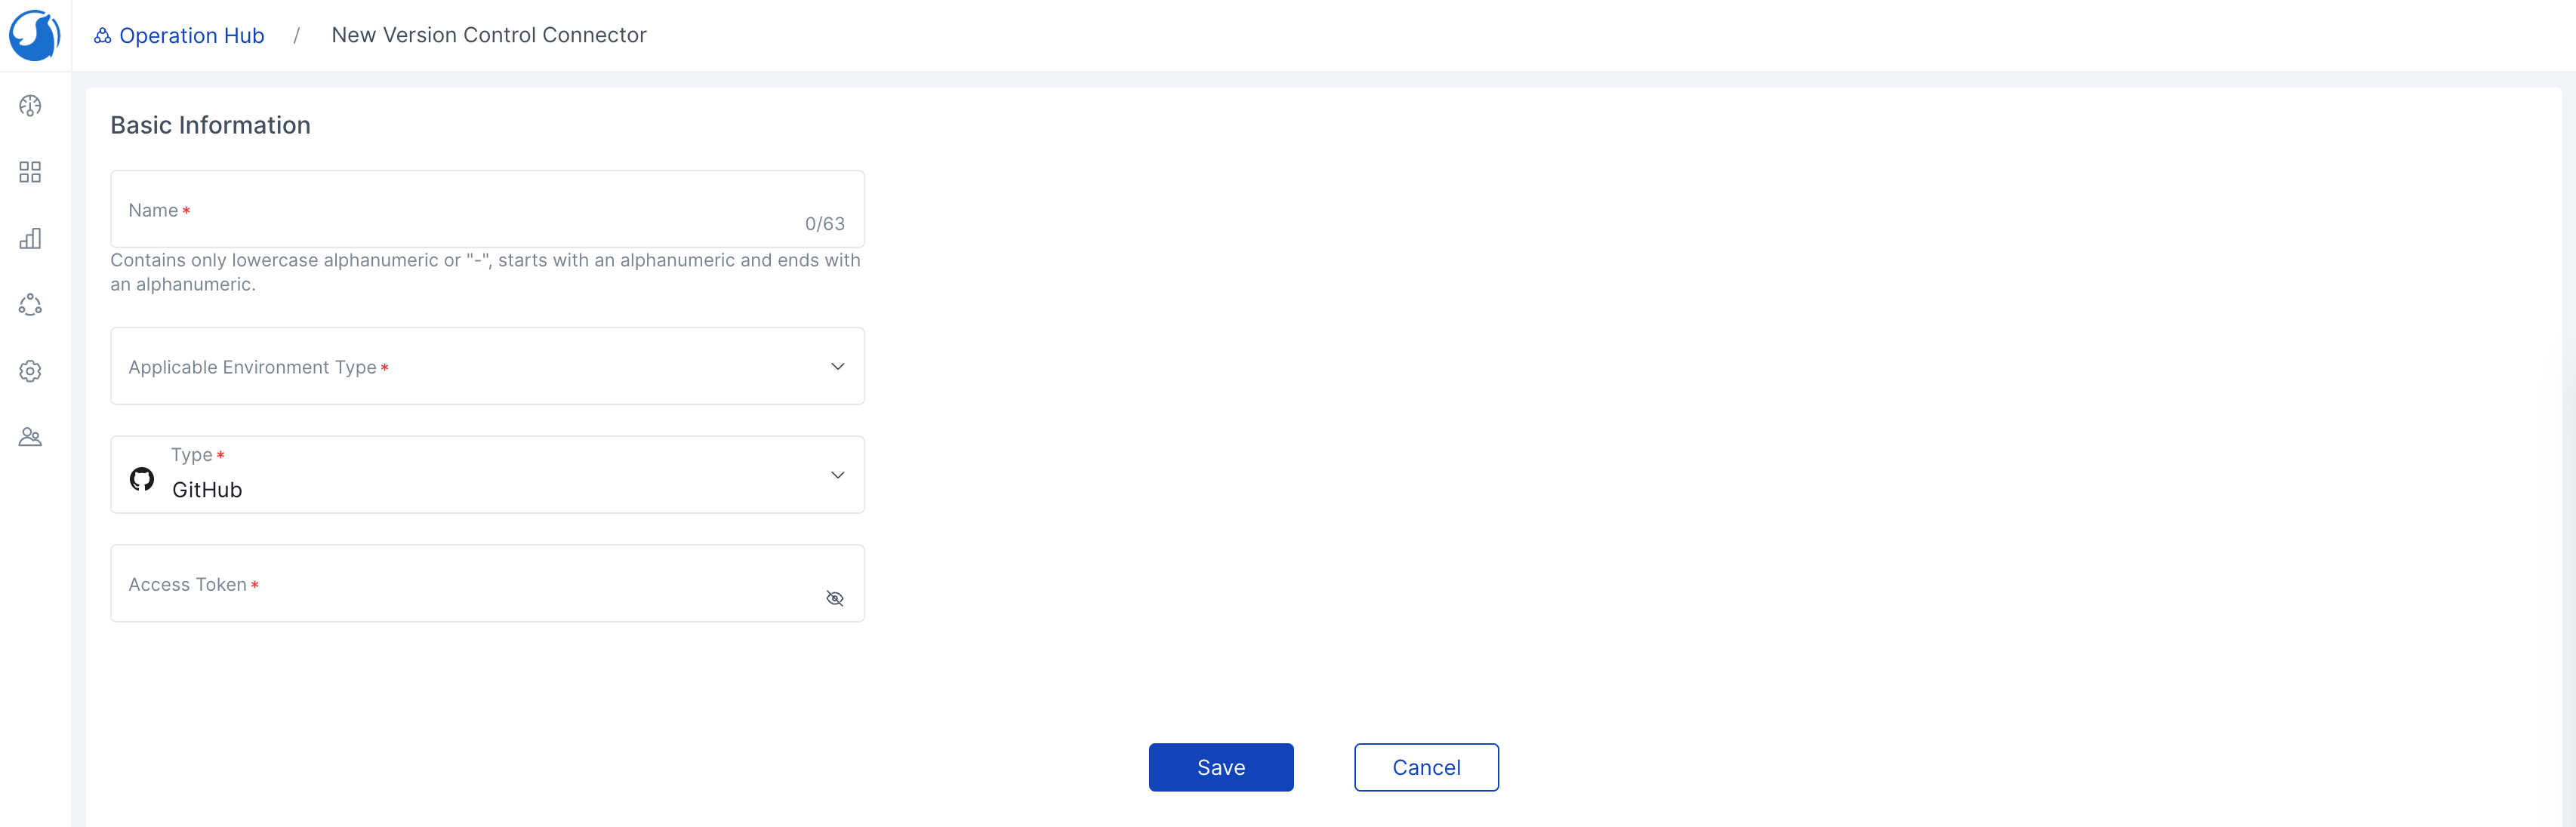
Creating a Version Control Connector
- Click on
New Connectorin the connectors list and selectVersion Control. - Choose the type. Currently supports GitHub, fill out the corresponding
Access token. The permission to operate the repo needs to be turned on. - Choose
Applicable Environment Type. - Fill in the form. After
Saveis successful, the version control connector is created.
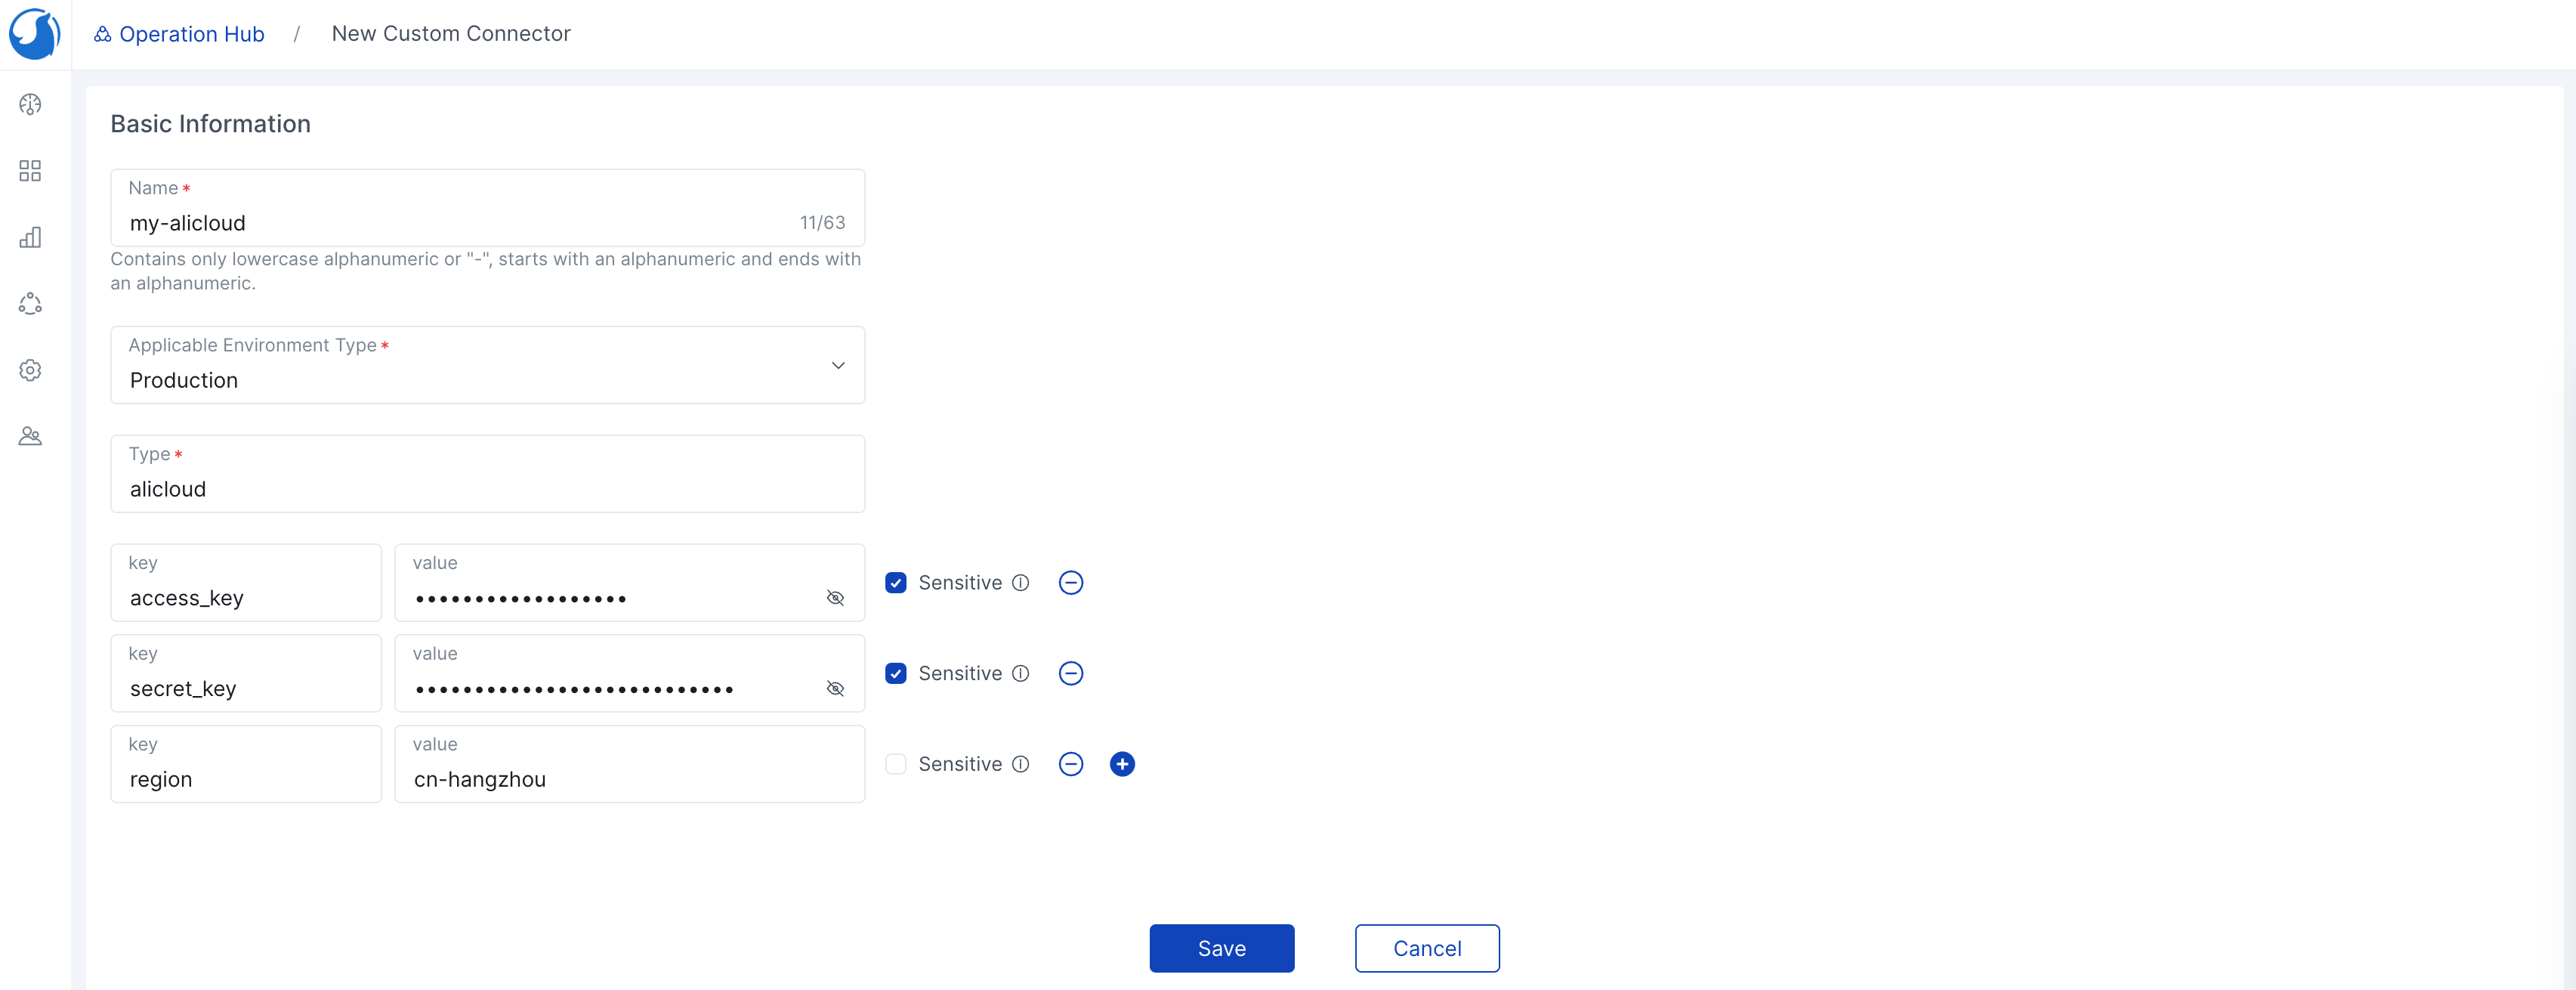
Creating a Custom Connector
- Click on
New Connectorin the connectors list and selectCustom. - The type is the type of third-party platform Terraform Provider, for example: AWS, AliCloud.
- Choose
Applicable Environment Type. - Add properties, for instance: if the Provider is AliCloud, you need to fill in access_key, secret_key, region.
provider "alicloud" {
  access_key = "${var.access_key}"
  secret_key = "${var.secret_key}"
  region     = "${var.region}"
}
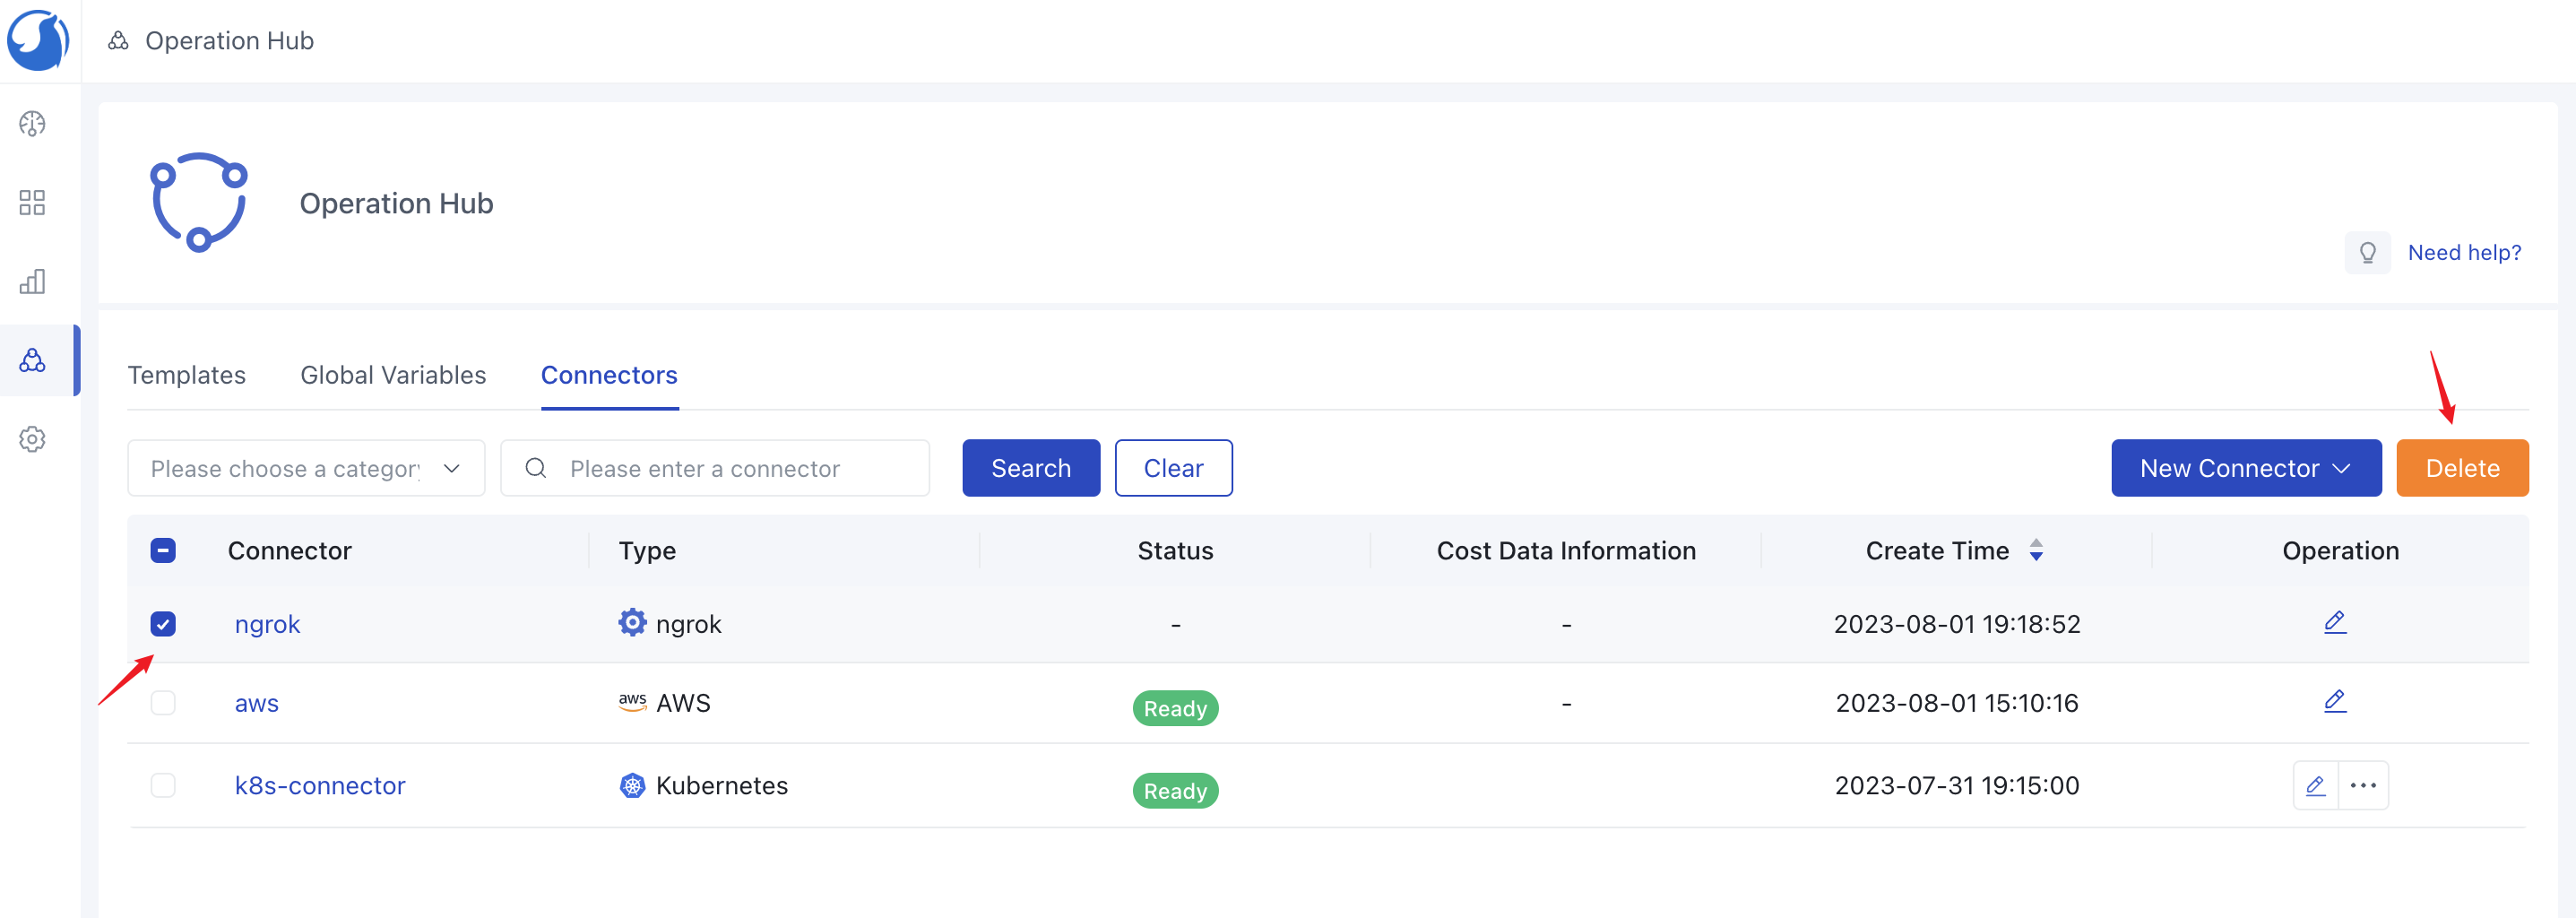
Deleting a Connector
- Click on
Operation Hub->Connectorsin the left-hand sidebar to go to the connectors list. - Find the connector you need to delete.
- Ensure that no environment depends on this connector before selecting the connector you want to delete, then click the
Deletebutton. - Click the
Confirmbutton to complete the deletion.
Usage
- Once the connector is successfully created.
- Add the corresponding connectors in the
Projects->Environmentdetails. - In the
Servicesof environment details, a new service can use the connector.
Note:
- Only administrators/platform engineers have the permission to create global connectors.
- The scope of project connectors is restricted to the current project. They can only be added to environments created by the current project and cannot be used by other projects.
- The scope of global connectors applied to all projects. They can be added to any project environment. If you need to restrict the scope, please use project connectors.